Hi Elementor beta testers,
We are incredibly excited to be introducing our new beta versions of Elementor 3.8 and Elementor 3.8 Pro, which includes some highly anticipated features. We also take this opportunity to introduce to you our new release mechanism, which will make our future releases a lot more predictable, and reliable.
These versions will include:
- Loop Builder (Pro)
- Flexbox Containers Beta – Marked as Stable
- Remove Kit – Revert kits to their previous condition
Introducing The Loop Builder – Pro feature
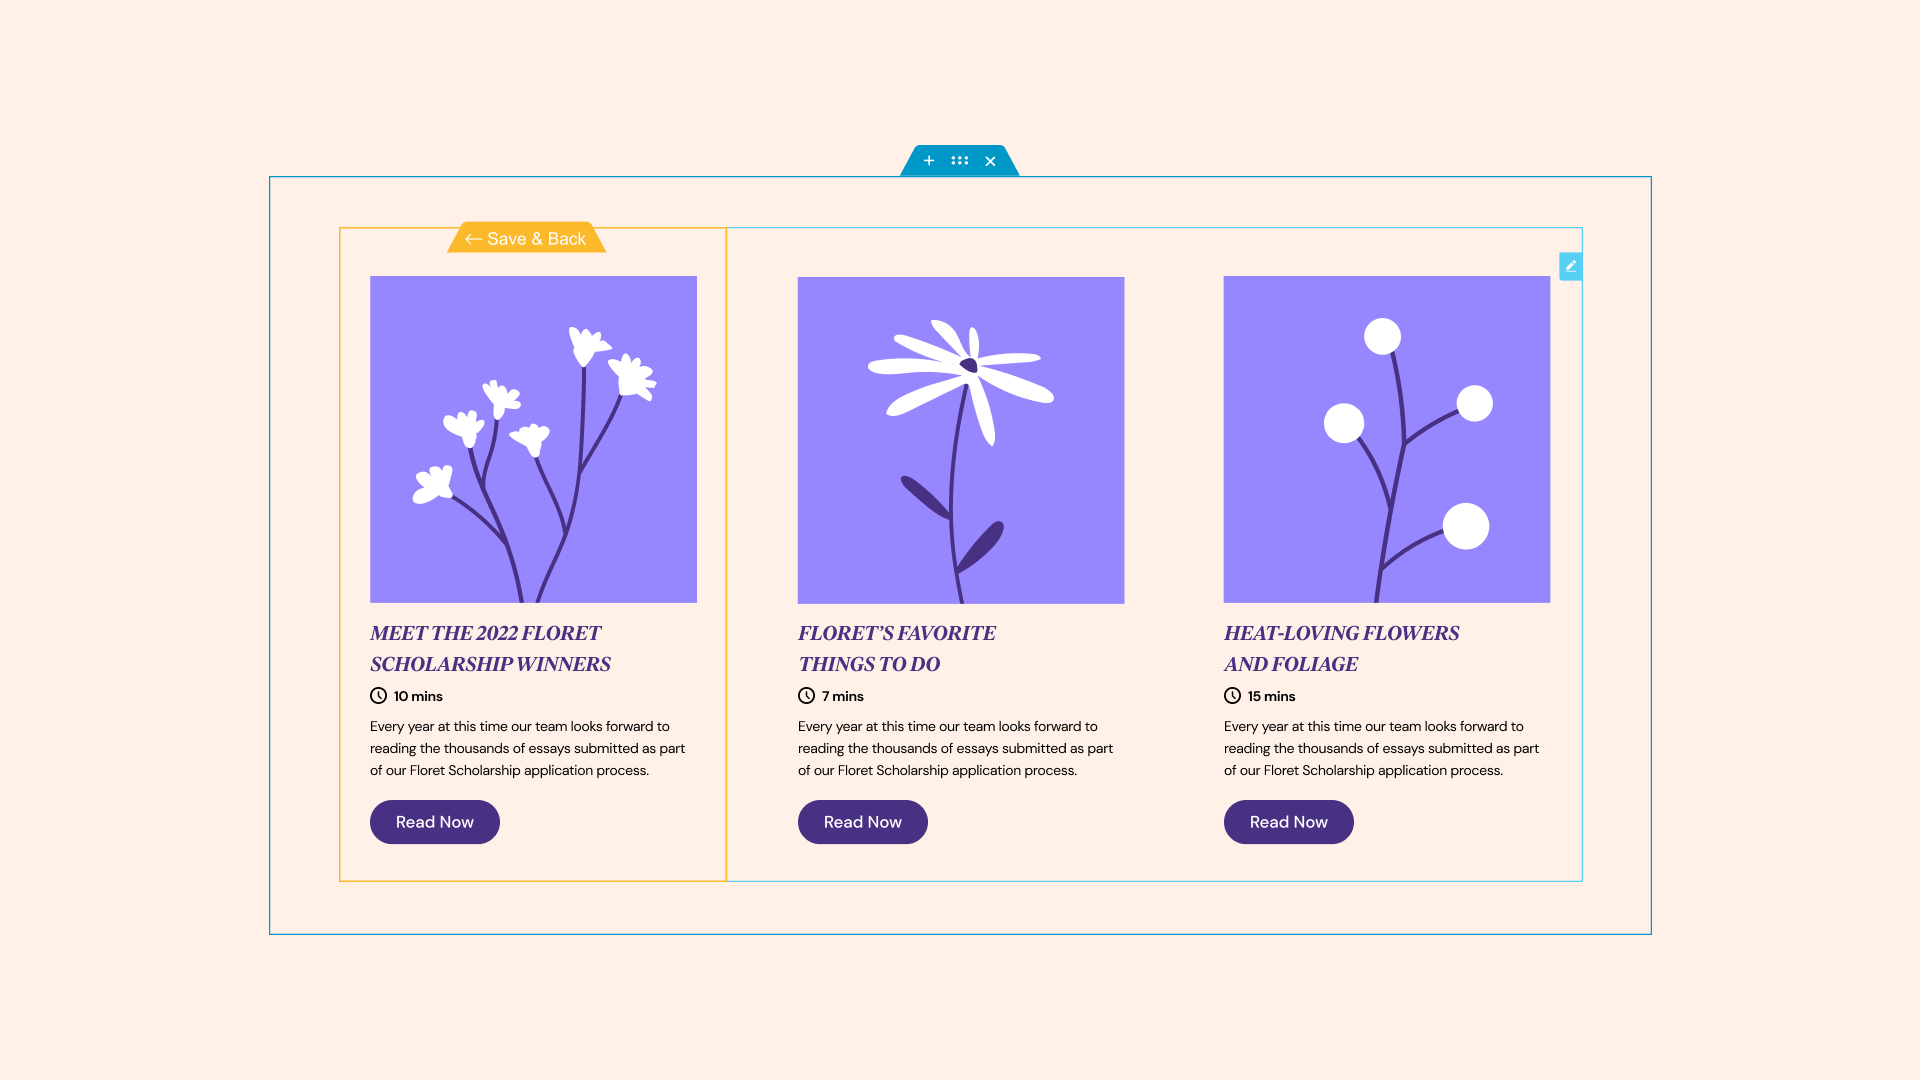
Elementor 3.8 will be introducing the first phase of the Loop Builder. The Loop Builder enables you to create and design the main item for repeating content (i.e. loops) such as listings, as well as customize its layout on the page. By creating a main item template yourself, you gain a lot more design and dynamic content flexibility than the Posts widget allows you to achieve.
The first phase of the Loop Builder includes the ability to create a main item for posts, and custom post types, future updates will include full WooCommerce support, and additional capabilities that will enhance your website.
Creating your Main Item Template
There are two ways to design your main item template:
- In-Place Editing – available by dragging the Loop Grid widget onto a page and clicking the ‘Create a Template’ button.
- Blank Canvas – available by adding a new Loop Item template from the Theme Builder, or by adding a new template from the Templates menu in the WordPress dashboard.
To design your main item template, you can use nearly any of the widgets in Elementor.. Each of the widgets you use, can be assigned any of the dynamic values available on your website, or they can be left as static and used to enhance the design of your main item.
Displaying the Loop on a Page
The loop templates you create can be used on any page, using the Loop Grid widget. With this widget, you can determine the name of the template you would like to use, the data source from WordPress to display content from, and adjust the layout, style and pagination to your liking.
- Since the Loop is dependent on Flexbox Containers, to use the Loop Builder on your website, you will need to enable the Flexbox Containers experiment.
- After activating the Flexbox Containers experiment, you will also need to activate the Loop experiment.
Important Note for Cloud Hosted Website Users
Please note that in order to eliminate conflict with other third party plugins, the naming convention for the Loop template has changed from ‘Loop’ to ‘Loop Item.’ As a result, if you’ve created loop templates with previous Cloud versions of Elementor, they will be deleted. We apologize for any inconvenience this may have caused. On the new version, this will be solved and templates will be saved properly.
How to Test It:
Create an In-place loop
- Make sure you have at least six posts on your website filled with the post title, featured images, and any additional content you want to use.
- Create a new page, edit it with Elementor and drag in the Loop Grid widget.
- Click on the Create Template button on the panel or in the Editor’s edit mode.
- Ensure that you are switching to an In-Place editing mode, within the main item’s container, and that the widgets panel suggests recommended Posts related widgets first.
- Drag and Drop any dynamic (and static) widget into the template area.
- Once the main item design is ready, click on the “Save & Back” yellow handle.
- Make sure you switch back to the parent page
- Ensure the other posts in the loop are populated automatically based on the main template design.
- Click on the “Edit Template” button or handle and switch to the main template design.
- Change the main item design, save, and return to the parent page.
- Ensure again that the design of the other posts in the loop change based on the new design of the main item.
- Go over the layout controls and change the Columns, Items Per Page and switch on Masonry.
- Check the Query section and make sure all the controls work as expected.
- Go over the Pagination controls and test the different options.
- Go over to the Style tab and start examining the layout and pagination possibilities.
- Make sure everything works as expected in the Editor and on the Frontend
Create a loop item from the Theme Builder
- Go to the Theme Builder (New UI and WordPress Table view), and create a new loop item template by clicking on the “Add New” Button
- Ensure you can see the recommended Posts related widgets.
- Drag and Drop any dynamic (and static) widget into the template area.
- Adjust the Preview width by clicking on the template settings icon (cogwheel icon). Then click on the Preview Settings section, and play with the width slider control.
- Rename the template name in the General Settings section (from the cogwheel icon).
- Once the main item design is ready, click on Publish.
- Create a new page, edit it with Elementor and drag in the Loop Grid widget
- Select the new template under the “Choose a template” option.
- Ensure the loop is presented correctly in the edit mode, and that the other posts in the loop are populated automatically based on the main template’s design.
- Make sure everything works as expected in the Editor and on the Frontend
Flexbox Containers Beta – Now Marked as Stable
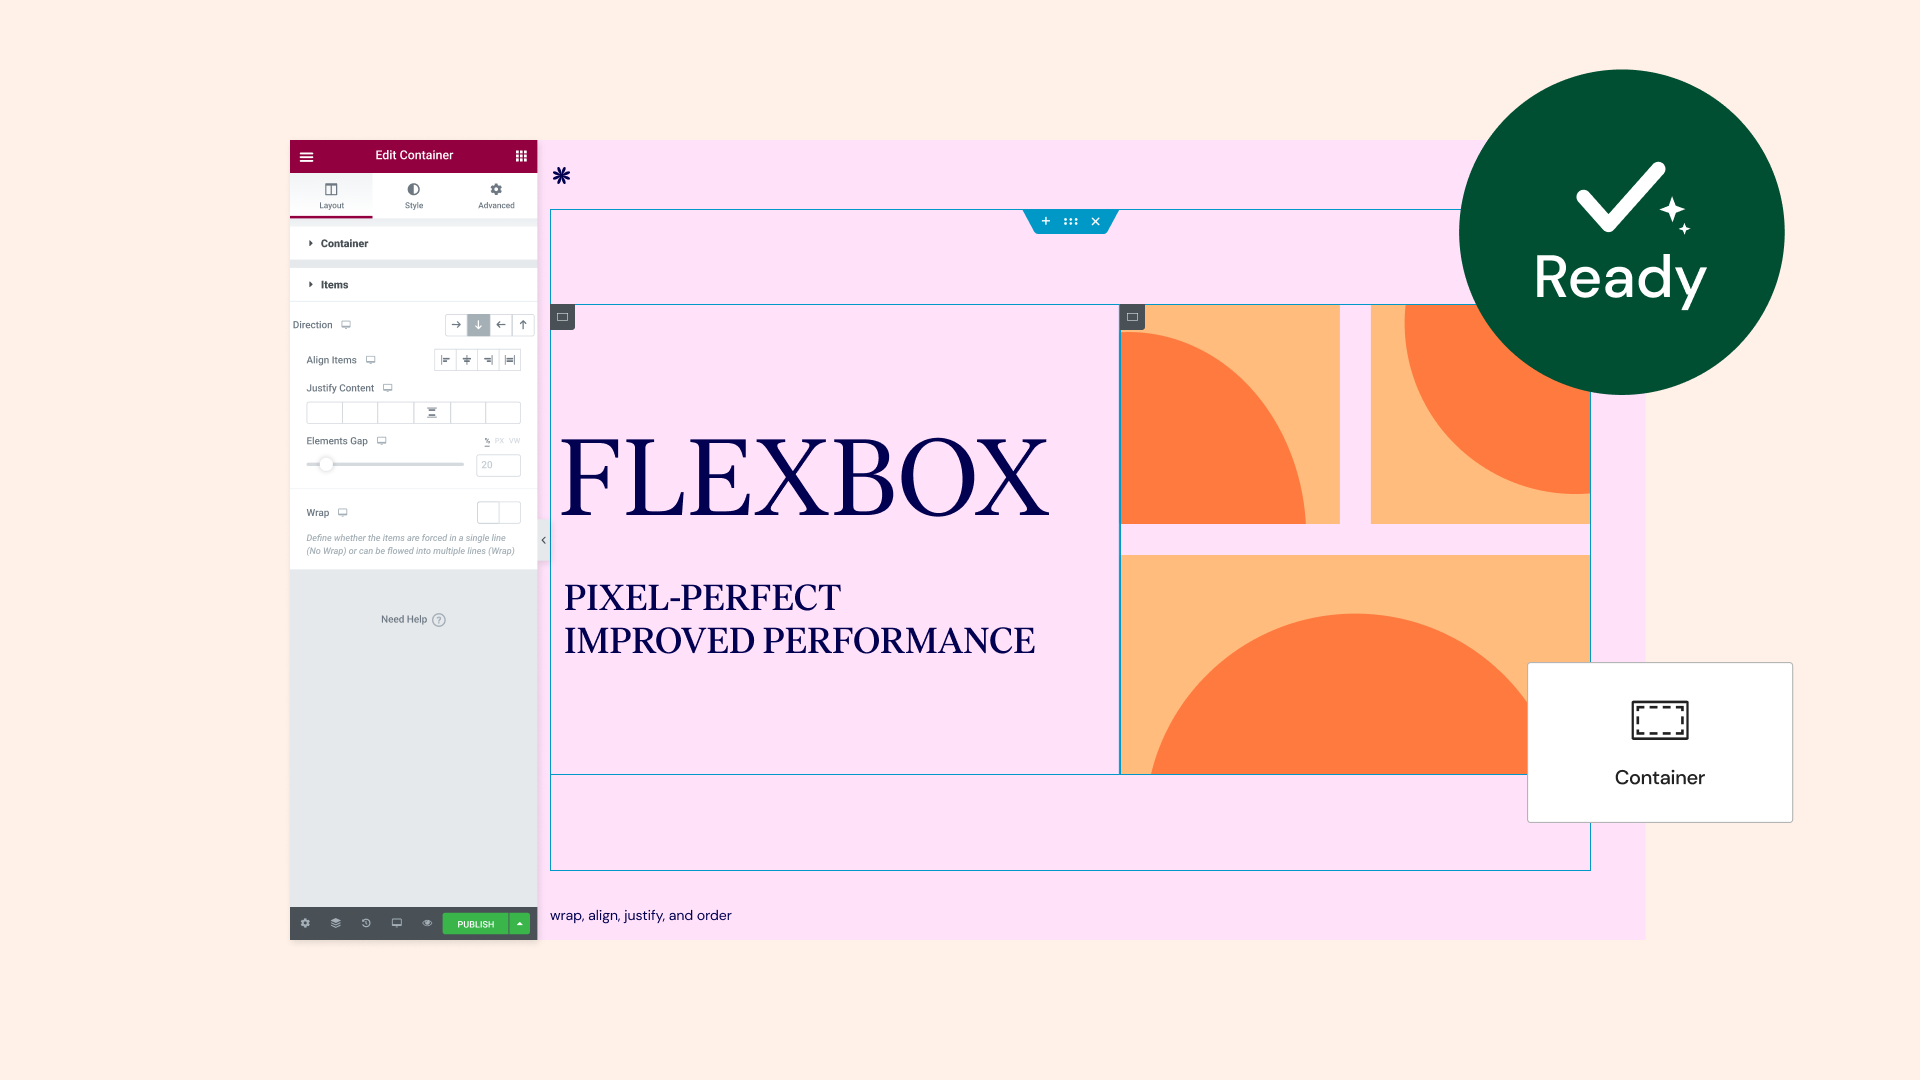
After having gone through extensive testing, and reviewed under a variety of use cases and integrations, this version marks the status of the Flexbox Containers experiment as beta, and is now considered stable. That means you can feel confident using them on your own website.
We will make an effort to ensure that any changes and improvements made to Containers from this point forward will also be backwards compatible, and should not affect the way they appear or function on existing websites who have activated the experiment. Since for some of you, Flexbox Containers will require some learning and getting used to, for the time being – it will be your decision when to activate the experiment and use Containers on your website. [That is also why, they will still be located under the Experiment tab in Elementor Settings for the time being].
Please note, if you decide to activate the experiment, and design layouts using the Container, but then decide to deactivate the experiments, all website parts created with Containers may disappear.
To learn more about how you can use Flexbox Containers on your website, you can also try it out yourself first in the Elementor Flexbox Playground
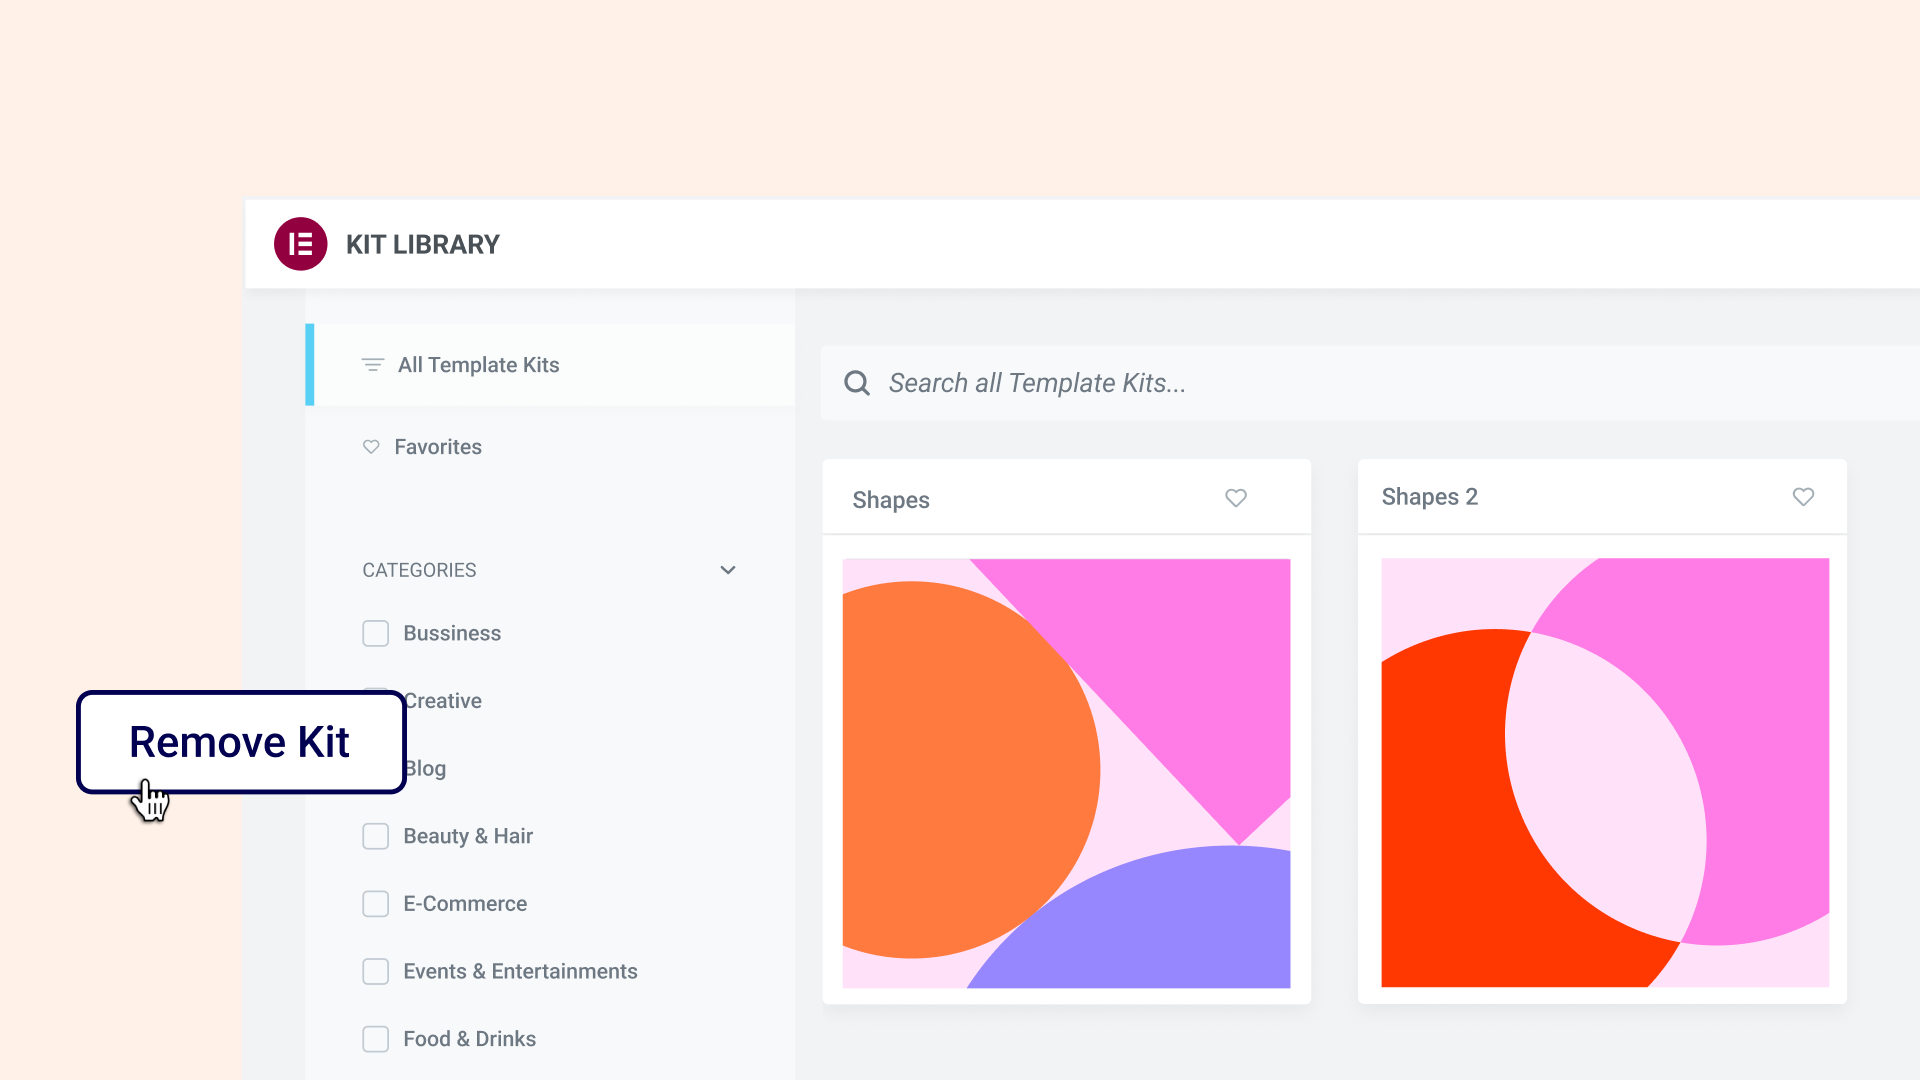
New: Remove Kit – Revert your Website to its Previous Condition
Ever downloaded a website kit but then changed your mind? With this update, you don’t need to restore your entire website to a previous version or manually undo all the global styles applied by the kit or delete the pages it came with.
Any kit downloaded from this version onwards can be easily removed by going to the Import/Export tab under Elementor Settings → Tools section(from the WordPress dashboard) and clicking the ‘Remove Kit’ button. This button will only appear if you downloaded a kit after updating to this version.
How to Test It:
- Download a website kit by going to WordPress dashboard → Templates → Kit Library
- See that everything works properly on the front-end and that it downloaded all the content associated with the kit
- Try adding a new page, and see how when you create a new page, the kit’s global styles apply on the new page
- Revert your kit to restore your website to its previous condition by going to Elementor → Tools → Import/Export Kit and click the new button at the bottom of the screen ‘Remove Kit’, then click ‘Yes’ on the action popup
- Review your posts and pages and make sure the pages that were added with the kit have been removed
- If you’ve created a new page, review its content to see that the content remind, and the Global styles of the page have restored to their previous condition, before downloading the kit
Update about the Release Mechanism
Over the past couple of months, we have been reviewing ways to increase the speed of providing you with new updates, and reducing incompatibility issues.
As a result, we decided to change our release process in two ways:
- Major versions of Elementor’s Free and Pro plugin will be updated at the same time, as evident in this upcoming version release.
- Implementing a consistent release schedule:
- Consistent small releases to Cloud Hosted Websites – deploying to these websites first allows us to increase release frequency in a controlled environment, which results in better and more compatible version releases.
Make An Impact: Share Feedback Before Features Are Released
We’re always looking to get to know Elementor customers on a deeper level. If you’re interested in meeting with our team and sharing your insights, feedback, and feature requests you’re welcome to sign up for some quality time with us here. Or download Elementor’s Dev Edition. Talk soon!
How to Install the Beta Version
If you still haven’t enabled beta testing in Elementor, please follow these steps:
- Go to Elementor > Tools > Versions
- Enable the beta tester feature
- Go to Dashboard > Updates and update to the latest beta version.
- This will get you set up to test the latest version of Elementor
Known Bugs in Elementor 3.8 Free and Pro Beta
As we prepare these Beta versions for stability, there are a number of bugs we identified that are already in progress of being solved, including:
Loop:
- Fix: Columns control is not working on responsive devices in Loop Grid widget
- Fix: Loop typography doesn’t render correctly from a template created in Theme Builder in Loop widget
- Fix: Button widget styles inside a loop template are affected from load more pagination button styles in Loop Grid widget
- Fix: Featured Image dynamic tag is not working as expected in loop template on a container level
- Fix: Error message appears when clicking the discard button when creating or editing a template
- Fix: Link styles in Theme Styles effects loop’s CTA button
- Fix: Loop template does not change live when editing the design in an in-place editing
- Tweak: Added ACF support for loop
Flexbox Container:
- Fix: Sticky functionality is not working as expected in Container
Notes
As we make changes to our GitHub in an effort to keep it organized, improve the way we deliver information to you, and our ability to review your feedback, please follow the instructions below when reporting bugs, or making feature requests:
- To view this update in GitHub – click here
- To report a bug related to this beta version – open a new Bug report
- For feature requests – open a new Feature request issue
- For other comments specifically about this beta version – comment here
Designated time for release: October 23, 2022 (Estimated)
Many thanks for your support and help!
Cheers,
Elementor Team
