Hey Beta testers,
Elementor 3.24 beta is now live and we would love to hear your feedback on it. Following the introduction of Floating Buttons in version 3.23, we’re excited to bring you Floating Bars. Now, you can place sticky bars at the top or bottom of your page, ensuring visitors never miss important updates or promotions. Version 3.24 also marks a significant performance milestone with improved CSS Loading; making your websites much faster, and reducing the CSS size by up to 668KB. In addition, we are pleased to introduce Variable Fonts, which give you even more flexibility to create stunning text designs and animations.
Make an impact on the future of Elementor by testing the 3.24 beta and sharing your impressions on the latest additions:
- Floating Bars
- [Pro] Variable Fonts
- Enhanced CSS Loading
- [Pro] New Updates in Display Conditions
- And More!
Looking forward to hearing your thoughts and feedback on these new features!
Elevate Your Website’s Potential with Floating Bars

Elementor 3.24 introduces an exciting new feature to enhance visitor engagement and boost conversions: Floating Bars. This new addition allows you to seamlessly integrate three types of bars to your website:
- Call to Action (CTA) Bar
- Ticker Bar
- Coupon Bar
For instance, an eCommerce website can use a Coupon Bar to promote a 24-hour flash sale at the top of every product page and leverage the new single-click copy to clipboard function. Similarly, a news portal might use the Ticker Bar to continuously display important posts or breaking news, keeping readers informed and engaged.
Seamless Setup and Customization
Setting up your Floating Bars is effortless. Upon adding a new Floating Element (WP Dashboard > Templates), you’ll be prompted to choose between a Floating Bar or Floating Button. Choose one of the 30+ templates available and then make the Floating Bar your own by customizing the design, icons, text content, CTA links, and more. Elementor Pro users can also leverage Display Conditions to specify where, when, and to whom the Floating Bars will appear, enhancing targeting and effectiveness.
30+ Templates to Choose From
With the addition of Floating Bars, you can also find new pre-designed templates in the library. The diverse array of pre-designed templates, enable you to enhance your site’s functionality and save time designing a Floating Bar from scratch. These templates can be customized according to your individual needs, enabling you to spotlight key messages and promotions effectively. You can find templates for online shops to promote sales or new products, templates with different signup buttons, templates with file downloads, table reservations, discount codes, milestones and so much more!.
The free version of Elementor includes the CTA Floating Bar, while with Elementor Pro you can benefit from the three distinct Floating Bar types and access all 30+ templates, enabling dynamic and effective promotions right at the top or bottom of the page. With Floating Bars, Elementor 3.24 not only simplifies website customization but also powers up your conversion and sales strategy by putting your most important messages front and center.
How to Test it:
- Ensure the “Flexbox Container” feature is activated by navigating to the Elementor menu in WordPress: Settings → Features.
- Navigate to the Elementor Template area and locate the Floating Elements section.
- Click on the “Add New Floating Element” button.
- A modal will open, prompting you to choose between “Floating Buttons” or “Floating Bars” and to name the template. Choose Floating Bars.
- You will be redirected to create a template, and a template library with pre-designed options will appear.
- This step is mandatory because you need to start with a template to create a floating bar.
- Click to insert your desired template.
- Continue to explore the floating bar’s capabilities in the Content and Style tabs. The settings and style options available will depend on the template you choose.
- Navigate to the Advanced tab and define where to position the floating bar and other options.
- Click the Publish button to define where the bar will appear on your website.
- For Pro users:
- When you publish the template, a display condition window will appear, allowing you to set where to present the floating bar.
- Choose where to display it: on the entire site or a specific page.
- For Free users:
- After clicking on Publish, navigate back to WordPress → Elementor Templates → Floating Elements.
- Locate the template you just created and hover over it. You will notice a “Set as Entire Site” link. Click on it if you want the floating bar to appear on the entire website.
- If you have two floating bars (or more), you can only set one floating bar for the entire site at a time.
- You can remove it from being presented on the site by clicking “Remove from the Entire Site.”
- Explore different templates to learn about the floating bar’s capabilities.
- Ensure everything is working in the editor and on the front end.
[Pro] Enhanced Creative Freedom with Variable Fonts
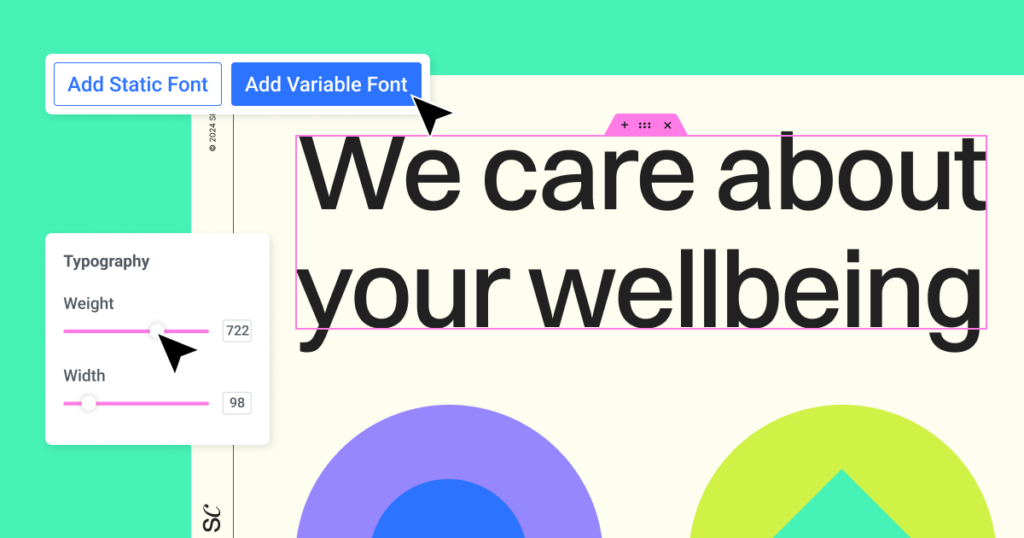
Variable Fonts is an exciting feature that brings unparalleled fluidity and control to text design. By simply uploading a single TTF file from sources like Google Fonts, you can now adjust text weight and width with incredible precision. To utilize this feature, go to WP Dashboard > Elementor > Custom Fonts > Add New > Add Variable Font, name the new font, upload your TTF file, select the desired weight and width checkboxes, set the values based on the font’s properties, and publish.
Flexible Design and Workflow
With static fonts, designers are confined to adjusting text weight and width in rigid increments of 100 pixels, which sometimes limits design flexibility. Now, Variable Fonts allow changes in single increments, ensuring full control over text customization, enabling more dynamic and engaging designs. When using custom CSS, Variable Fonts also enable animations to smoothly transition between different weights and widths without abrupt jumps. Designers can now create text that morphs gracefully, enhancing visual storytelling and viewer engagement.
When editing text and navigating to the Typography control, you can see the new fonts at the top of the Font Family selection, under ‘Variable Fonts’, enhancing workflow efficiency and simplifying access. Whether adjusting for aesthetic appeal or animation purposes, Variable Fonts allow you to gain control and offer you the freedom to explore a broader range of design possibilities.
How to Test it:
- Navigate to the Elementor area in WordPress and locate the Custom Fonts section.
- Click on the “Add New” button.
- Enter the Font Family name.
- Click on the “Add Variable Font” button, and upload the variable font TTF file.
- You can add any variable font from any provider.
- Check the boxes for Width and Weight (depending on the font), and ensure to set the Minimum and Maximum values for each.
- Click on Publish.
- Now, navigate to edit an Elementor page.
- Choose a Heading widget, and go to the Style tab.
- Click on the Typography control, and locate the Family select control.
- You will find the Variable Fonts section at the top of the fonts list, where you’ll see the font you added earlier.
- Choose the font, and test the Weight and Width controls to adjust the font appearance.
- Ensure everything is working in the editor and on the front end.
Performance Optimization Unleashed with Enhanced CSS Loading
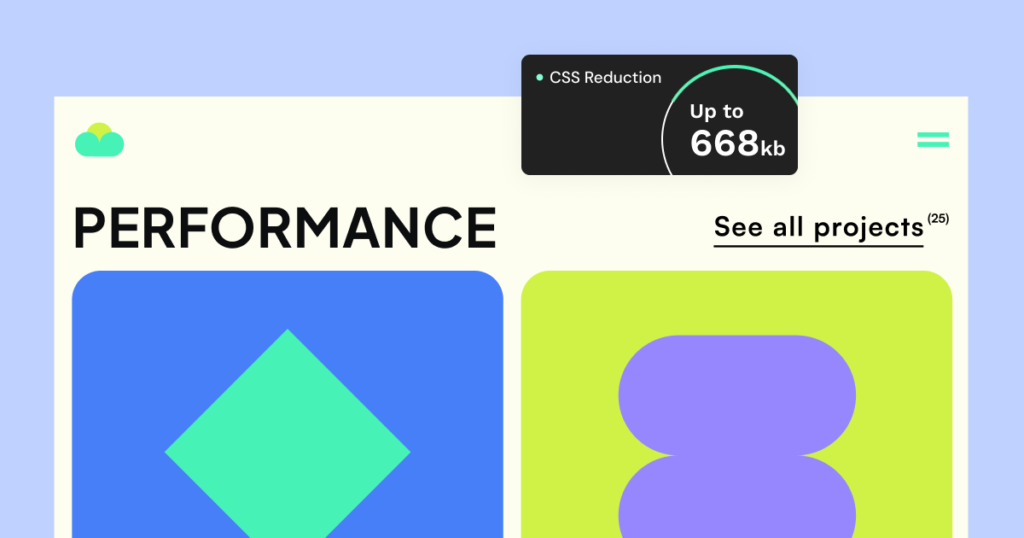
Elementor 3.24 brings a pivotal enhancement to CSS management – Conditional CSS Loading. This feature ensures that only the CSS necessary for the page being viewed is loaded, and drastically reduces the amount of loaded CSS. For instance, specific features like Shape Dividers, Sliders, Lightbox, Dialogs, Animations and others load only when utilized on the page. Furthermore, all widget styles are now loaded conditionally, without loading styles for unused widgets.
Optimized CSS Delivery for Faster Loading Times
The “Improved CSS Loading” feature, introduced in v3.3.0, made a valuable impact on Editor performance, and is now native for all websites who update to v3.24. The level of CSS reduction that you will see, depends on whether your website already had the “Improved CSS Loading” feature activated or not. Websites that had the feature active before updating, will experience an additional reduction of up to 145KB in CSS size, while websites who haven’t activated this feature will experience a reduction in CSS size of up to 668KB.
Reducing CLS and Boosting Performance
In this release, we’ve significantly optimized the way CSS assets are loaded for Elementor widgets, improving both performance and visual stability. Previously, widget styles were loaded at the end of the `<body>`, which could lead to Cumulative Layout Shifts (CLS) as the page content adjusted after loading. With our new “style dependencies caching” system, these styles are now cached on the first visit and loaded from the cache into the `<head>` on subsequent visits. This change minimizes CLS by ensuring that styles are applied earlier in the page load process, resulting in a smoother, more stable user experience.
Elementor’s Commitment to Efficiency
This strategic optimization addresses our continued commitment to significantly enhance site performance. You can expect faster loading times, which contributes to a better overall visitor experience. This upgrade not only streamlines the design process but also ensures that your website remains swift and efficient, directly improving SEO rankings and user satisfaction.
How to Test it:
- Pre-Update: Using Elementor 3.23, create a page with a few Free and Pro widgets.
- Measure the size of the loaded CSS using your preferred tool.
- Update: Upgrade to Elementor 3.24 (Free and Pro).
- Measure the size of the loaded CSS again.
- Compare: Analyze and compare the results before and after the update.
[Pro] Streamlined Workflow with Display Conditions
Visual Indications in The Navigator
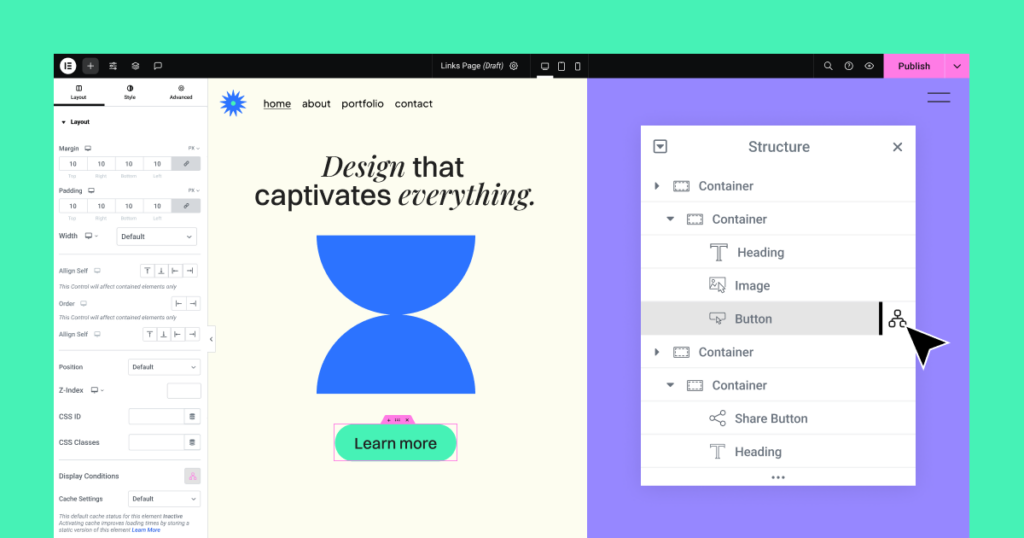
Elementor 3.24 introduces an improved workflow for managing Display Conditions when working on elements, crucial for optimizing your web creation process. When setting a Display Condition for an element, a vertical line will appear on the affected section in The Navigator. Additionally, a dedicated icon will appear on hover, both indicating that a change has been made to this item and that a Display Condition is active on it. Until now, these indicators were added when applying Custom CSS, Absolute Position, and Motion Effects, but starting from v3.24, this will also be applied for Display Conditions. Furthermore, when clicking on the icon in the Navigator, the user will be redirected to the Display Condition area in the panel. These enhancements allow you to quickly ascertain what sections have conditions set and seamlessly alter them, streamlining your design process and reducing time spent searching through settings.
Seamlessly Manage Display Conditions
This update comes with two enhancements to improve your workflow:
- Copy and paste Display Conditions – replicate settings across various elements and pages effortlessly, eliminating the need to manually set repetitive conditions.
- Clear Display Conditions – reset the conditions set to an element or section instantly from the context menu, available when you right click an element.
Both of these enhancements can be easily leveraged when right clicking any element on your website. If the element already has Display Conditions applied to it, you can click “copy” and will also see a new option to “clear display conditions”. You can then go on to another element and right-click to “paste display conditions”. These tools significantly speed up project completion times and save you valuable time.
Feature Enhancements: Search, Elementor AI & More
[Pro] Bringing Search to The Next Level
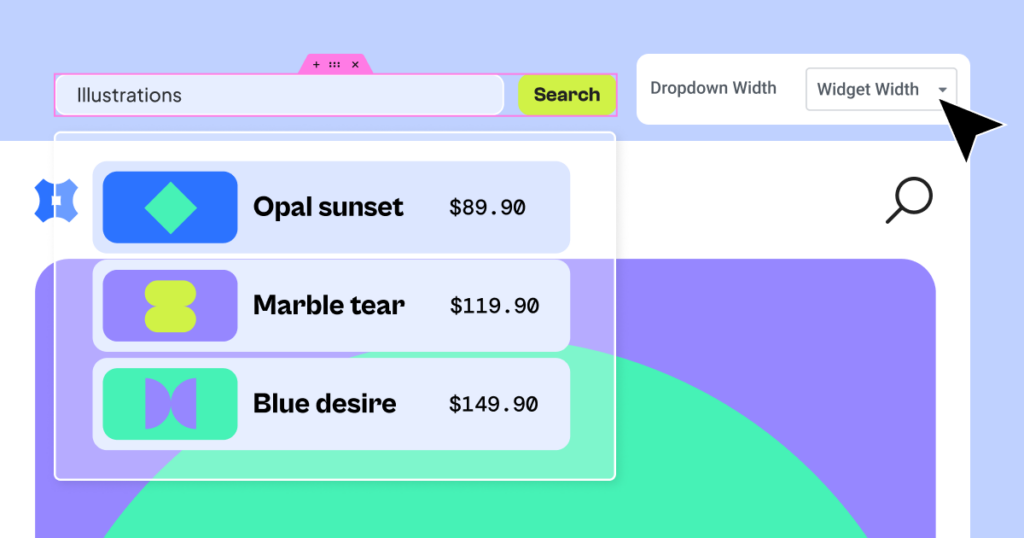
In version 3.23 we introduced the new Search widget, which leverages AJAX loading to display live results as the visitor is typing, as well as a collection of new design possibilities. In version 3.24 we continue to develop the Search widget while listening to the feedback of our users. These enhancements, available now in 3.24 beta, include:
- Significantly shorter result page URLs for a better visitor experience and workflow.
- A new button within the widget’s content tab, taking you directly to the Theme Builder, and allowing you to create a new loop template for a smoother building experience.
- The option to control the result dropdown’s width, as well as to customize the search loader’s visibility and design.
- Search is now a native part of the Editor and no longer needs to be enabled in Features.
Opt Out Option for Elementor AI
Elementor AI tools streamline your workflow and speed up website delivery, all while keeping your professional guidance front and center. You can now easily turn off AI features when handing over the website to clients, ensuring they only see the final, polished product without any AI elements. The ability to disable AI notices is also useful for anyone who is not interested in using Elementor AI and wants to clean up their workspace. To turn off Elementor AI go to the WP Dashboard > Users > Profile and see the option to opt out.
Additional Updates
- Taxonomy Filter, Link in Bio and Floating Contact Buttons are now a native part of the Editor and no longer in the Features page.
- Nested Elements are now active by default for new websites.
- Lazy Load Background Images are merged and moved to the Performance Settings.
- Accessibility – New ability to name your Off-Canvas widgets.
How to Install the Beta Version
If you still haven’t enabled beta testing in Elementor, please follow these steps:
- Go to Elementor > Tools > Versions
- Enable the beta tester feature
- Go to Dashboard > Updates and update to the latest beta version.
- This will get you set up to test the new Elementor 3.24 Beta.
Notes
As we make changes to our GitHub in an effort to keep it organized, improve the way we deliver information to you, and our ability to review your feedback, please follow the instructions below when reporting bugs, or making feature requests:
- To report a bug related to this beta version – open a new Bug report
- For feature requests – open a new Feature request issue
- For other comments specifically about this beta version – comment here
Designated time for release: September 9th (Estimated)
Many thanks for your support and help!Cheers,
Elementor Team
