Hey Beta testers,
Elementor 3.19 beta is now available and we would love to hear your feedback on the new Display Conditions feature. This is the first phase of the new feature that allows you to enhance the visitor experience by setting display conditions for elements on your website. In addition, the Element Manager now includes role permissions that empower you to specify the widgets displayed in the Widget Panel for each team member, depending on their assigned role in the Role Manager.
We encourage you to try out 3.19 beta and provide us with your thoughts on our latest additions, which include:
- [Pro] New – Display Conditions for Elements
- [Pro] Element Manager – Role Permissions
- [Pro] Akismet Spam Filter Integration in the Form Builder
- [Elementor AI] Generate Container Variations from the Template Library
- And More!
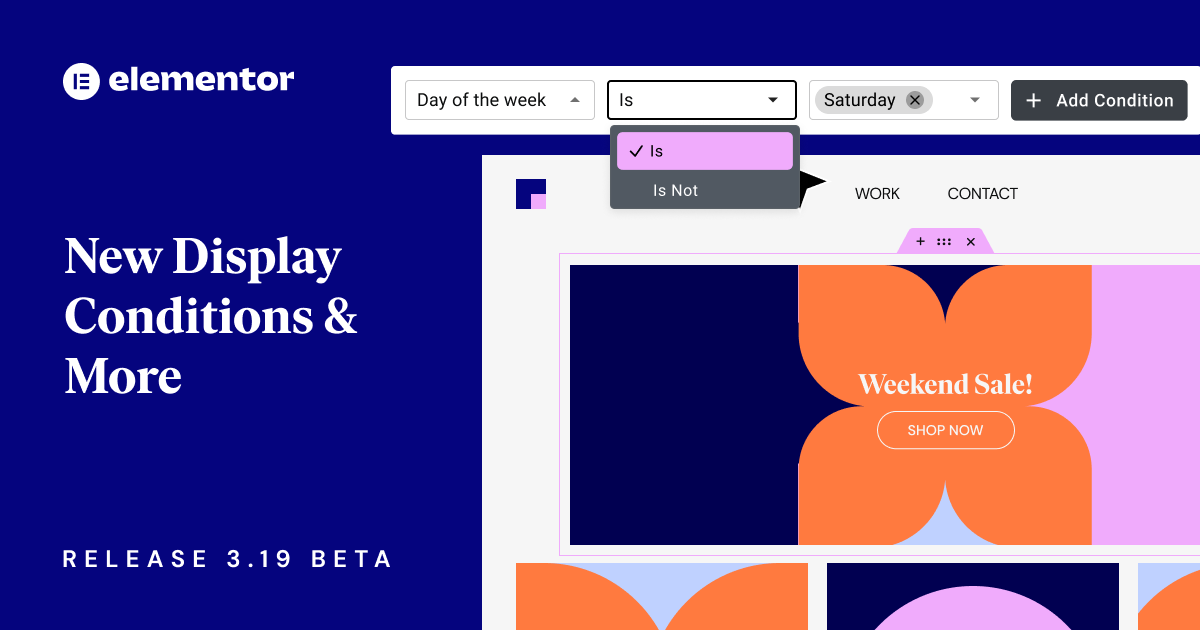
[Pro] New: Display Conditions for Elements
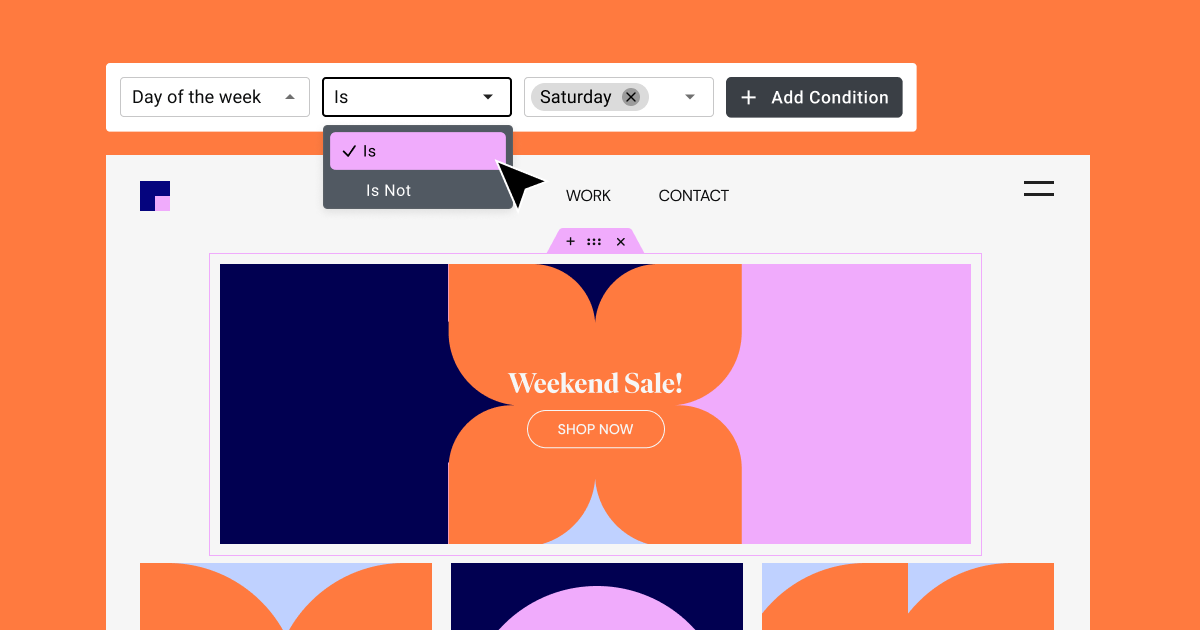
Version 3.19 introduces the first phase of the Display Conditions feature, which empowers you to set conditions for displaying elements on your website. By setting display conditions, you can create different visitor experiences according to various parameters, such as the time and date of the visit, the visitor’s identity, and the type of page they are viewing. You can give an element a single display condition or set multiple conditions. Currently, when assigning multiple conditions, each one is linked with the “AND” logic, which means that the element is displayed if all conditions are satisfied.
To set display conditions for an element, select the element and go to the Advanced tab in the editing panel. Scroll down to the new display conditions icon and click on it. This will open the display conditions modal, where you can choose conditions and specify their rules. Categories include “Page”, “Post”, “User”, “Date and Time”, and “Other”.
For example, if you want to display an image on Thursdays, choose the “day of the week” condition. Then modify the condition to “Is”, and choose “Thursday”. If you want to display the image on Thursdays and only make it visible for visitors who are logged into your site, click “Add Condition”, and choose “Login Status”, “Is”, “Logged In”. This will only display the element to users who are logged in and on Mondays.
Please ensure that you update both the Elementor and Elementor Pro plugins to version 3.19 Beta in order to set Display Conditions. If you only update the Element Pro Plugin, you will be able to see the Display Conditions icon but won’t be able to use the feature.
Note: The Display Conditions for elements feature will only be available in the Advanced Elementor Pro subscription or higher and Legacy Essential subscriptions purchased before December 4th, 2023.
How to Test it:
- Make sure you have updated both Elementor and Elementor Pro to version 3.19.
- Activate the “Display Conditions” feature by going to the Elementor menu in WordPress and then navigating to Settings → Features.
- Confirm the presence of a new “Display Conditions” option under the Advanced tab of each widget.
- Click on the “Display Conditions” icon to open the modal.
- Explore the various suggested rules and check if the element is displayed or not based on those rules.
- Verify that the AND logic is working as expected.
- Ensure everything functions correctly both in the Editor and on the front end.
[Pro] Role Permissions in the Element Manager
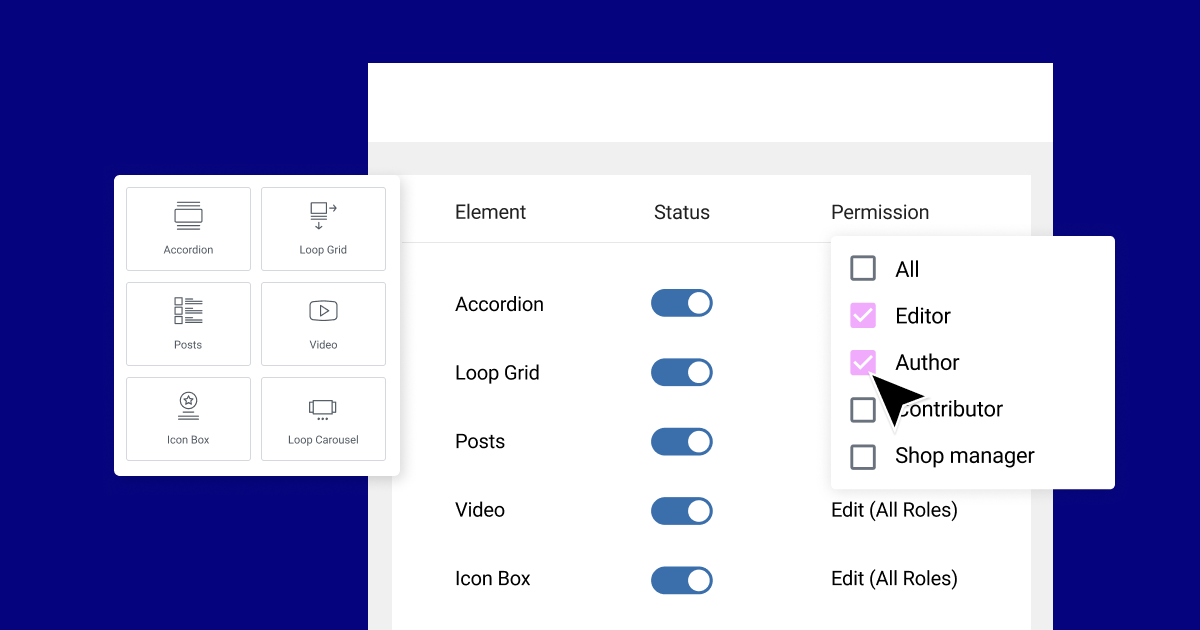
This version improves collaboration with teammates and other stakeholders by introducing role permissions into the Element Manager. This allows you to customize the widgets displayed in the Widget Panel for each team member based on their assigned role in the Role Manager. As a result, the widget panel becomes more streamlined, only showing the relevant widget for each role.
Unlike disabling widgets with the Element Manager, modifying a widget’s role permissions will not impact the frontend of your site or remove existing widgets from the canvas. The widget will still be visible to visitors, but users without permissions to a specific widget will not be able to add that widget into the Editor.
Note: The Role Permissions in the Element Manager will only be available in the Advanced Elementor Pro subscription or higher.
How to Test it:
- Navigate to WordPress > Elementor Menu > Elements Manager.
- Confirm that the Plugins list displays relevant widgets for your website, and use the filter option to review the widgets list.
- In the Permission column, click on the Edit button.
- Choose the role from which you want to hide the widget in the widget panel.
- Ensure the selected roles appear next to the Edit button.
- Save the changes and check the widget panel for that role.
- Confirm that the widget is not appearing in the widget panel, while existing widgets on the canvas remain editable and visible on the front end.
- Check the “All Statuses” filter to ensure you can switch between Active and Inactive widgets.
- Verify that everything functions correctly in the Editor and front end.
[Pro] Form Builder – Akismet Integration
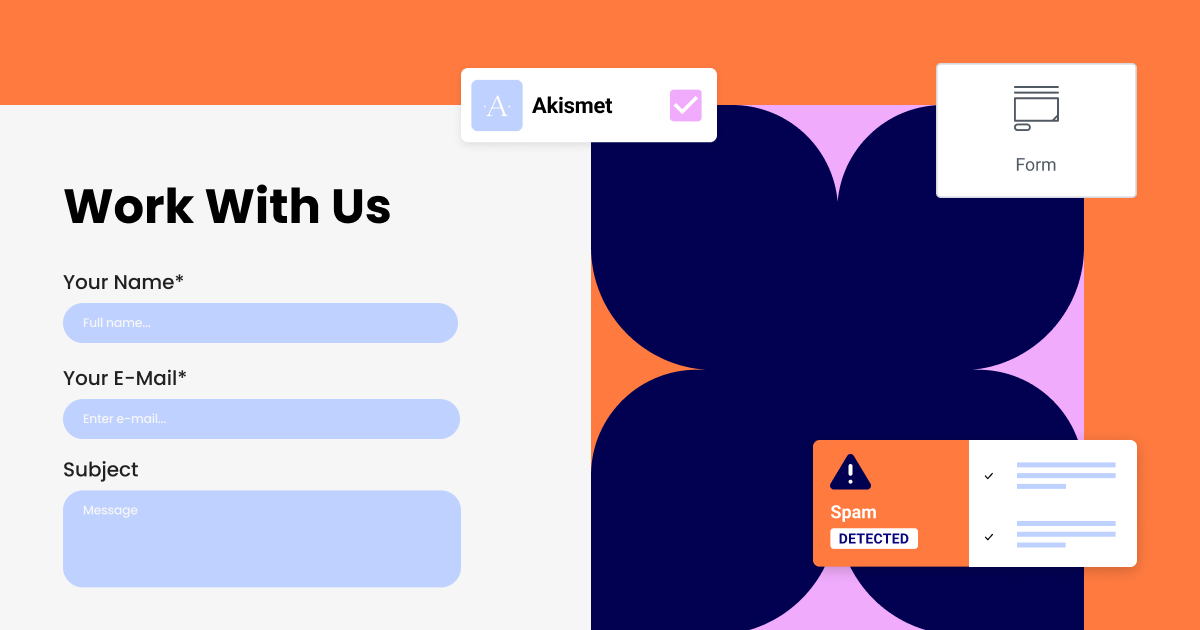
Elementor’s Form Builder now integrates seamlessly with the Akismet spam filter to protect your forms from spam submissions. Akismet works in the background, using AI technology to detect spam with 99.9 percent accuracy without any additional interactions required by your visitors. This creates a seamless experience for visitors while also protecting site managers. The Akismet plugin can be enabled on four different field types: “Name,” “URL,” “Email,” and “Message”. Once the filter is enabled, submissions suspected as spam will be marked as such in your submissions page and won’t be sent by mail. This makes it easier for you to manage actual messages from visitors.
Note: The Akismet Integration in the Form Builder will only be available in the Advanced Elementor Pro subscription or higher.
How to Test it:
- Download and install the Akismet plugin, and create an Akismet account.
- Generate an API Key on the Akismet website and copy it.
- Go to Settings > Akismet Anti-spam in your WordPress Dashboard and paste your API Key.
- In the Elementor Editor, select your form and go to “Actions After Submit.”
- Add “Akismet” to activate the spam filter.
- A new Akismet Spam Protection section will appear in the editing panel with inputs for “Name,” “URL,” “Email,” and “Message.”
- To activate the spam filter on your desired form fields:
- Go to the Content Tab in the Form Builder.
- Click on the desired form field item and open its advanced tab.
- Copy the field’s shortcode.
- Return to the Akismet Spam Protection section and paste the shortcode into the respective input field.
- Save the page and preview it on the front end.
- Check if the spam protection is working by following the instructions on the Akismet website.
- Ensure the spam protection is effective by verifying that you didn’t receive the email and that an error message indicates spam was detected.
[Elementor AI] Generate Container Variations from the Template Library
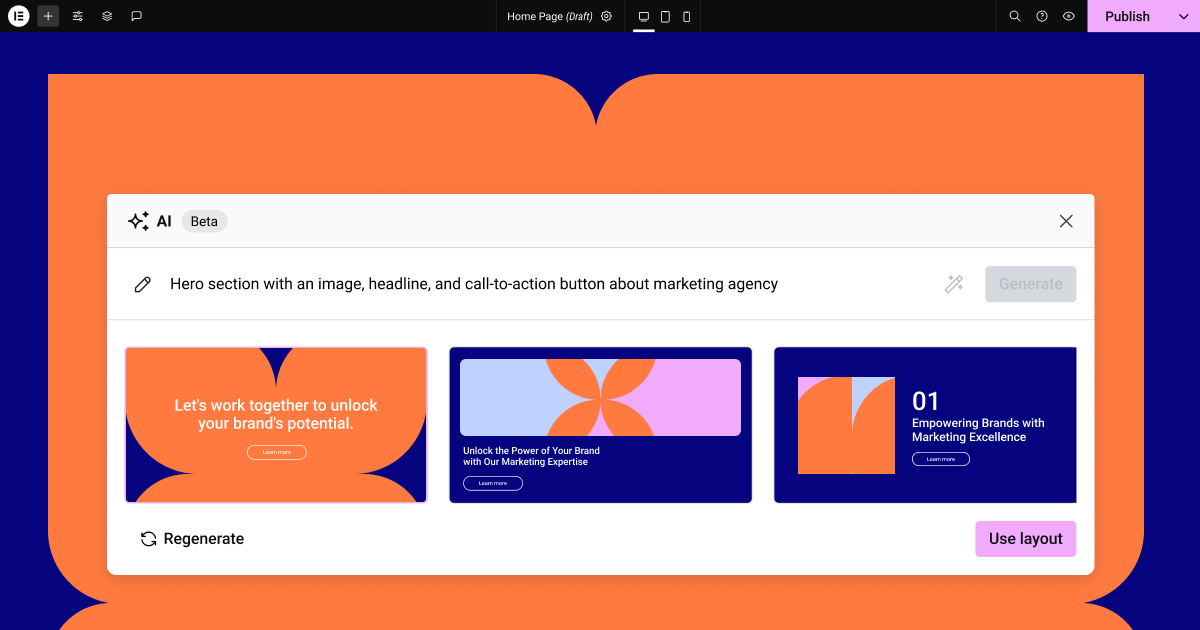
Enhance your building experience by generating AI Container variations directly from Elementor’s template library. This version adds a “Generate Variations” button to the template library, which provides three different AI based versions of the template, each with its own layout, style and content. You can also generate container variations from the Template Library directly from the AI Containers prompt input. Each Container can be customized in the Editor manually to perfect your result, and leverage additional AI features, such as text and images.
How to Test it:
- Start by going to your WordPress dashboard. Navigate to Elementor > Settings > Features and enable the “Build with AI” experiment. Note: This feature requires the Containers feature to be active on your site.
- Create a new page and open it with Elementor for editing.
- On your canvas, click the Folder icon to access the Template Library.
- Hover over a template and select the “Generate Variations” button.
- Make sure the thumbnail of your chosen template is visible. Then, specify your desired changes – these can include modifications to content, colors, typography, images, and icons. For assistance in crafting your prompt, use the “Enhance variation” button to augment your original prompt with AI.
- Click “Generate” and review the three variations generated based on your initial container.
- Insert your preferred variation onto your page. You can repeat this process for other containers as necessary.
- Verify that everything functions correctly in the Editor and front end.
- Now, let’s try the other way around: on your page, click on the “Build with AI” button (pink AI charm icon) and make sure the prompt modal launches..
- Click on the “Plus” icon next to the prompt input area, and select “Create variations from Template Library” and make sure the library launches.
- Select any template from the “Blocks” section and click “Insert”, now, your template should be attached to the Build with AI modal.
- Hit generate and make sure the results are relevant for your prompt.
Additional Updates
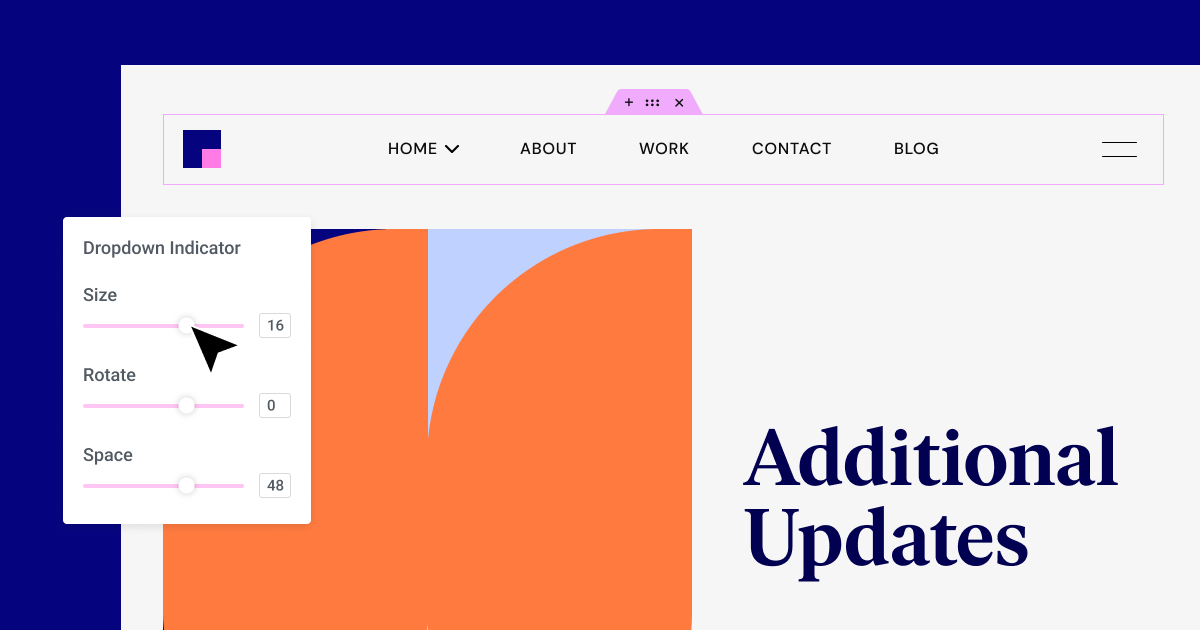
- Mega Menu Enhancement: Style the dropdown indicator including size, spacing, rotation, and color.
- Additional Units Everywhere: Additional units to various controls added across the Editor.
- Editor Workflow Hints: Improve accessibility and SEO with hints in the editing panel when an image is missing an alt text.
- Responsive Gradient Background: Adjust the location and angle settings of gradient backgrounds according to breakpoints with responsive controls.
Minimum Required PHP Version 7.4
As part of our ongoing efforts to introduce new features, improve performance, and enhance security, it is necessary to fully utilize the capabilities of the latest versions of PHP. Therefore, this version of Elementor will only be compatible with websites running PHP version 7.4 and later. If your server still uses older PHP versions, your website will continue to function, but you will not be able to update to Elementor 3.19. For more information, read about Elementor’s roadmap to upgrade PHP versions.
Make An Impact: Share Feedback Before Features Are Released
We’re always looking to get to know Elementor customers on a deeper level. If you’re interested in meeting with our team and sharing your insights, feedback, and feature requests you’re welcome to sign up for some quality time with us here. Talk soon!
How to Install the Beta Version
If you still haven’t enabled beta testing in Elementor, please follow these steps:
- Go to Elementor > Tools > Versions
- Enable the beta tester feature
- Go to Dashboard > Updates and update to the latest beta version.
- This will get you set up to test the new Elementor 3.18 Beta.
Notes
As we make changes to our GitHub in an effort to keep it organized, improve the way we deliver information to you, and our ability to review your feedback, please follow the instructions below when reporting bugs, or making feature requests:
- To report a bug related to this beta version – open a new Bug report
- For feature requests – open a new Feature request issue
- For other comments specifically about this beta version – comment here
Designated time for release: January 29th (Estimated)
Many thanks for your support and help!
Cheers,
Elementor Team
