Hey Beta testers,
The beta version of Elementor 3.15 is here and we’re excited for you to explore its new features. Elementor Pro now includes a Taxonomy Filter widget, allowing visitors to filter product and post listings based on various taxonomies. Release 3.15 also includes a new Accordion widget, new styling capabilities and extends Elementor AI.
Try out this beta versions and let us know what you think about our newest additions, which include:
- [Pro] New Taxonomy Filter Widget
- New Accordion Widget With Nesting Capabilities
- [Pro] Carousel & Loop Carousel- Offset Slides, New Pagination & Navigation Options
- Enhancements to Elementor AI Images
- And more…
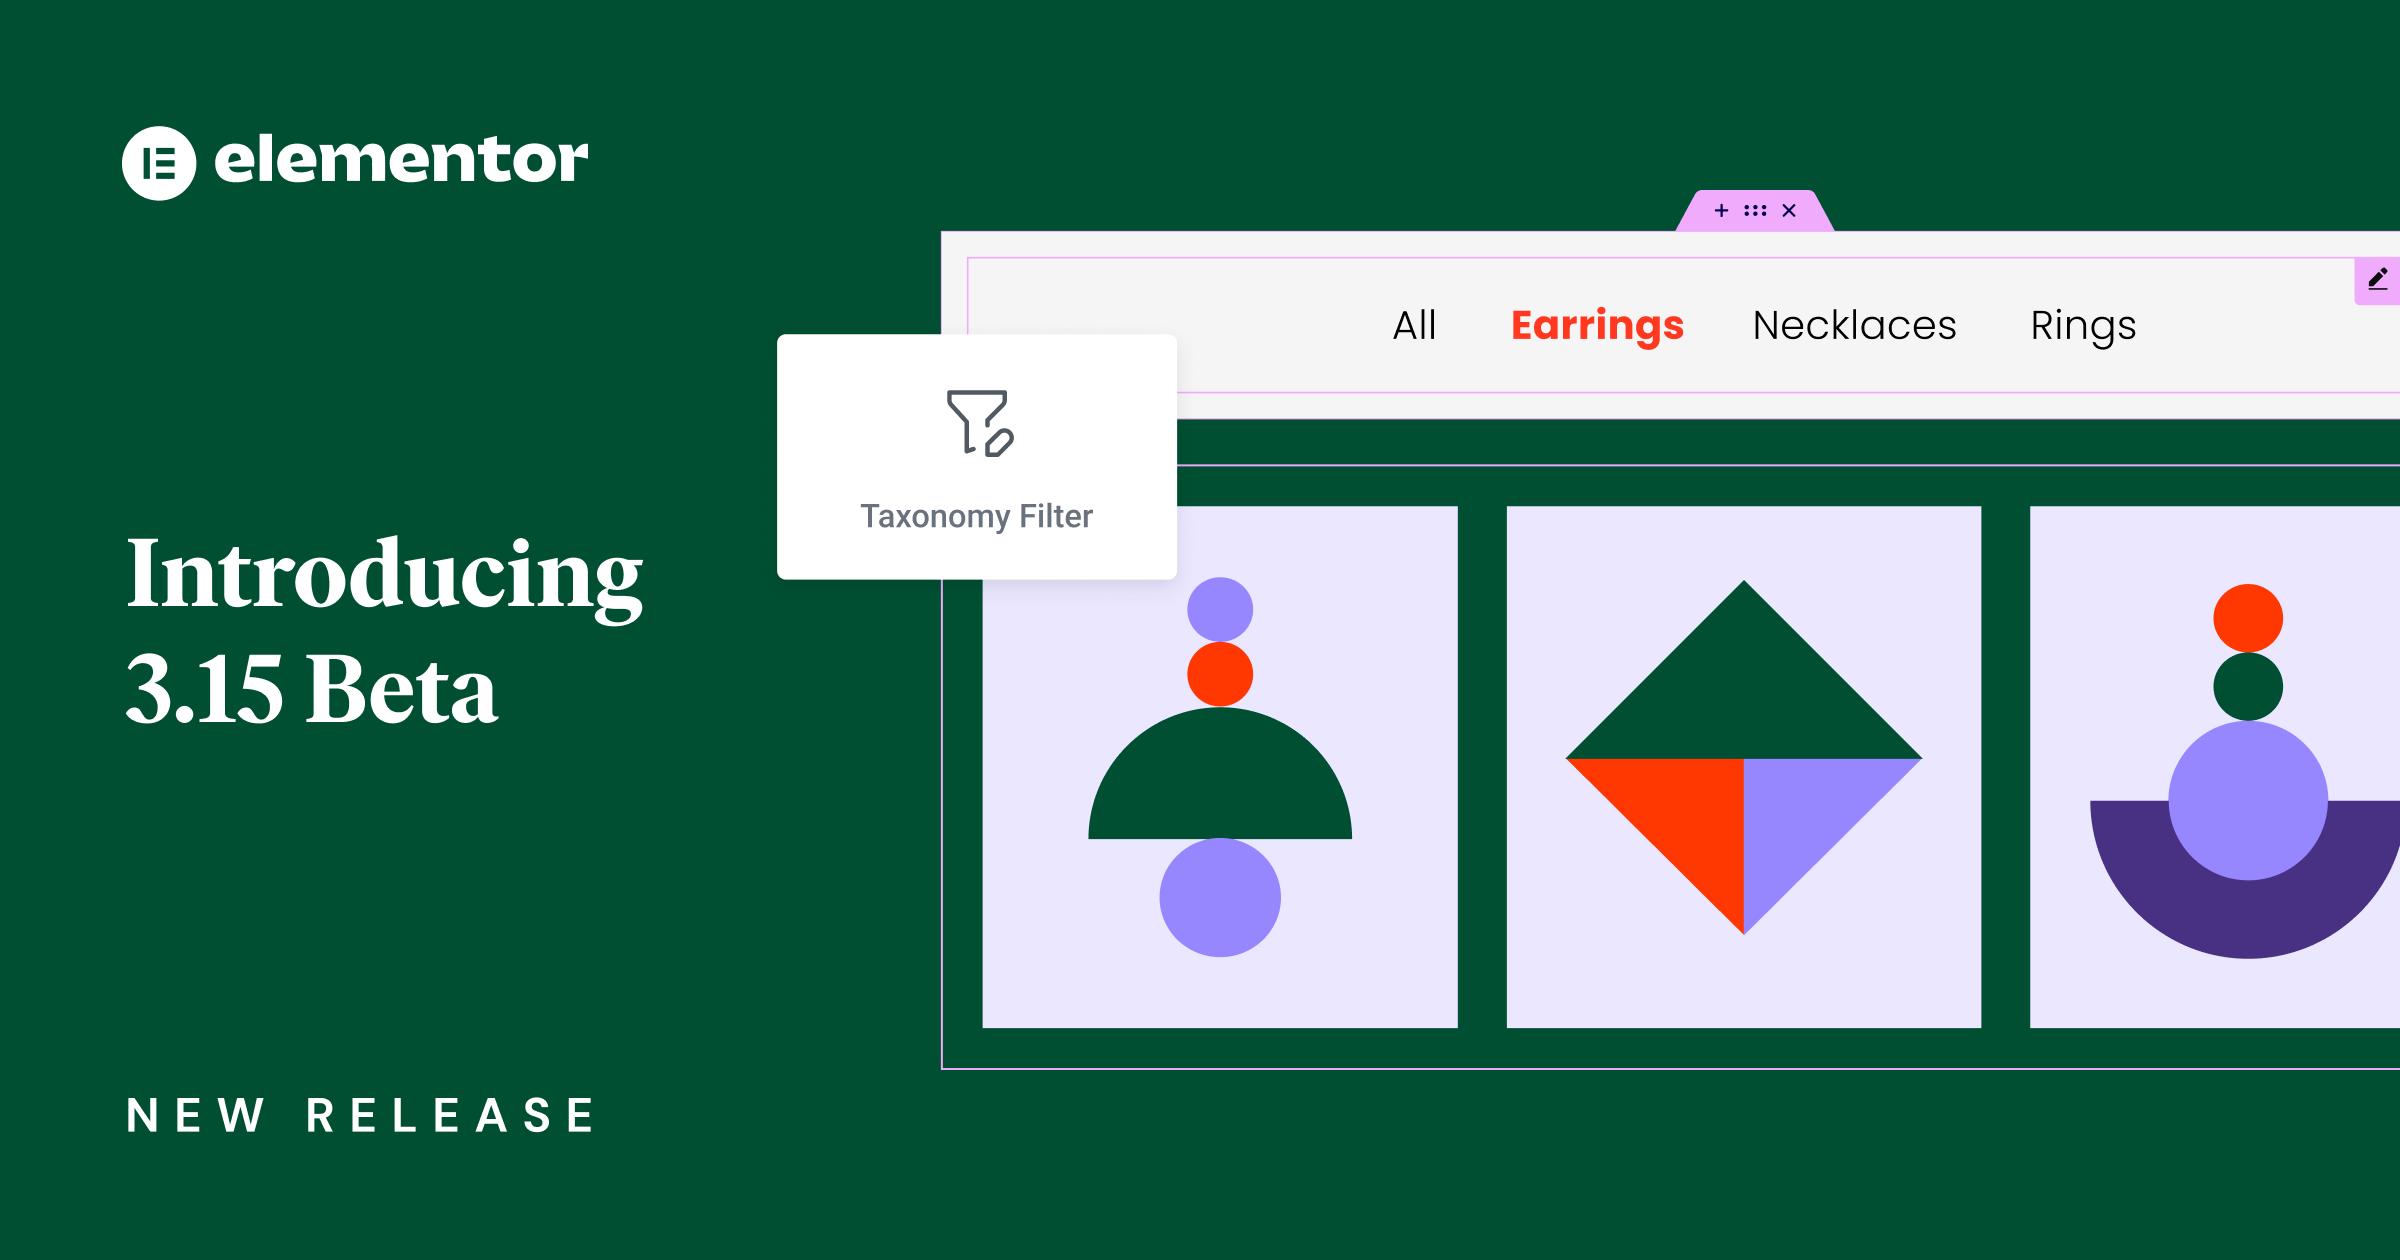
[Pro] New Taxonomy Filter Widget – Allow Visitors to Filter Listings
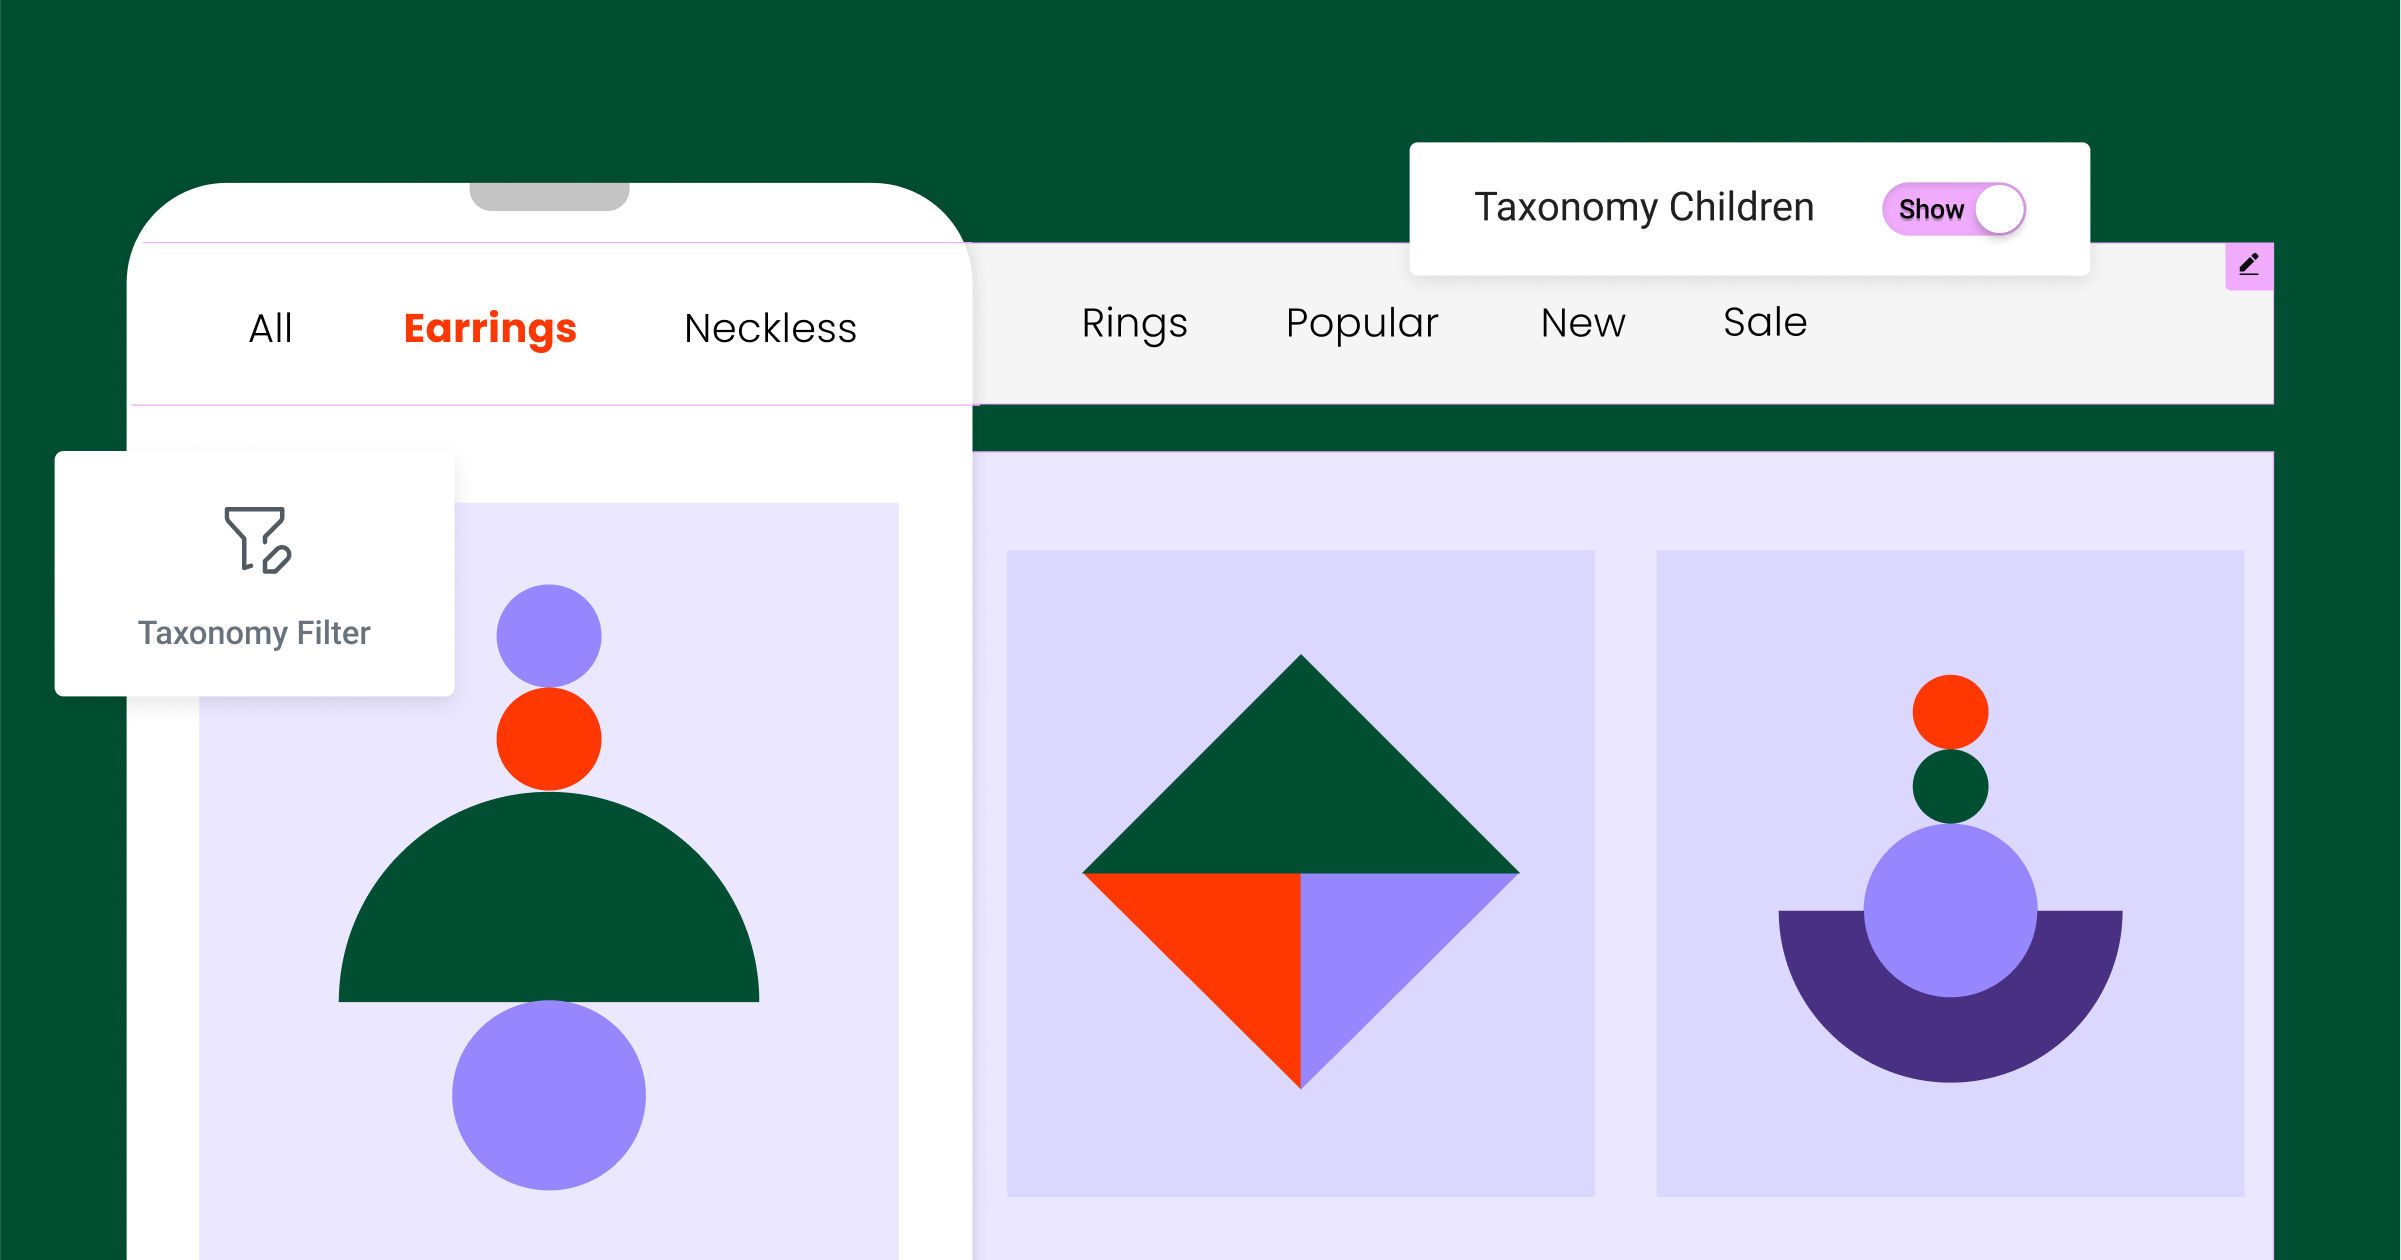
The much-awaited Taxonomy filter is finally here. It allows visitors to filter listings displayed in Loop Grids according to taxonomies, making it easier for them to find what they are looking for and increase their engagement with your website.
To add a Taxonomy Filter to your website, drag the new widget onto the page and connect it to a Loop Grid using the “Select loop grid” control. This control displays grids in a dropdown menu in the order they appear on the page. The widget will automatically offer the taxonomies relevant to that Loop Grid, and will also adjust based on whether your Loop Grid displays products or posts.
After connecting the filter to a Loop Grid and setting the taxonomy, you can customize all of its different elements. For example, you can set its layout direction to horizontal or vertical. This would be useful if you want to display your Loop Grid and Taxonomy Filter side by side. You can also choose the colors and position of your titles, choose to hide or display empty categories, the first category (all), and control the depth of taxonomies displayed. Additionally, each filter automatically creates a deep link to allow visitors to share a direct link to a chosen category or tag.
Pro tip: To allow visitors to filter listings based on a category AND a tag, you can place two Taxonomy Filters and connect them both to the same Loop Grid.
To use this widget, activate the Taxonomy Filter Bar and the Loop Grid features by going to WordPress Dashboard → Elementor → Features.
How to Test it:
- Ensure you activate the “Taxonomy Filter” and “Loop” features by going to the Elementor menu in WordPress → Settings → Features.
- Ensure you have at least six posts or products in different categories on your website.
- Create a new page, edit it with Elementor, and drag the Loop Grid widget into the Editor – Design a main Loop Item template (or choose an existing one) under the “Choose a template” control in the widget panel.
- Drag the Taxonomy Filter widget into the Editor and place it above or next to the Loop Grid.
- Connect between the filter and loop grid by choosing the loop grid from the list under the “Select loop grid” control, and choose the relevant taxonomy.
- Change the layout direction and item alignment.
- Continue exploring the filter settings and try the different options such as “Taxonomy Children” and “Horizontal Scroll.”
- Go to the Style tab, adjust the spacing between items, and style the items with the dedicated style controls.
- Ensure the filter is working correctly and filter the items accurately.
- Make sure everything works as expected in the Editor and on the Frontend.
Introducing – New Accordion Widget for Complete Design Flexibility
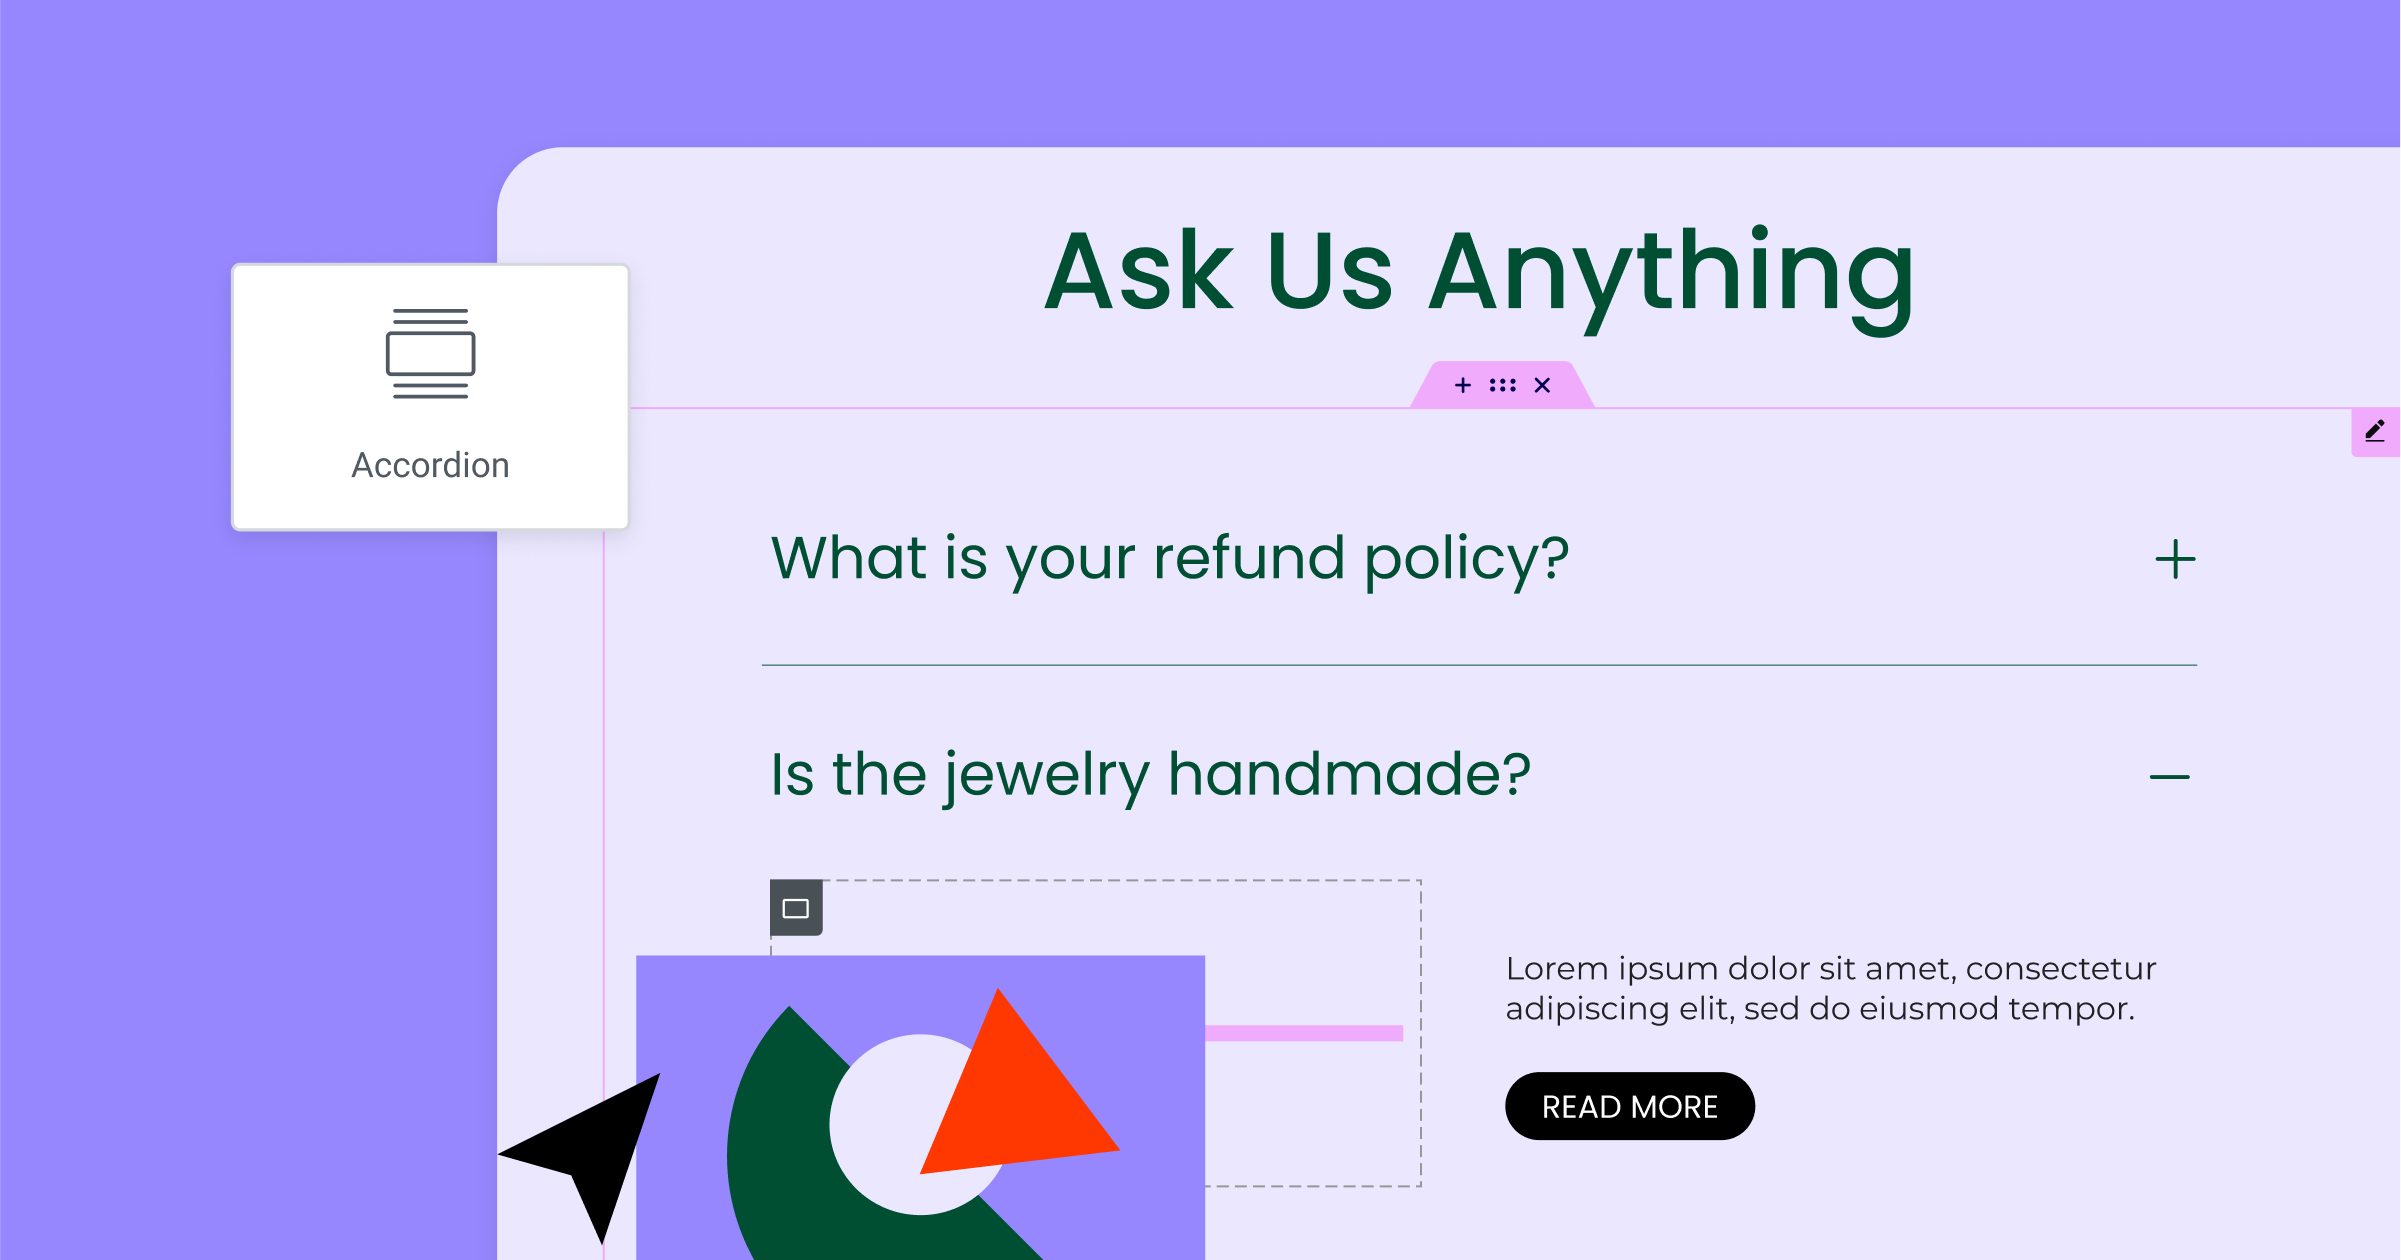
This version introduces the latest member of the nested elements series – the Accordion. Like the Menu, Tabs, and Carousel widgets, the Accordion’s nested capabilities turn each item into a container, for unlimited flexibility, allowing you to insert any widget and content type.
This widget combines the best features of the previous Accordion and Toggle widgets and allows you to fine-tune your visitors’ experience by giving you the ability to set its default state. You can choose to have the first item expanded by default or have all items collapsed. Additionally, you can limit the number of items a visitor can have open at the same time.
The Accordion also provides a new level of layout and design customization. You can control the spacing between items and within each item, reposition icons relative to the titles, and choose the duration of the animation effect when items are expanded or collapsed. You can also assign an HTML tag to each title for better SEO. In upcoming versions, we will continue to develop this feature and include the FAQ Schema option, among others.
To use the new widget, activate the Container and Nested Elements features by going to WordPress Dashboard → Elementor → Features.
Note that activating the widget will replace the previous version of the Accordion and Toggle widgets. You will be able to edit existing Accordion and Toggle widgets.
How to Test it:
- Ensure you activate the “Flexbox Container” and “Nested Elements” experiments by going to the Elementor menu in WordPress → Settings → Experiments.
- Create a new page and drag the Accordion widget into the Editor.
- Ensure you view the new Accordion widget on the canvas and have more content, style, and advanced options than in the original Accordion widget.
- Adjust the layout by adding more Accordion Items and changing the Item Position, Icons, and Icon Position.
- Continue exploring the Accordion’s Interactions section and change the Default State and Max Items Expanded options.
- Go over to the Style tab, and adjust the spacing and styling of the Accordion, Header, and Content.
- Make sure that the previous Accordion and Toggle made with the previous widgets can still be edited and styled.
- Make sure everything works as expected in the Editor and on the Frontend.
[Pro] Enhanced Styling Capabilities in the Carousel & Loop Carousel
Elementor is introducing highly requested new enhancements to the Carousel and Loop Carousel widgets. These updates empower you to build beautiful Carousels that fit your website perfectly.
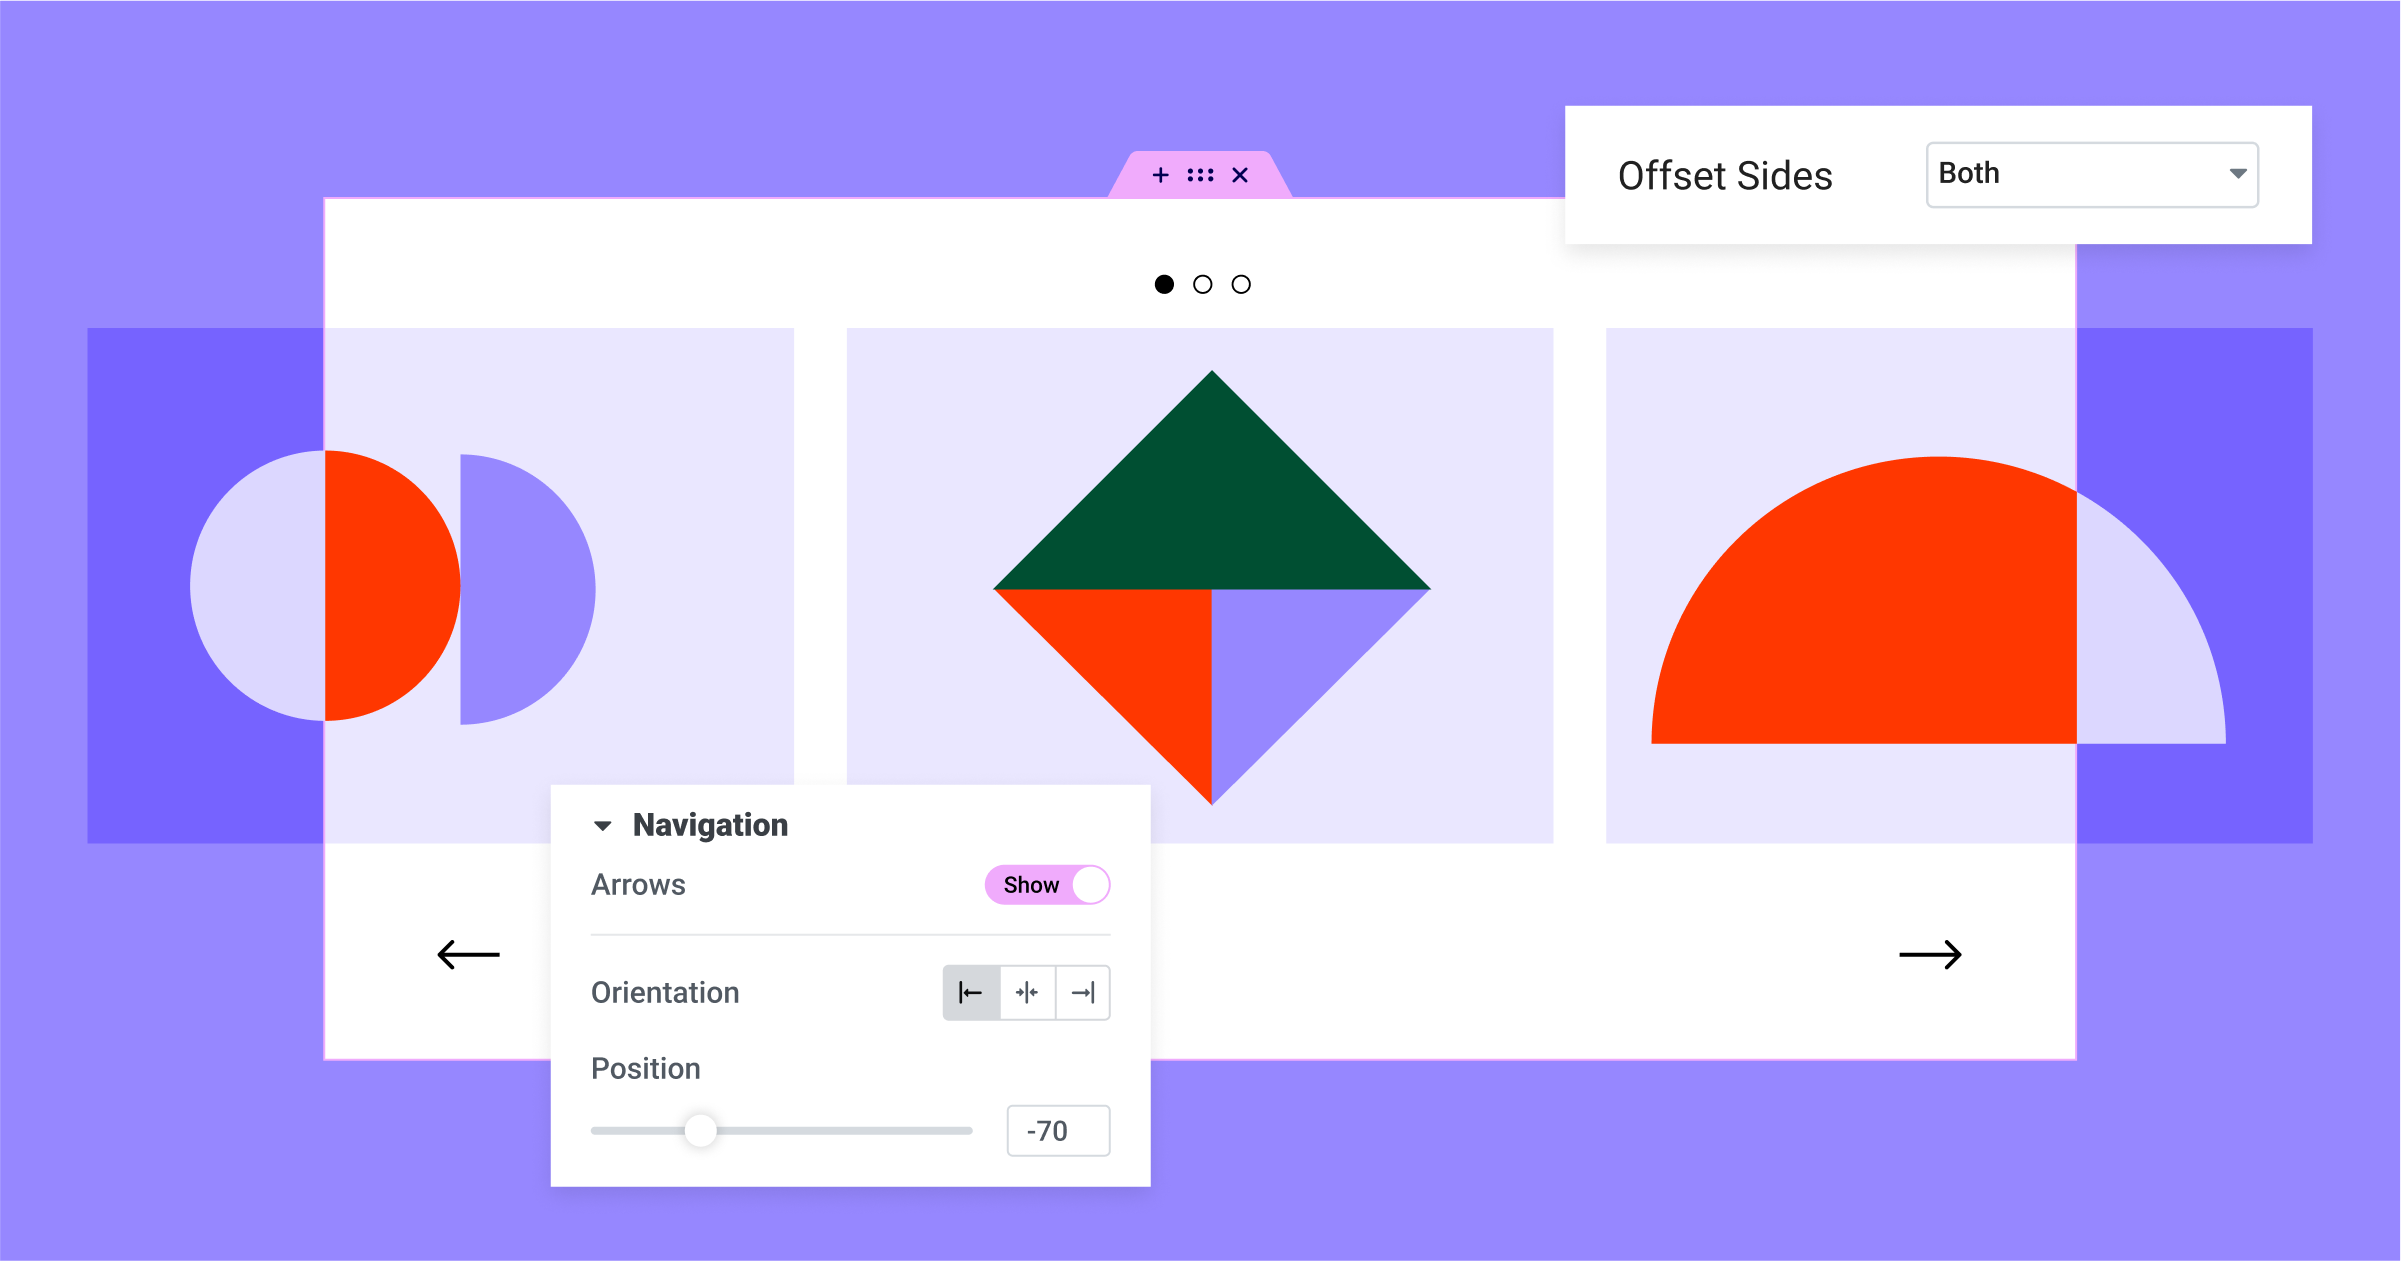
Offset Slides
Spark your visitors’ curiosity by giving them a sneak peek of the next slides with offset Carousel layouts. This also helps indicate to visitors that there’s additional content still to come, if they continue scrolling through the carousel. To apply the offset effect, go to Content → Settings and choose to offset either or both sides. Once set, you can adjust the offset width per viewport to make it look great from anywhere.
Customize Your Carousel’s Pagination and Navigation
Build unique Carousels tailored to your website with new styling capabilities. You can now further customize your carousels by adjusting the position and orientation of navigation and pagination elements. For example, you can reposition the pagination element and place navigation elements next to each other. You can also customize the color, background color, border, and box shadow of each navigation icon.
To use the new widget, activate the Container, Nested Elements, and Loop features by going to WordPress Dashboard → Elementor → Features.
Elementor AI – Extending Elementor AI for Images
After the initial releases of Elementor AI included the ability to create text, code, and images, we are happy to introduce two additional tools that will help you generate and edit images that fit perfectly into your website.
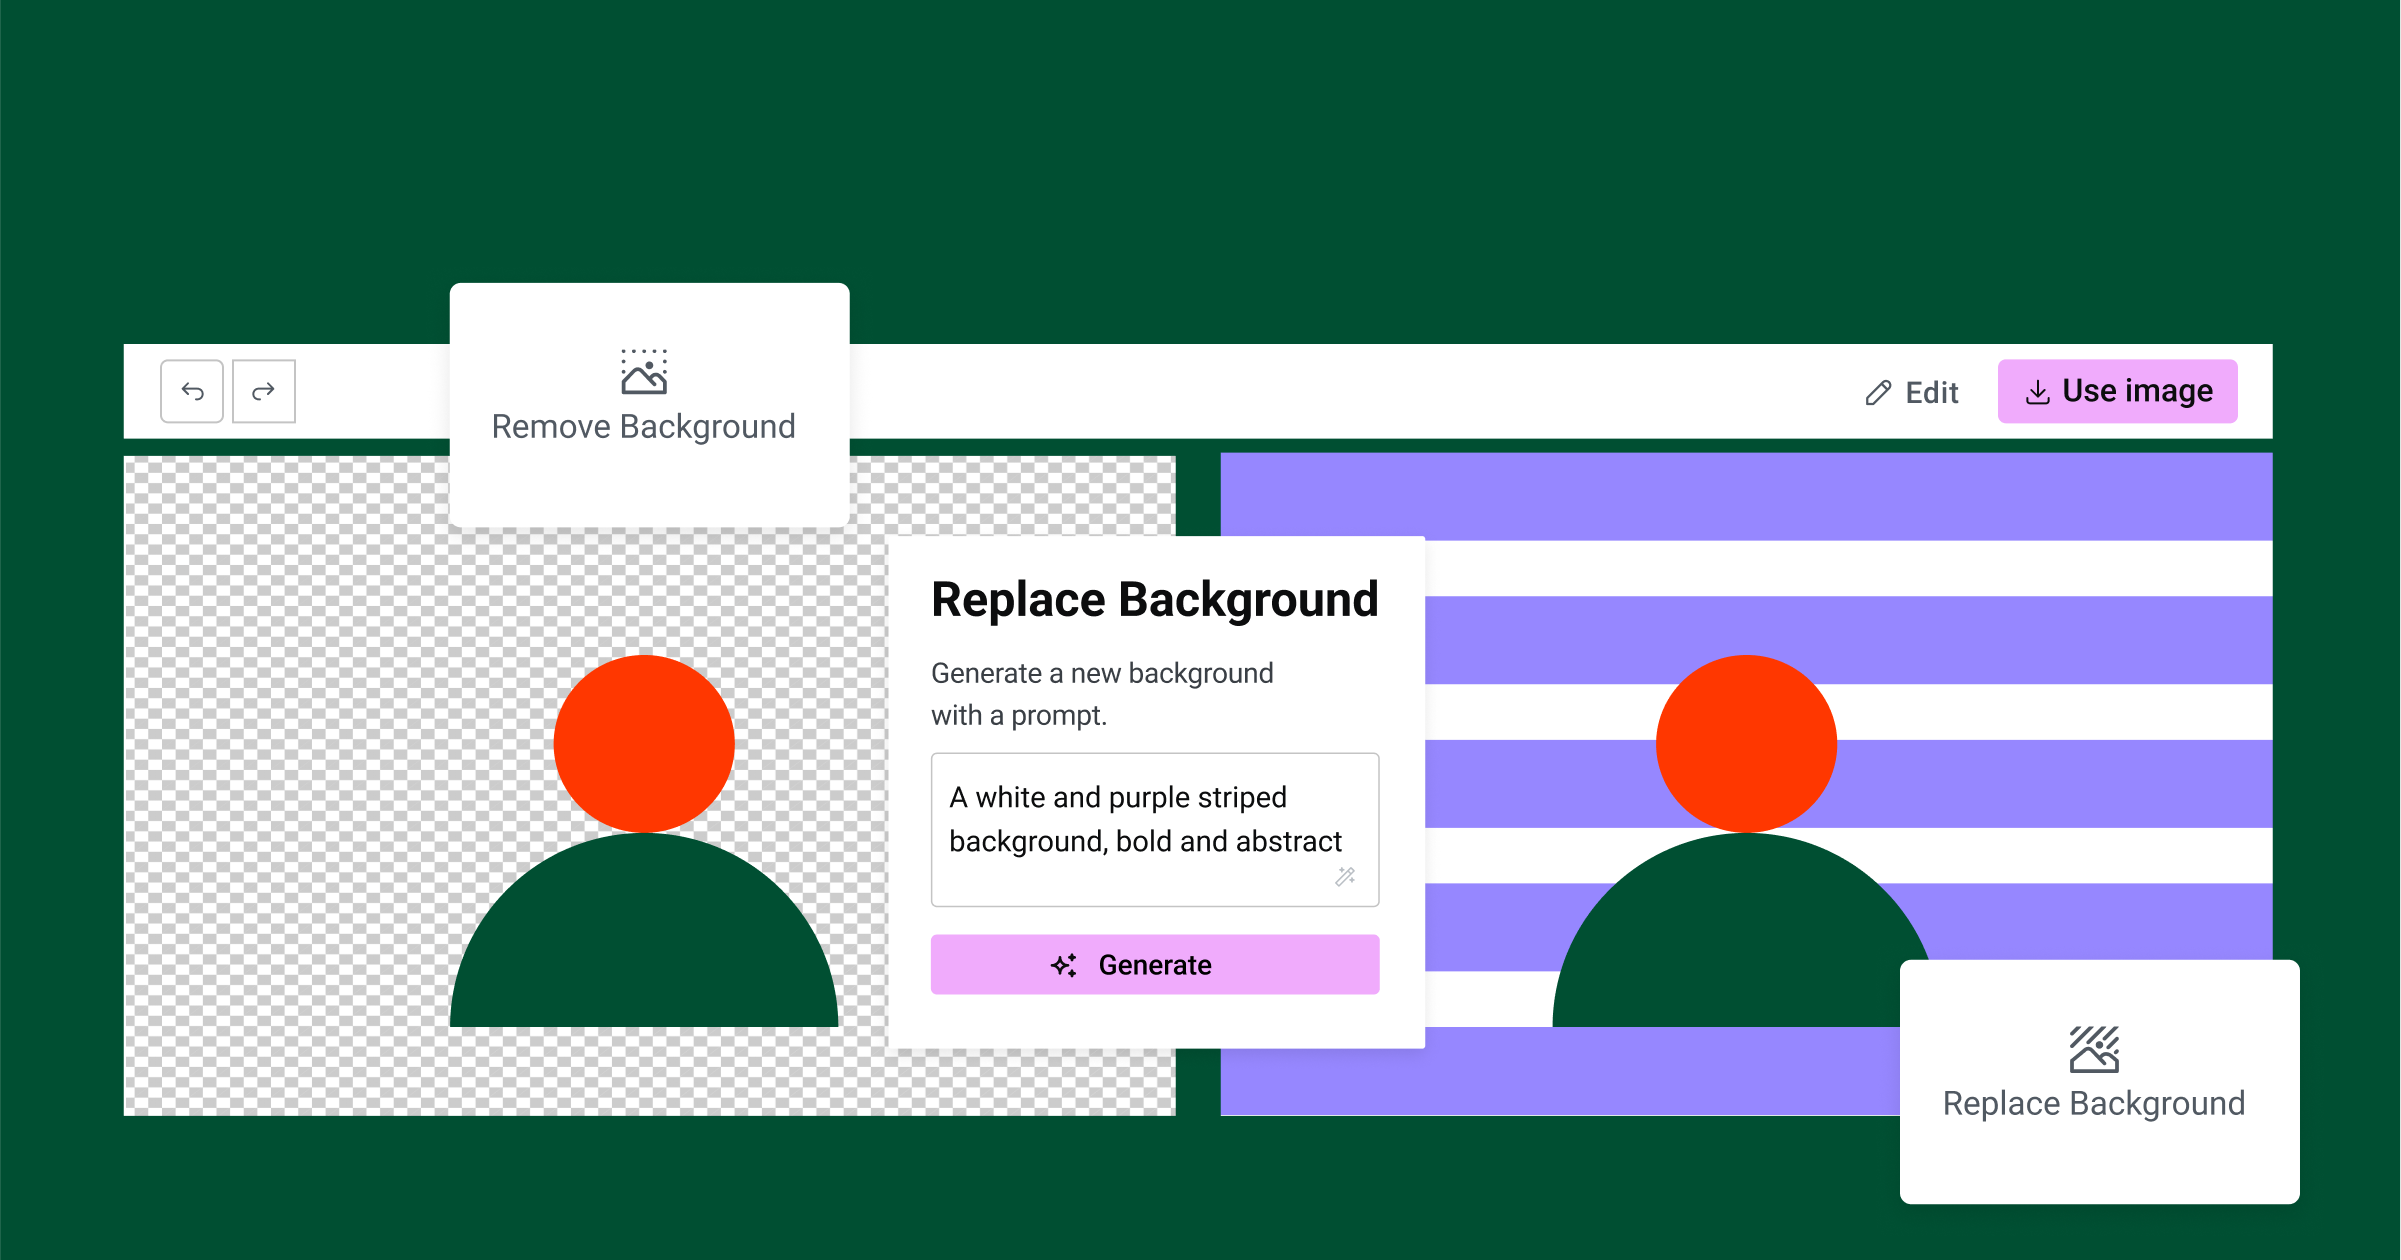
Remove Background
Do you have a beautiful product image with the wrong background color? Elementor AI includes a Remove Background tool that will automatically detect the object in your image and replace the background with a transparent one. This is perfect for giving product images and portraits the background color of their parent container.
Replace Background
Elementor AI empowers you to change the background of an image using a text description. For instance, you can switch your model’s background from a beach to a rainforest or outer space. To use this feature, edit an image with Elementor AI → Remove background, and then enter a prompt describing your desired background, and click on the Generate button.
How to Test it:
- Create a new page and drag an image widget into the page and upload an image.
- Try the “AI Image Editing” feature by clicking the “Edit” button (visible when hovering over an image), or by selecting an existing image widget in the canvas and clicking “Edit with AI” in the widgets panel.
- If prompted, connect to your account by clicking the “Connect” button.
- Accept the Terms and Conditions & Privacy Policy of Elementor AI and click “Get Started”.
- You now have access to all currently available Elementor AI features (please note: you need to have Elementor 3.15.0 – beta 1 or higher in order to use Remove Background and Replace Background).
- Start by using the “Remove Background” tool: click on Remove Background in the “Edit with AI” panel. Elementor AI will generate a new image of the subject on a transparent background.
- Go back to the “Edit” mode and click the “Replace Background” button. Enter a prompt that describes the desired background and hit “generate.”
- Try different prompts, configurations and make sure everything works as expected.
Updated Experiments
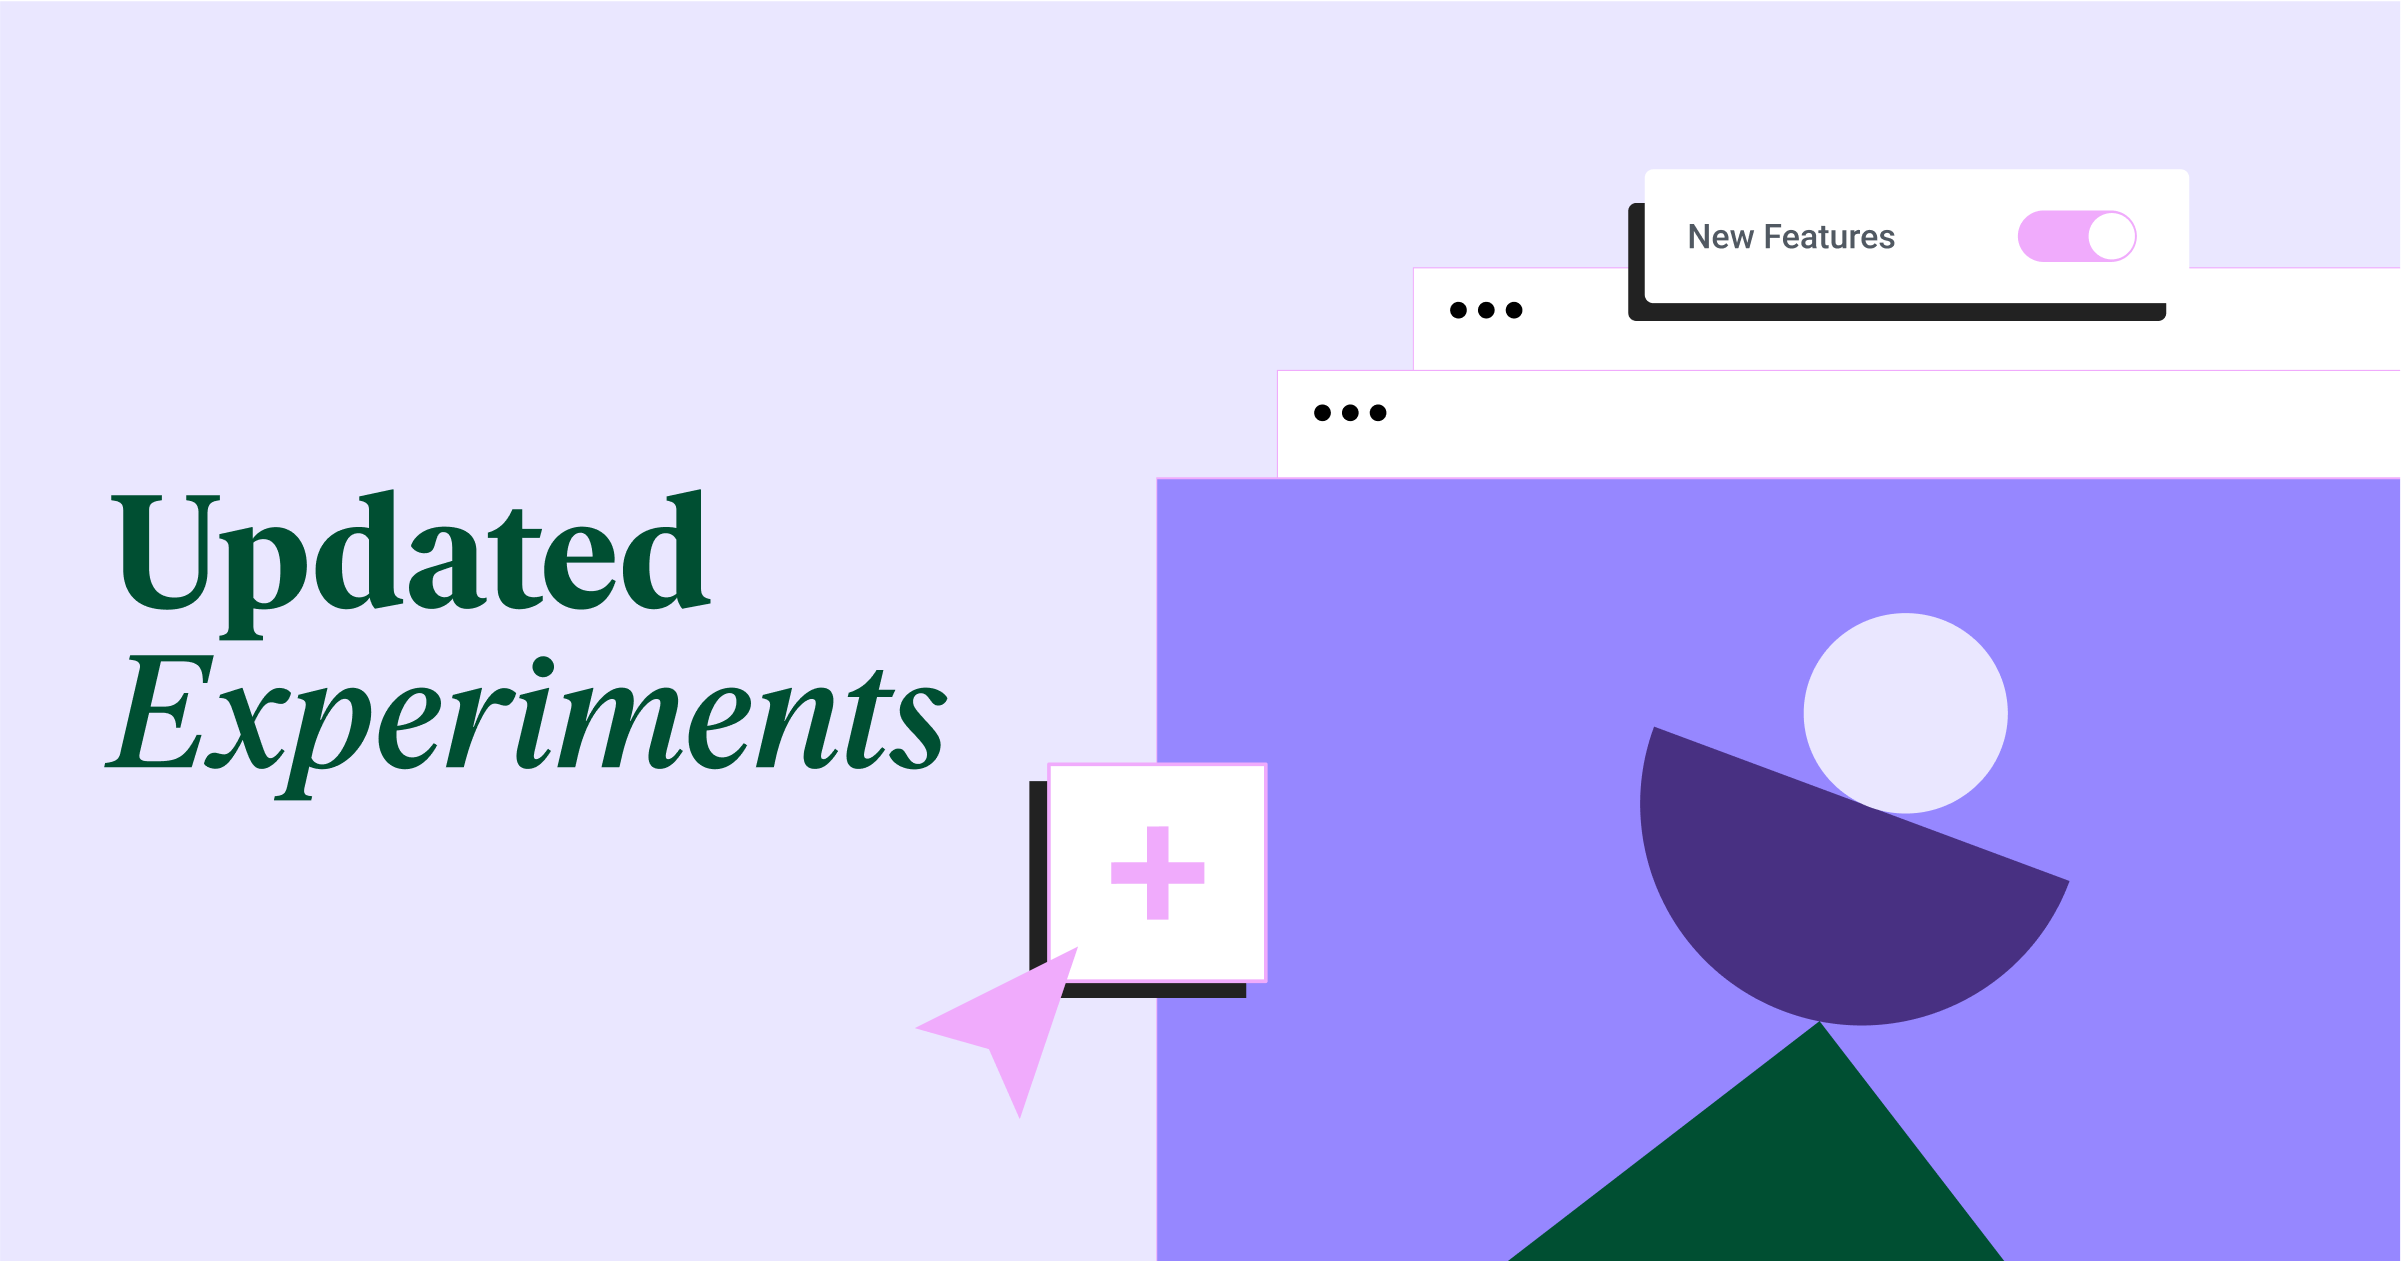
With Elementor 3.15, the following features will be activated by default on all websites:
- Optimized DOM Output: improve performance by reducing the number of wrapper elements in the HTML generated by Elementor. However, it may adversely affect websites that are still running on Elementor 3.0 or earlier. Learn More.
- Improved Asset Loading: load less code by default, resulting in significantly faster page load times and better page speed scores. Learn more.
- Global Style Guide: preview your global styles and make instant changes to global colors and fonts in a sleek style guide from the site’s settings.
- Page Transitions: customize entrance and exit animations for every page on your site, add a preloader with predefined animations and icons, or upload your own images. Learn more.
Additionally, the Landing Pages feature will be disabled by default for new sites made with this version onwards. If you’d like to activate it on your website, you can do so from Elementor → Settings → Features. All landing pages already created on your website will remain available.
Make An Impact: Share Feedback Before Features Are Released
We’re always looking to get to know Elementor customers on a deeper level. If you’re interested in meeting with our team and sharing your insights, feedback, and feature requests you’re welcome to sign up for some quality time with us here. Talk soon!
How to Install the Beta Version
If you still haven’t enabled beta testing in Elementor, please follow these steps:
- Go to Elementor > Tools > Versions
- Enable the beta tester feature
- Go to Dashboard > Updates and update to the latest beta version.
- This will get you set up to test the new Elementor 3.15 Beta.
Notes
As we make changes to our GitHub in an effort to keep it organized, improve the way we deliver information to you, and our ability to review your feedback, please follow the instructions below when reporting bugs, or making feature requests:
- To report a bug related to this beta version – open a new bug report
- For feature requests – open a new feature request issue
- For other comments specifically about this beta version – comment here
Designated time for release: July 31, 2023 (Estimated)
Many thanks for your support and help!
Cheers,
Elementor Team
