Hi Elementor beta testers,
We are incredibly excited to introduce our new beta versions, Elementor 3.13. These versions include early access to a free trial of Elementor AI, which will transform the way you build websites. These updates also include a new CSS Grid Container, enhancements to the new Menu widget, additional UI updates to streamline your workflow, and more.
Try out our new beta versions and let us know what you think about our newest additions, which include:
- Elementor AI
- Container – CSS Grid
- [Pro] New Styling Capabilities in the Menu Widget
- Editor UI Revamp – Experiment: Top Bar Updates
- [Pro] Post Excerpt widget – New Excerpt Source
- Performance Improvements
- Accessibility Improvements
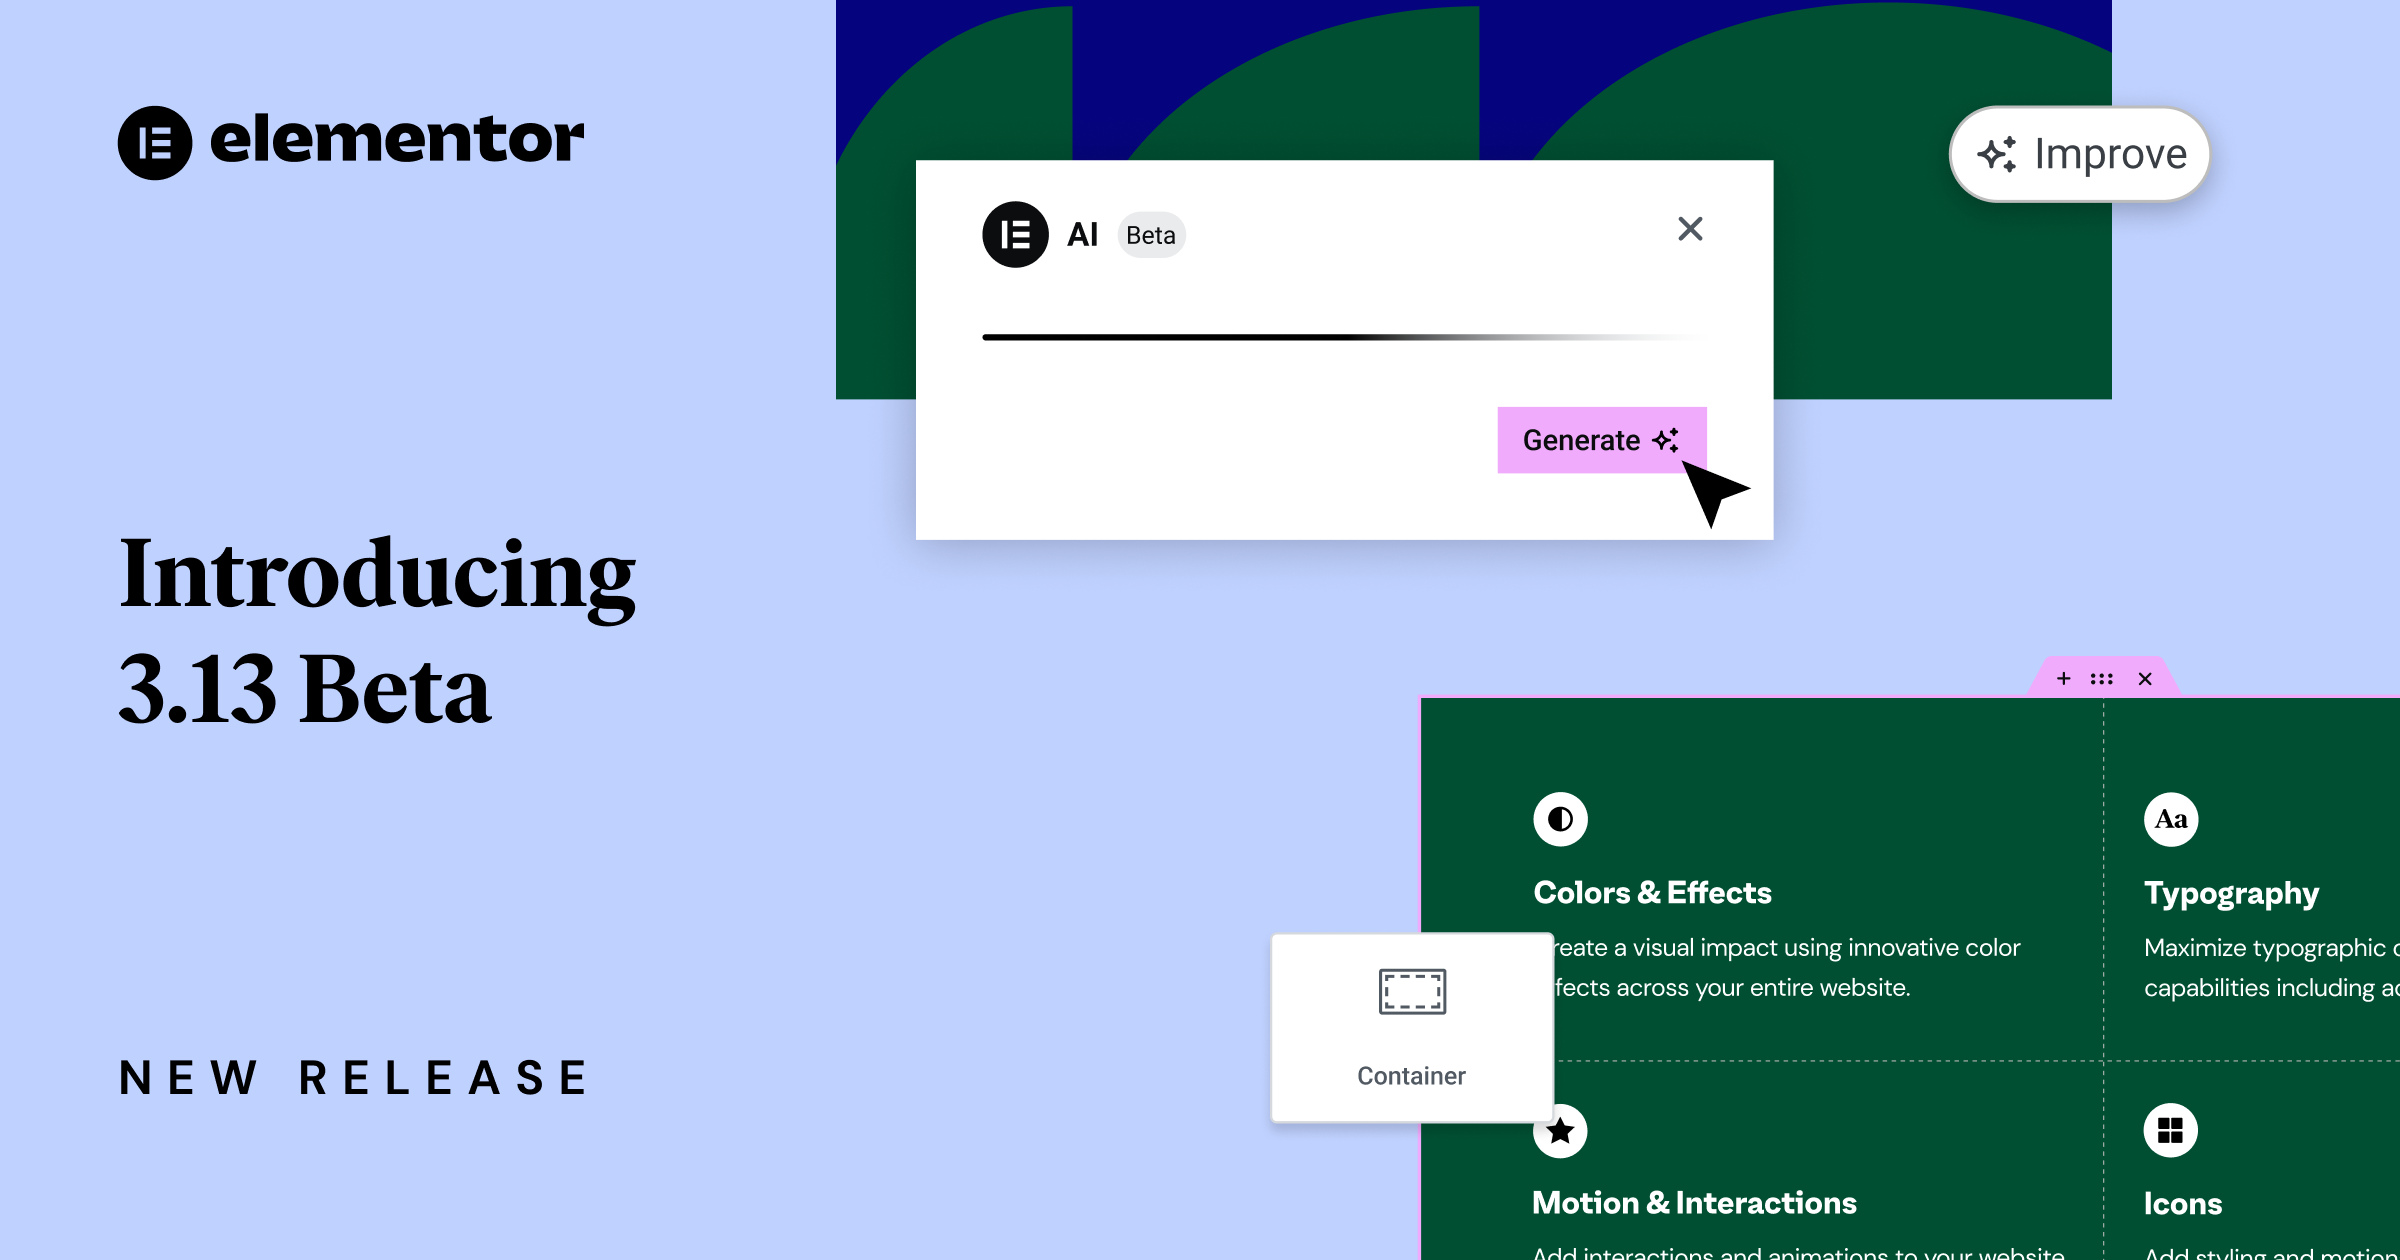
Introducing: Elementor AI – Transform the Way You Build Websites
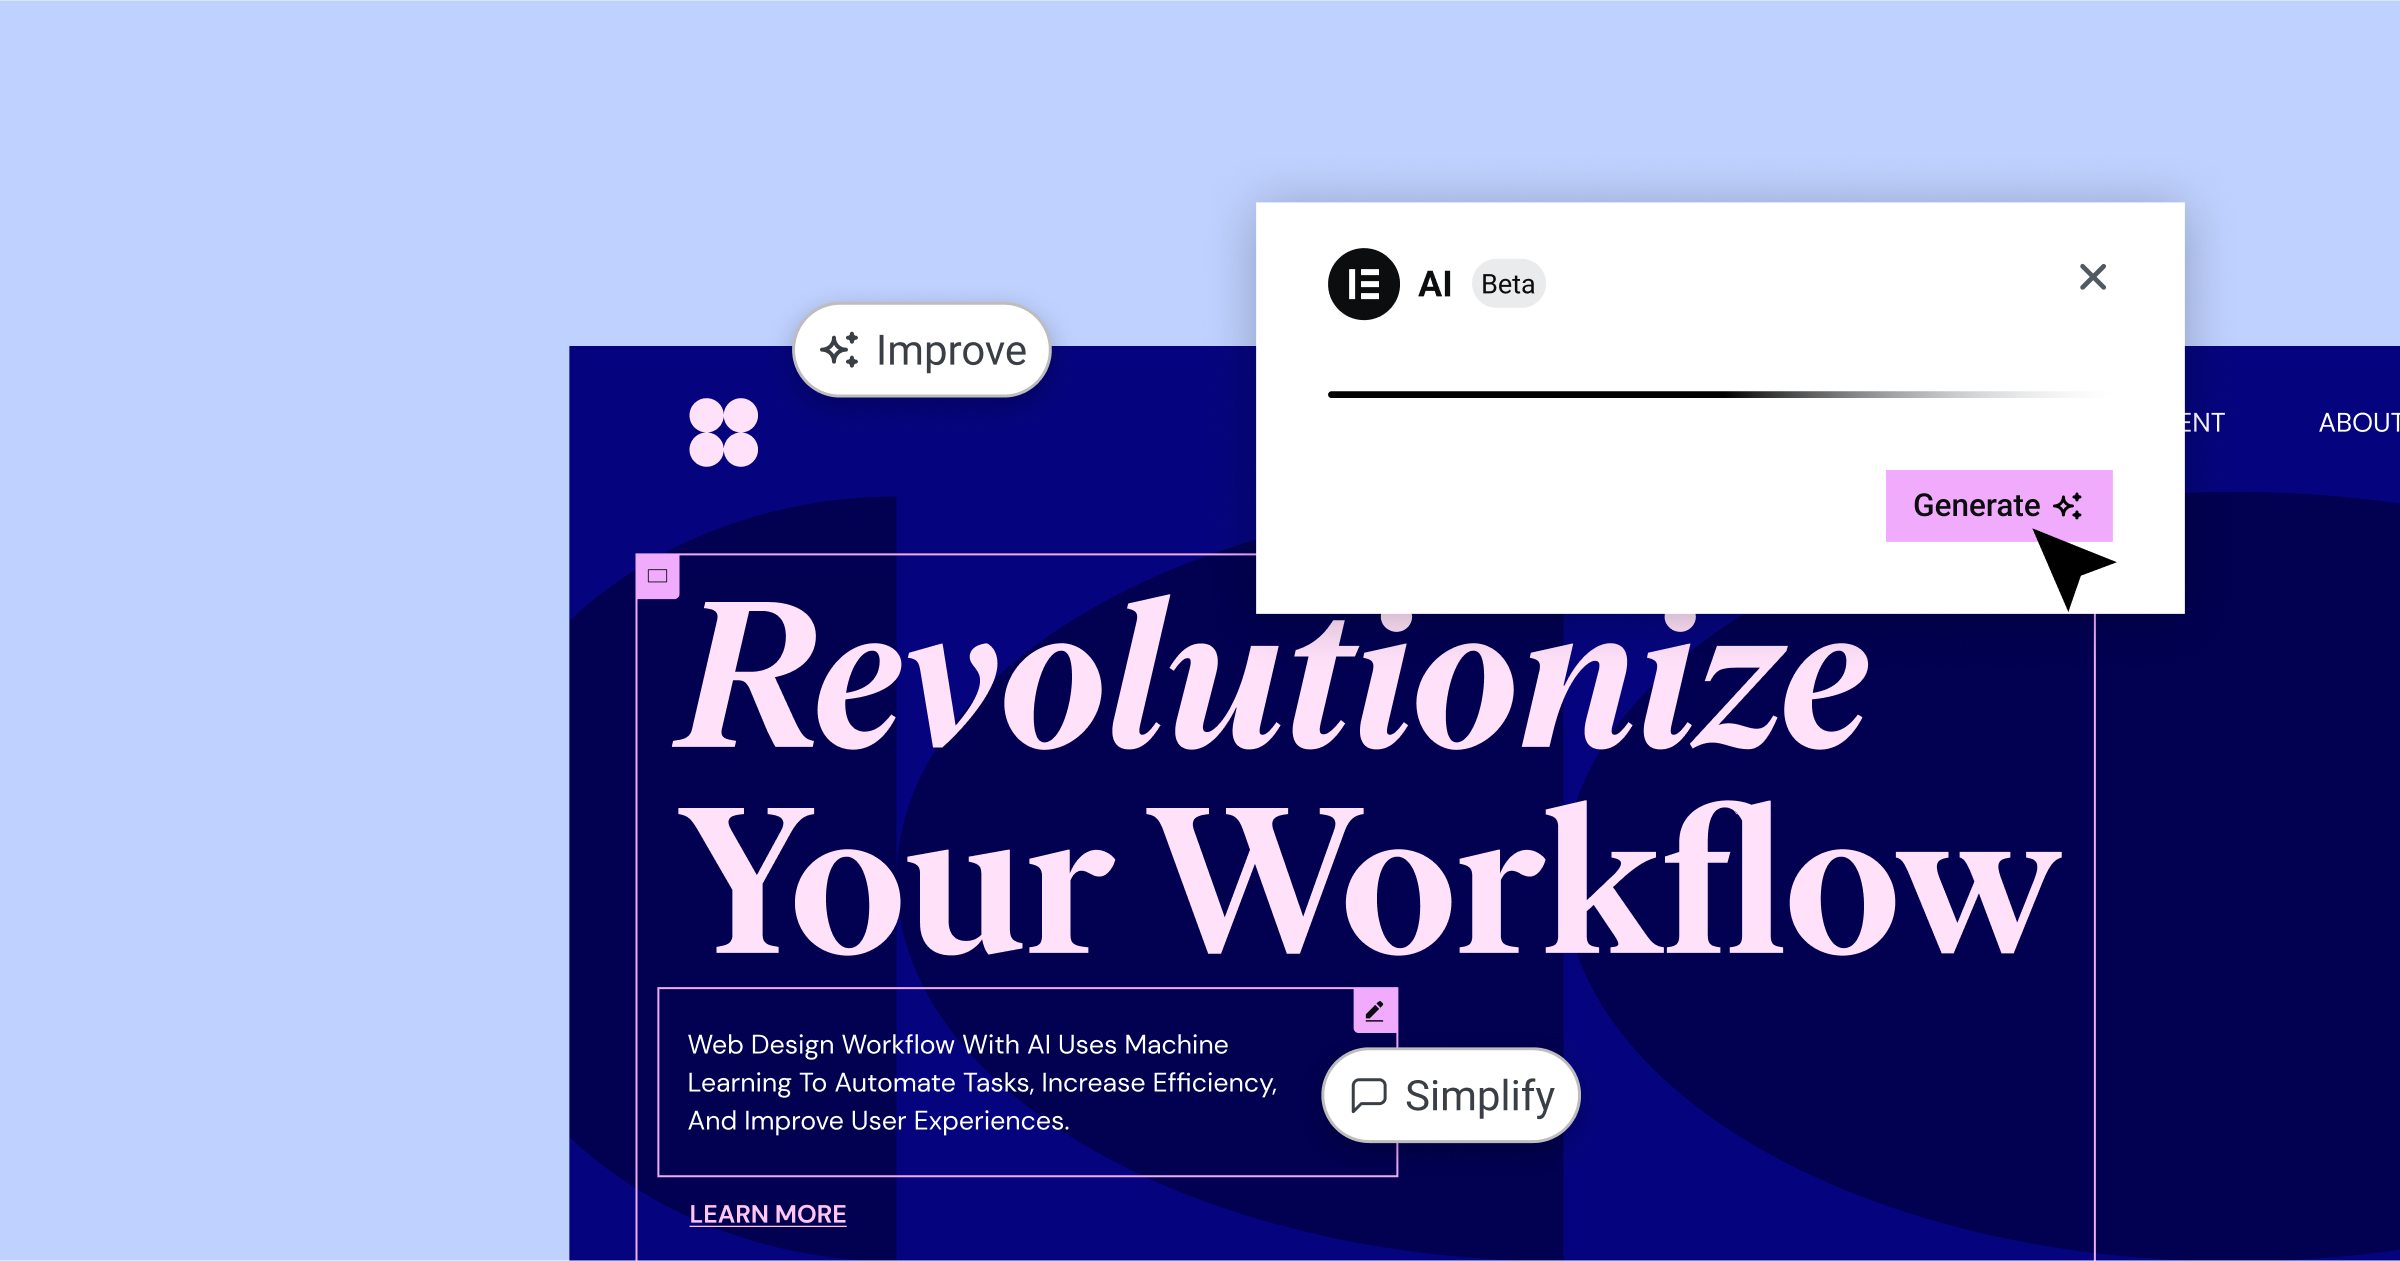
Boost your productivity and efficiency, while elevating your website’s design and content with Elementor AI. With a native integration to Elementor, the generative AI product empowers you to create and improve your website’s text, and customize your website design using professional custom code, without having to write a single line of code yourself. With contextual prompt suggestions, Elementor AI makes it seamless to create consistent messaging across your site, and translate it to multiple languages. Additionally, Elementor AI’s Code Assistant empowers you to create and add custom code snippets anywhere.
In the first phase, Elementor AI will be available in the following areas:
Content area – in the content (text) area of every widget, there will be a new feature ‘Write with AI’ available in the content area of the widget panel, and in the Editor when highlighting specific text.
Custom HTML – the HTML widget has a new ‘AI Code Assistant’ to help with generating or enhancing HTML scripts.
Custom CSS [available for PRO subscriptions only] – you will be able to use the AI Code Assistant in the Custom CSS of every widget. The AI Code Assistant will generate Custom CSS that is relevant to each widget you use it on, to provide you with relevant results.
Custom Code [available for PRO subscriptions only] – Custom Code in the WordPress dashboard will also have an ‘AI Code Assistant’ to generate custom code snippets, such as Google Analytics code or Facebook Pixel code to measure the impact of your website’s pages.
New Layout Option in Containers – CSS Grid
With Containers, you can achieve infinite design possibilities that accommodate any device, while improving your website’s performance. Now, when you add a Container, you can choose between Flexbox or Grid Containers. Using Grid Containers is ideal for grid-like layouts, helps you maintain the alignment of elements in the Container, and reduces the learning curve associated with the transition from the section-column layout to the container layout.
With Grid Containers, you can choose the number of rows and columns you want to compose your grid, determine the distance between your columns and rows using the Gaps control, and choose whether you want Auto-Flow to go based on column or row. You can also justify and align content and items, similar to how you would a Flexbox Container.
Each cell in the Grid can accept one element, that can be styled and edited as you normally would. To achieve a higher level of sophistication, you can place a Flexbox Container inside the cell of a Grid, and place as many elements as you’d like to, within the Flexbox Container.
To use the Container Grid, make sure to enable the Flexbox Container and the Grid Container features from WordPress Dashboard → Elementor → Settings → Features.
How to Test It:
- Ensure you activate the “Flexbox Container” and “Grid Container” feature by going to the Elementor menu in WordPress Dashboard → Elementor → Settings → Features, and save.
- Create a new page and start building your design.
- Add a new Container with the plus button in the canvas, choose your desired Grid structure, or drag the Container widget to the canvas and choose Grid under the “Container Layout” option.
- Drag in a few widgets, and adjust the Grid layout by choosing the number of Columns and Rows.
- Adjust the Gaps between elements and the widgets’ direction under the Auto Flow control.
- Align the items horizontally and vertically using the Justify and Align Items controls.
- Go back to the Columns and Rows controls and choose the Custom option under the unit selector.
- When the custom unit option is active, write the following values ‘1fr 2fr 1fr’ in the input field and examine if the layout is changed based on these values.
- Play around with the custom unit option using CSS Grid properties.
- Try using ‘100px 200px 200px’ values in both fields – Columns and Rows.
- Align the cells horizontally and vertically using the Justify and Align Content controls.
- Make sure your design is responsive and looks as you would expect it to on various devices.
- Examine the Grid Outline visibility and ensure they are helping you better understand the Grid structure.
- Make sure everything works as expected in the Editor and on the Frontend.
[Pro] New Styling Capabilities in the Menu Widget
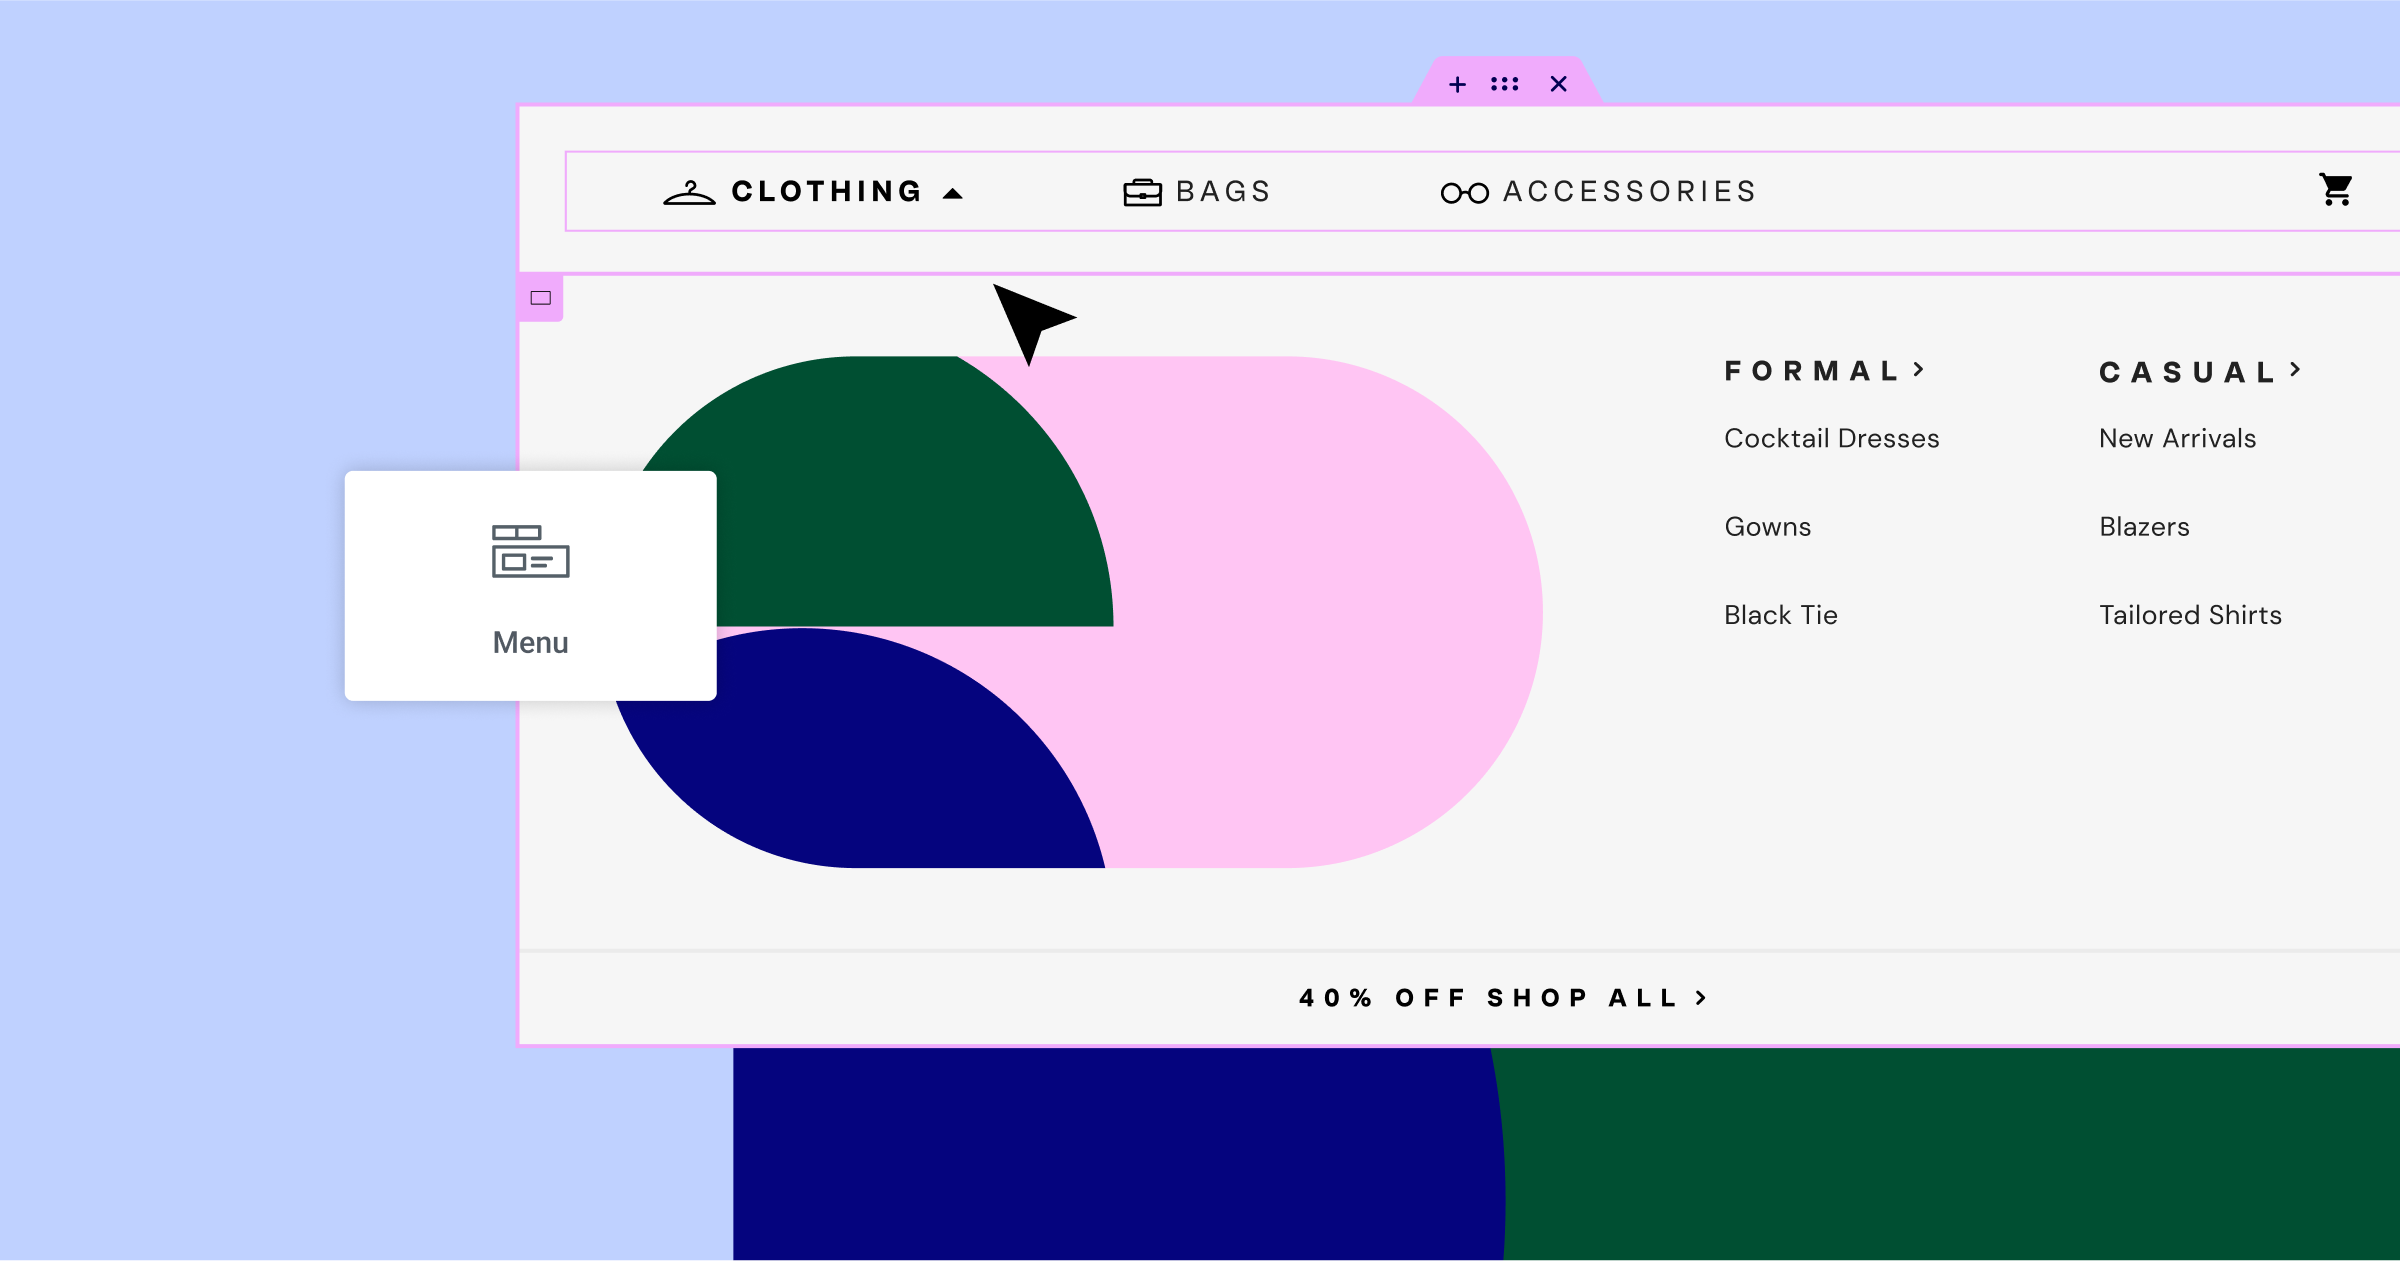
Elementor 3.12 first introduced the new Menu widget, which enables you to create simple, single level menus to sophisticated dropdown content menus. Elementor 3.13 includes two new styling capabilities available in the Menu widget:
- Icons – add icons in the top level of your menu to enhance your menus design.
- Active state with anchors – indicate active states in your menu when a visitor clicks an anchor link in the menu.
How to Test It:
- Ensure you activate the “Container”, “Nested Elements” and “Menu” features by going to the Elementor menu in WordPress Dashboard → Elementor → Settings → Features, and save.
- Create a new page and drag the Menu widget into the Editor.
- Inside the Menu Item repeater, Choose an Icon and an Active Icon for each item.
- Add a link to each menu item (Tip: Use the Internal URL dynamic tag to add a link).
- Go over to the Style tab, and change the position and styling of the icons under the Icon section.
- Ensure that the icon is presented as expected and that the icon changes to the active one when you are on the currently active page based on the links you added.
- Make sure everything works as expected in the Editor and on the Frontend.
Elementor Interface Revamp
In Elementor 3.12, we began the gradual roll out of upcoming changes to the Elementor interface. These changes are written in React, which improves performance and allows for future product growth and scale. Additionally, these changes promote Elementor best-practices, resulting in better and more streamlined user experience.
Experiment: Top Bar Expanded
Elementor 3.13 expands the capabilities available in the Top Bar:
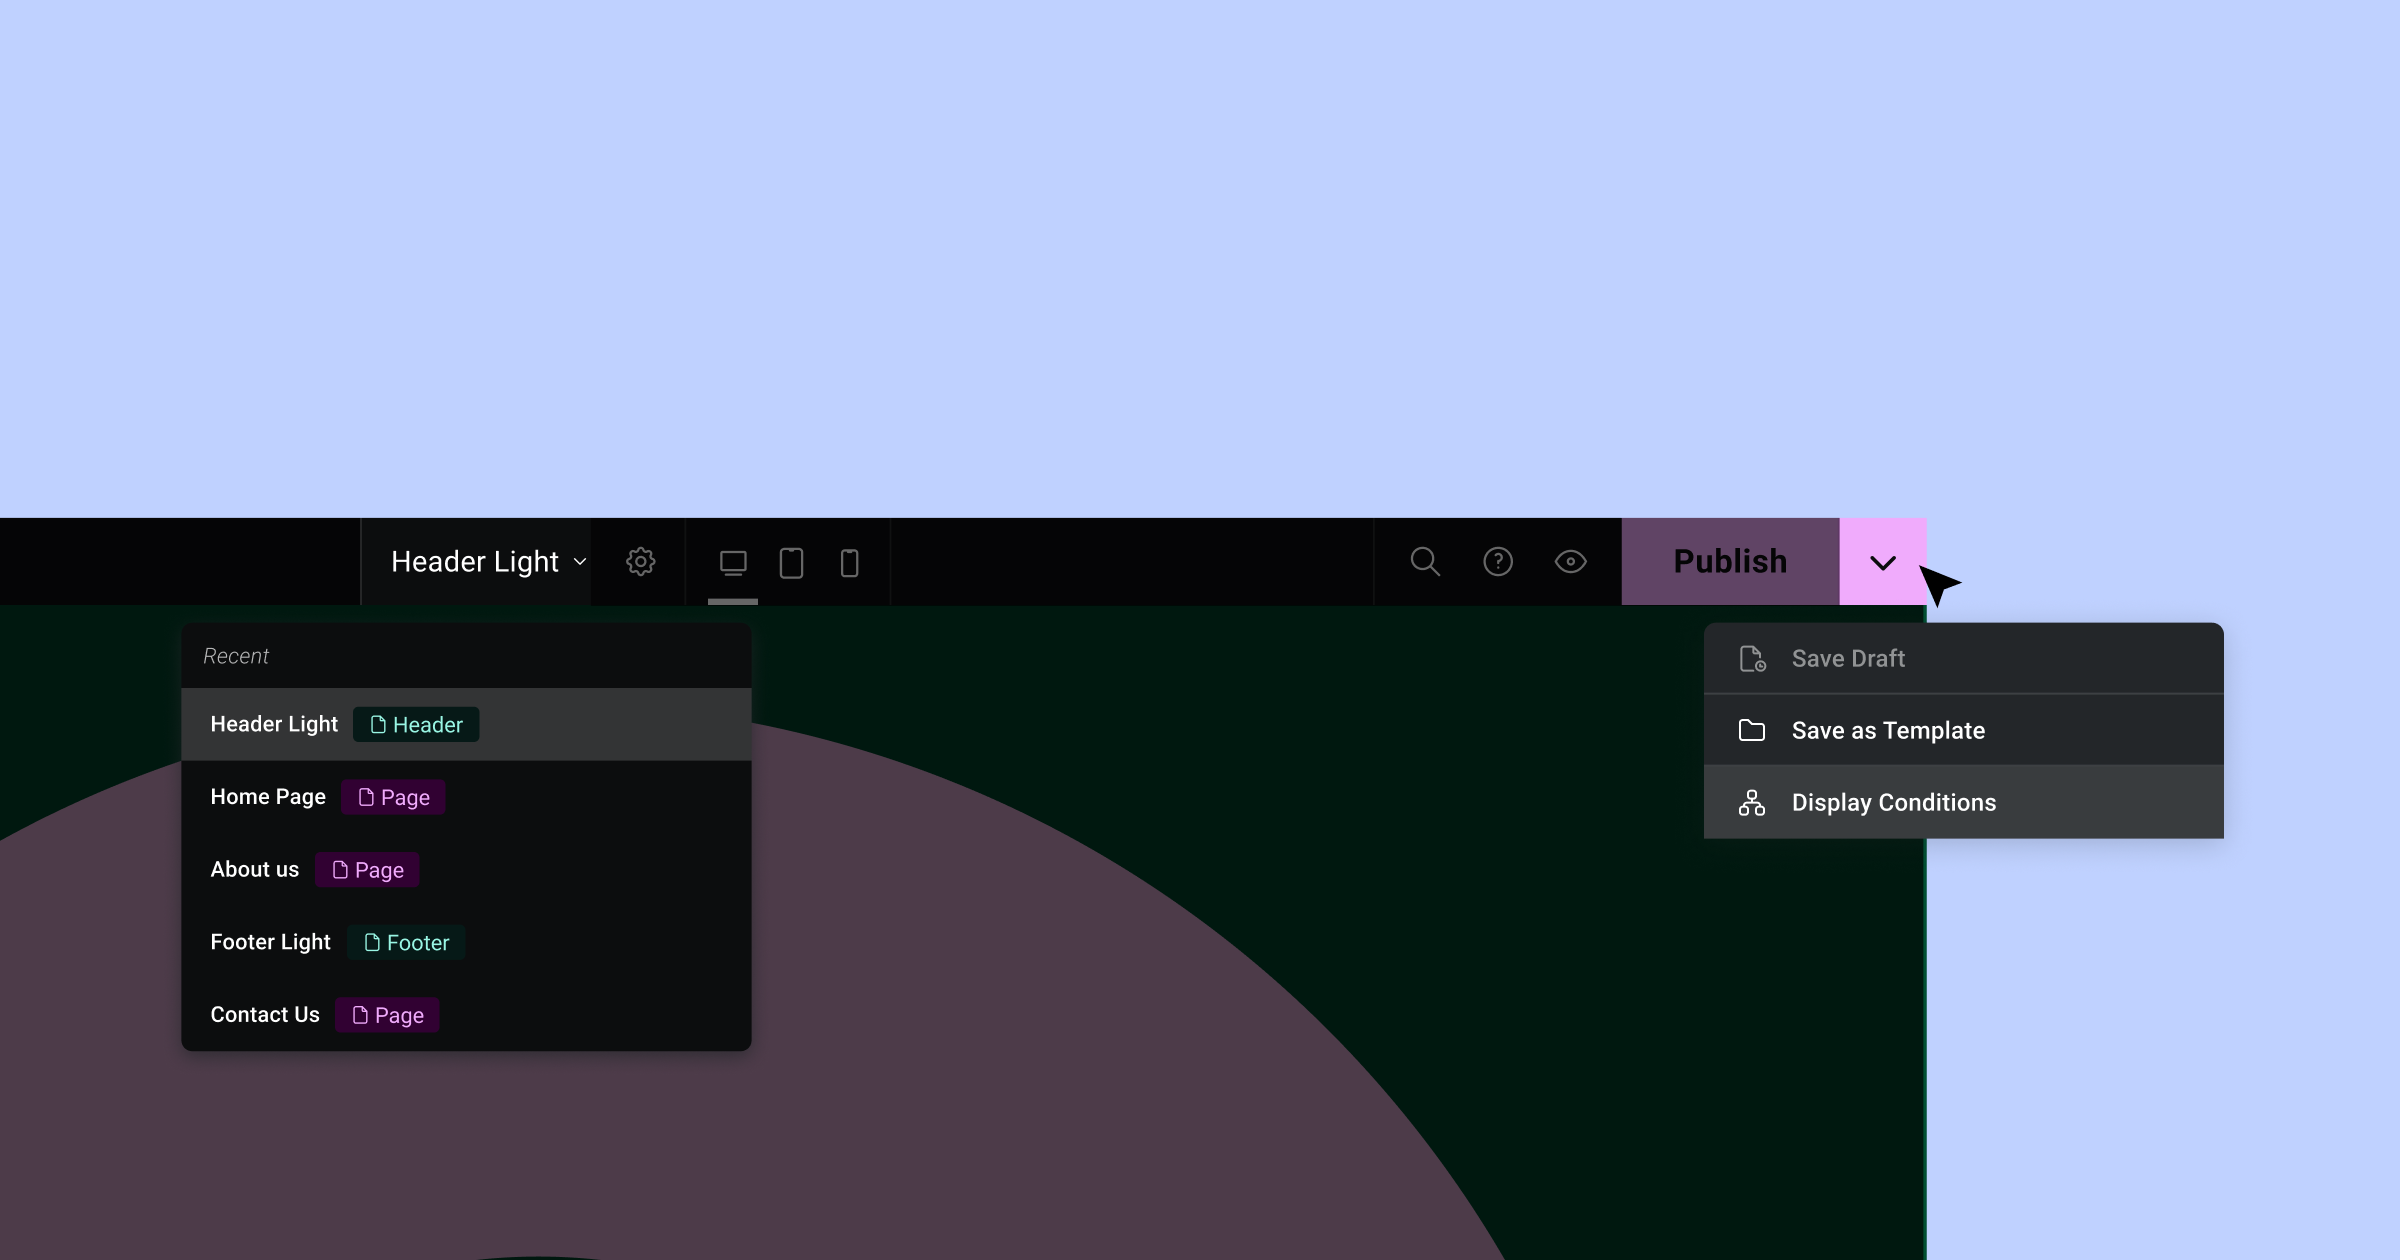
- Save Options in Publish Button – now includes the ability to Save as a Draft, Save as a Template, and Display Conditions when available.
- Page Navigation – When clicking the Page Indication in the Top Bar, a dropdown will appear that includes the 5 latest website parts (pages, posts, popups, theme parts, and more) you worked on. Clicking any of the recently edited website parts will direct you to the page you chose.
[Pro] Automatically Populate The Post Excerpt from Your Post’s Content
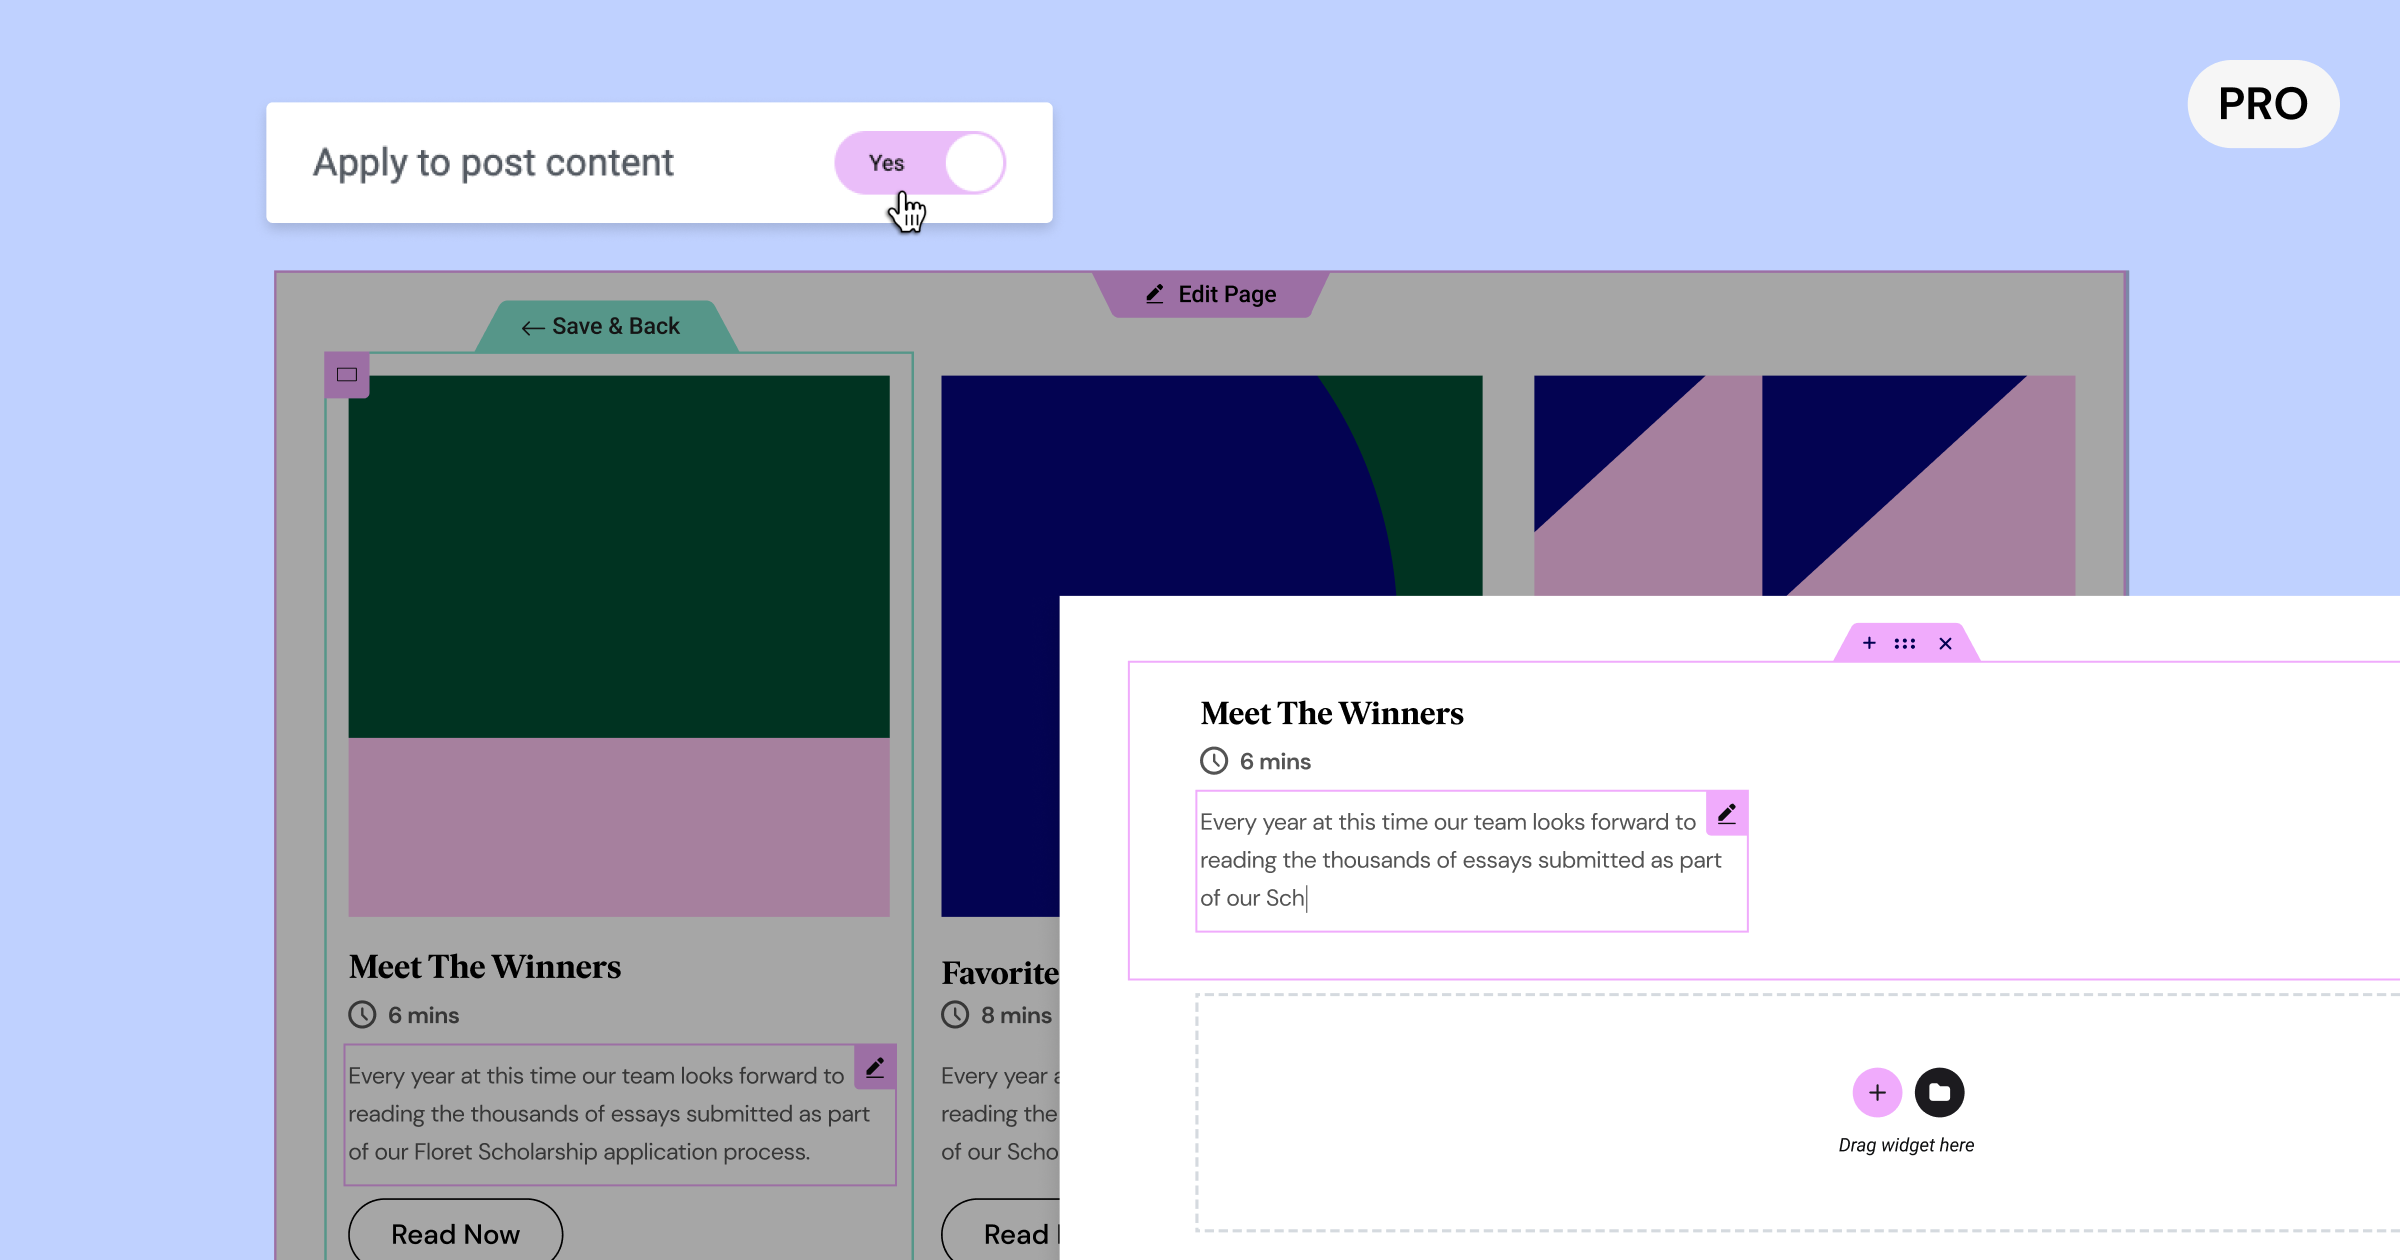
Up until now, if you used the Post Excerpt widget or dynamic tag, the content would populate dynamically from the Custom Excerpt you had to manually insert in WordPress. WIth this update, you can choose whether you want to automatically populate your Post Excerpt’s content from the first few characters in your post, or from your Custom Excerpt in WordPress. This has been one of the main requests since the introduction of the Loop Builder, and the ability to add the Post Excerpt widget anywhere within your loop item.
How to Test It:
- Make sure you have at least six posts on your website filled with the post title, featured images, post excerpt, and/or additional content inserted using WordPress or Elementor.
- Create a new page, edit it with Elementor and drag in the Loop Grid widget.
- Click the Create Template button on the panel or in the Editor’s edit mode.
- Ensure that you are switching to an In-Place editing mode within the main item’s container.
- Drag and Drop any dynamic (and static) widget into the template area, and the Post Excerpt widget, or use a Heading with the Post Excerpt dynamic tag.
- After inserting the Post Excerpt widget, click on the wrench icon, and open the modal – Then, if you want to enable the Post Excerpt from the post content, activate the “Apply to post content” option.
- Once the main item design is ready, click on the “Save & Back” Teal handle.
- Make sure you switch back to the parent page.
- Ensure the other posts in the loop are populated automatically based on the main template design and that the excerpt is appearing in all posts.
- Ensure that if you inserted content in the dedicated Post Excerpt it appears, and if you left it blank, you will view content from your post.
- Make sure everything works as expected in the Editor and on the Frontend.
Performance Improvements

In previous versions performance improvements focused on the most common widgets on the main pages. With Elementor 3.13, the focus was shifted to widgets used mainly on inner pages, where site visitors often spend most of their time.
The Author Box, Post Info and Price List widgets display images and user profile pictures, these images now have a lazy load applied to them. This change should improve the initial page load of your inner pages.
In addition, since the Header appears above the fold, it should always load immediately upon page load. Therefore, lazy load was removed from headers to improve the visitor experience when using the Lazy Load Background Images experiment.
Accessibility Improvements
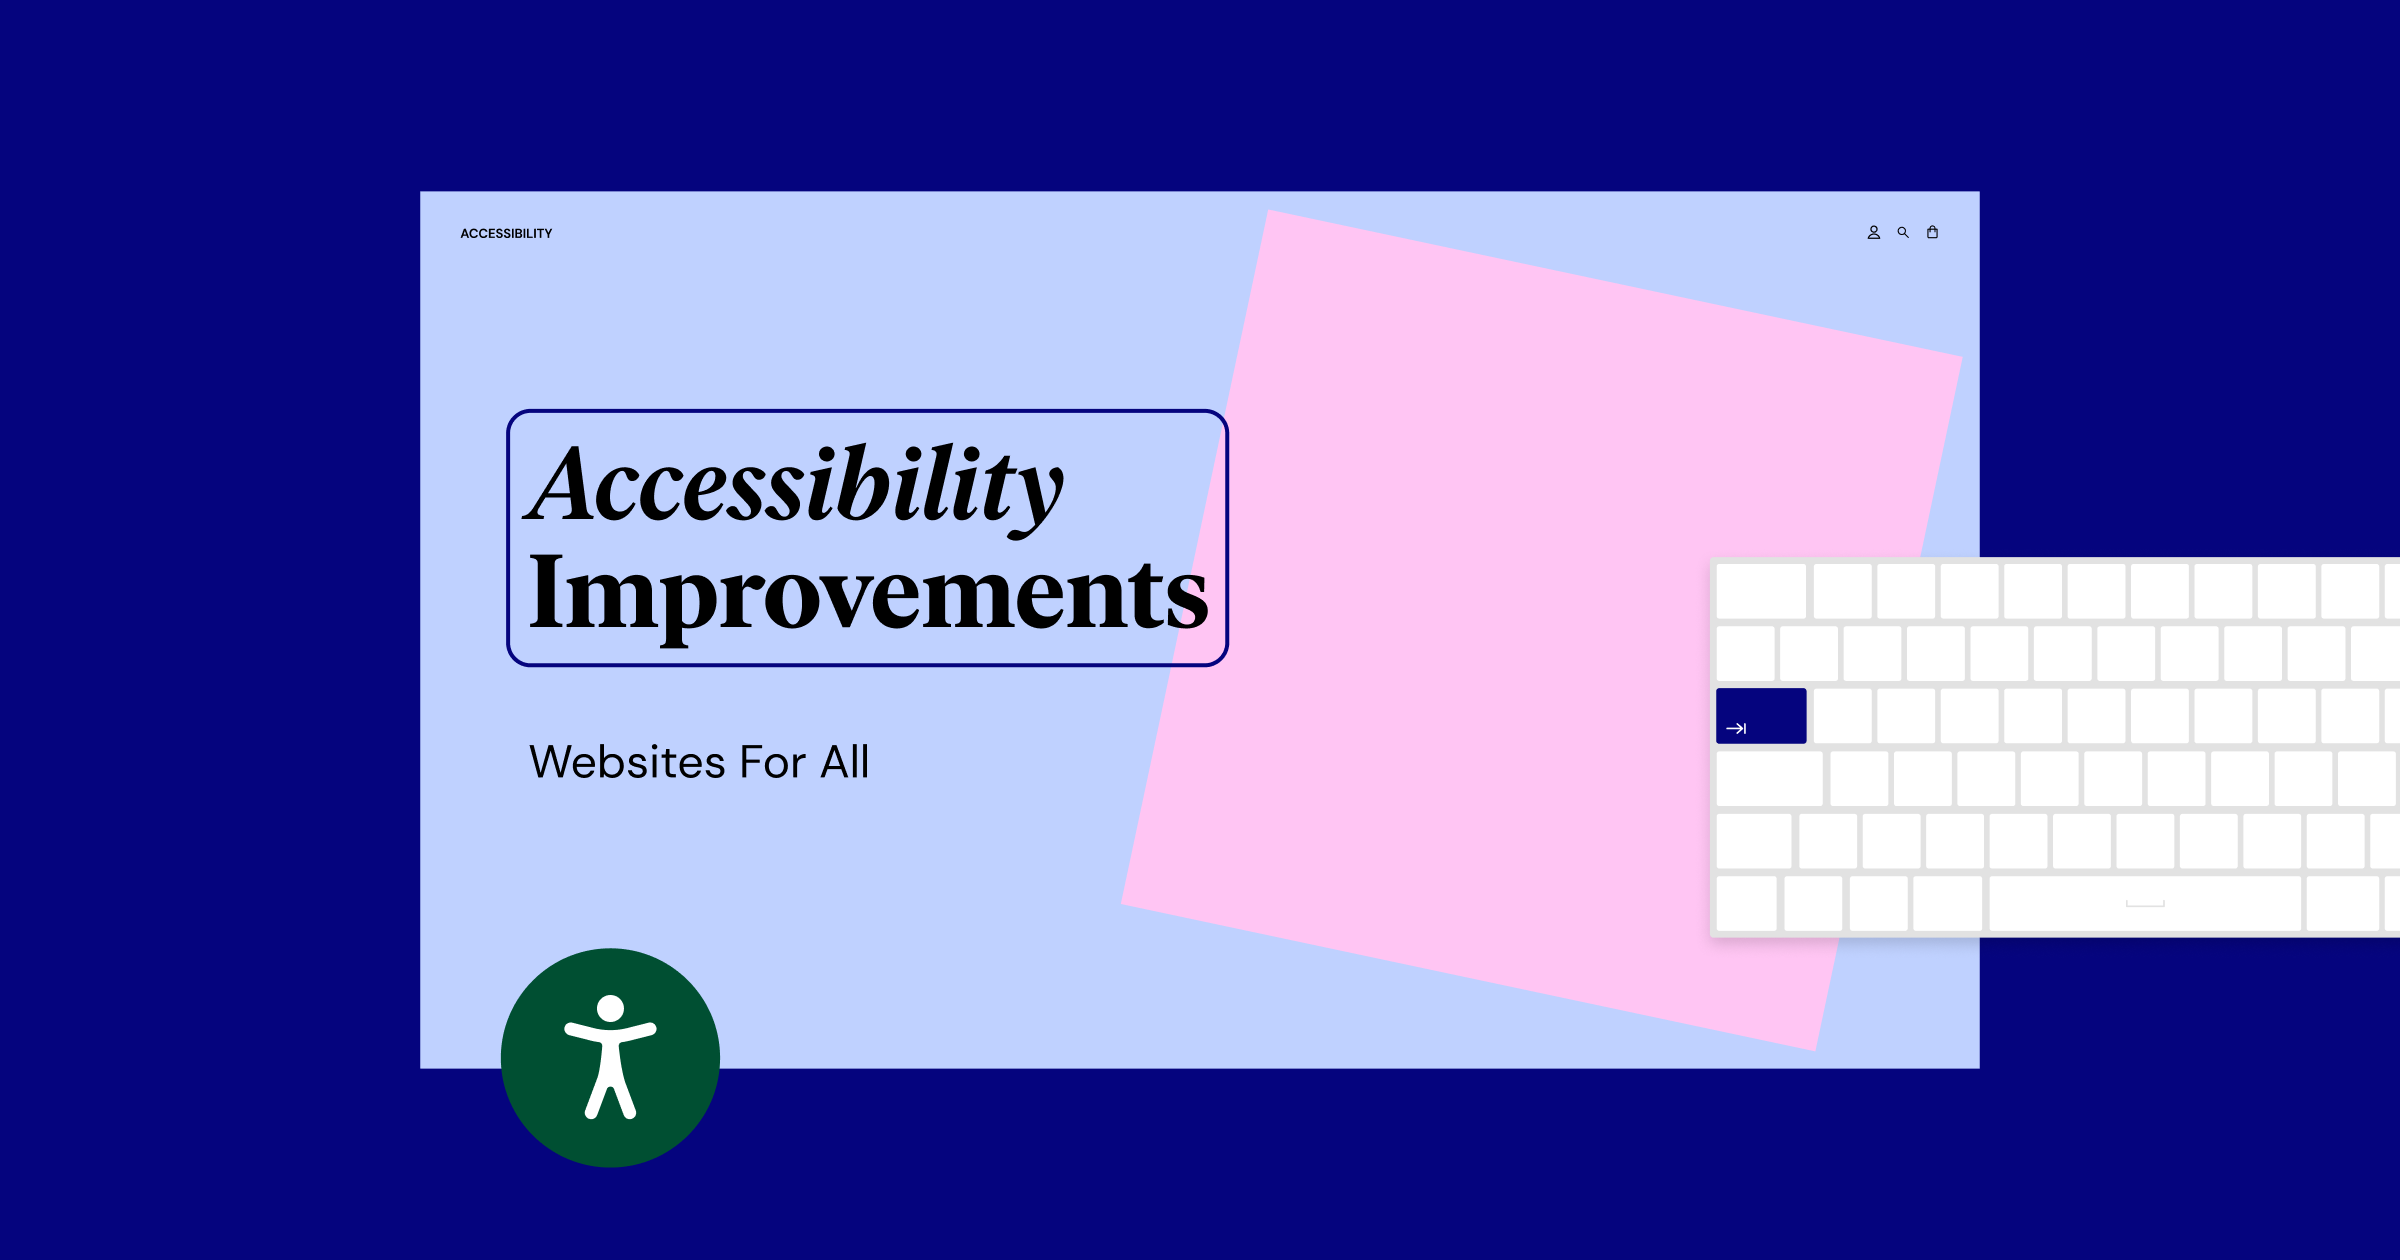
Elementor 3.13 is full of tweaks and fixes that improve your website’s accessibility, as well as the Elementor Editor. In this version, we focused on keyboard navigation, implementing additional ARIA tags, fixing existing ARIA compliance issues, and applying semantic markup.
The menu toggle icon in the WordPress Menu widget can now be opened and closed with the Enter / Space keys, in addition to a mouse click.
The toggle icon in the Table of Content widget can now be focused on, and opened/closed using keyboard keys, and also includes all the relevant ARIA tags.
The Call to Action widget, Media Carousel widget and the Slides widget all display background images. The background images now have ARIA tags containing the images ALT text.
The Search Form widget received several a11y improvements. First, a hidden label was added to the form for screen readers, a few ROLE and ARIA tags were added and the buttons can now be accessed using your keyboard. Moreover, when using multiple search forms widgets on the page, you no longer have duplicate IDs.
The Gallery widget is now accessible to keyboard users in a unique scenario. When the images have no links (meaning that they are not focusable), but you set them to display the image titles on hover. In this case, keyboard users can’t navigate to the images to see the image text.
Fixed an issue in the Progress Bar widget that led to lower Lighthouse / PageSpeed scores in the accessibility section when inner text is not provided.
The Elementor Editor, where you spend most of your time, is receiving a lot of accessibility attention. Starting with semantic markup, ARIA attributes, landmark elements, making different elements accessible for screen-readers & keyboard-users, and improving the usability for non-mouse users.
General Improvements
- Install Elementor Pro with Composer [Request #4042 in GitHub] – with this update, Elementor Pro can be installed with Composer as part of the automatic flow.
- Expanded Color Picker – the color picker library has been updated to support HEXA, RGBA, and HSLA color codes so you can achieve a greater level of accuracy. Colors in the color picker will automatically be converted to each of the color codes.
Make An Impact: Share Feedback Before Features Are Released
We’re always looking to get to know Elementor customers on a deeper level. If you’re interested in meeting with our team and sharing your insights, feedback, and feature requests you’re welcome to sign up for some quality time with us here. Or download Elementor’s Dev Edition. Talk soon!
How to Install the Beta Version
If you still haven’t enabled beta testing in Elementor, please follow these steps:
- Go to Elementor > Tools > Versions
- Enable the beta tester feature
- Go to Dashboard > Updates and update to the latest beta version.
- This will get you set up to test the new Elementor 3.13 Beta.
Notes
As we make changes to our GitHub in an effort to keep it organized, improve the way we deliver information to you, and our ability to review your feedback, please follow the instructions below when reporting bugs, or making feature requests:
- To report a bug related to this beta version – open a new Bug report
- For feature requests – open a new Feature request issue
- For other comments specifically about this beta version – Comment here
Designated time for release: May 8, 2023 (Estimated)
Many thanks for your support and help!
Cheers,
Elementor Team
