Hi Elementor beta testers,
We are incredibly excited to introduce our new beta versions, Elementor and Elementor Pro 3.10, which introduce major new additions that will take your website design and responsiveness to a whole other level. These versions include the new Tabs widget, which is getting a complete overhaul.
Try out our new beta versions and let us know what you think about our newest additions, which include:
- New Nested Elements – The future of design with Elementor widgets including a renewed tabs widget.
- Introducing Custom Units – A new way to choose any unit you want, including CSS math functions.
- Container-Based Full Website Kits, Templates and Blocks – Plenty of updated elements based on containers.
- Dynamic Due Date in Countdown Widget – Set specific dates from native custom fields, ACF or PODS.
- Disable Google Fonts – Eliminate this risk of violating GDPR and privacy regulation.
Meet Nested Elements – the future of design with Elementor widgets
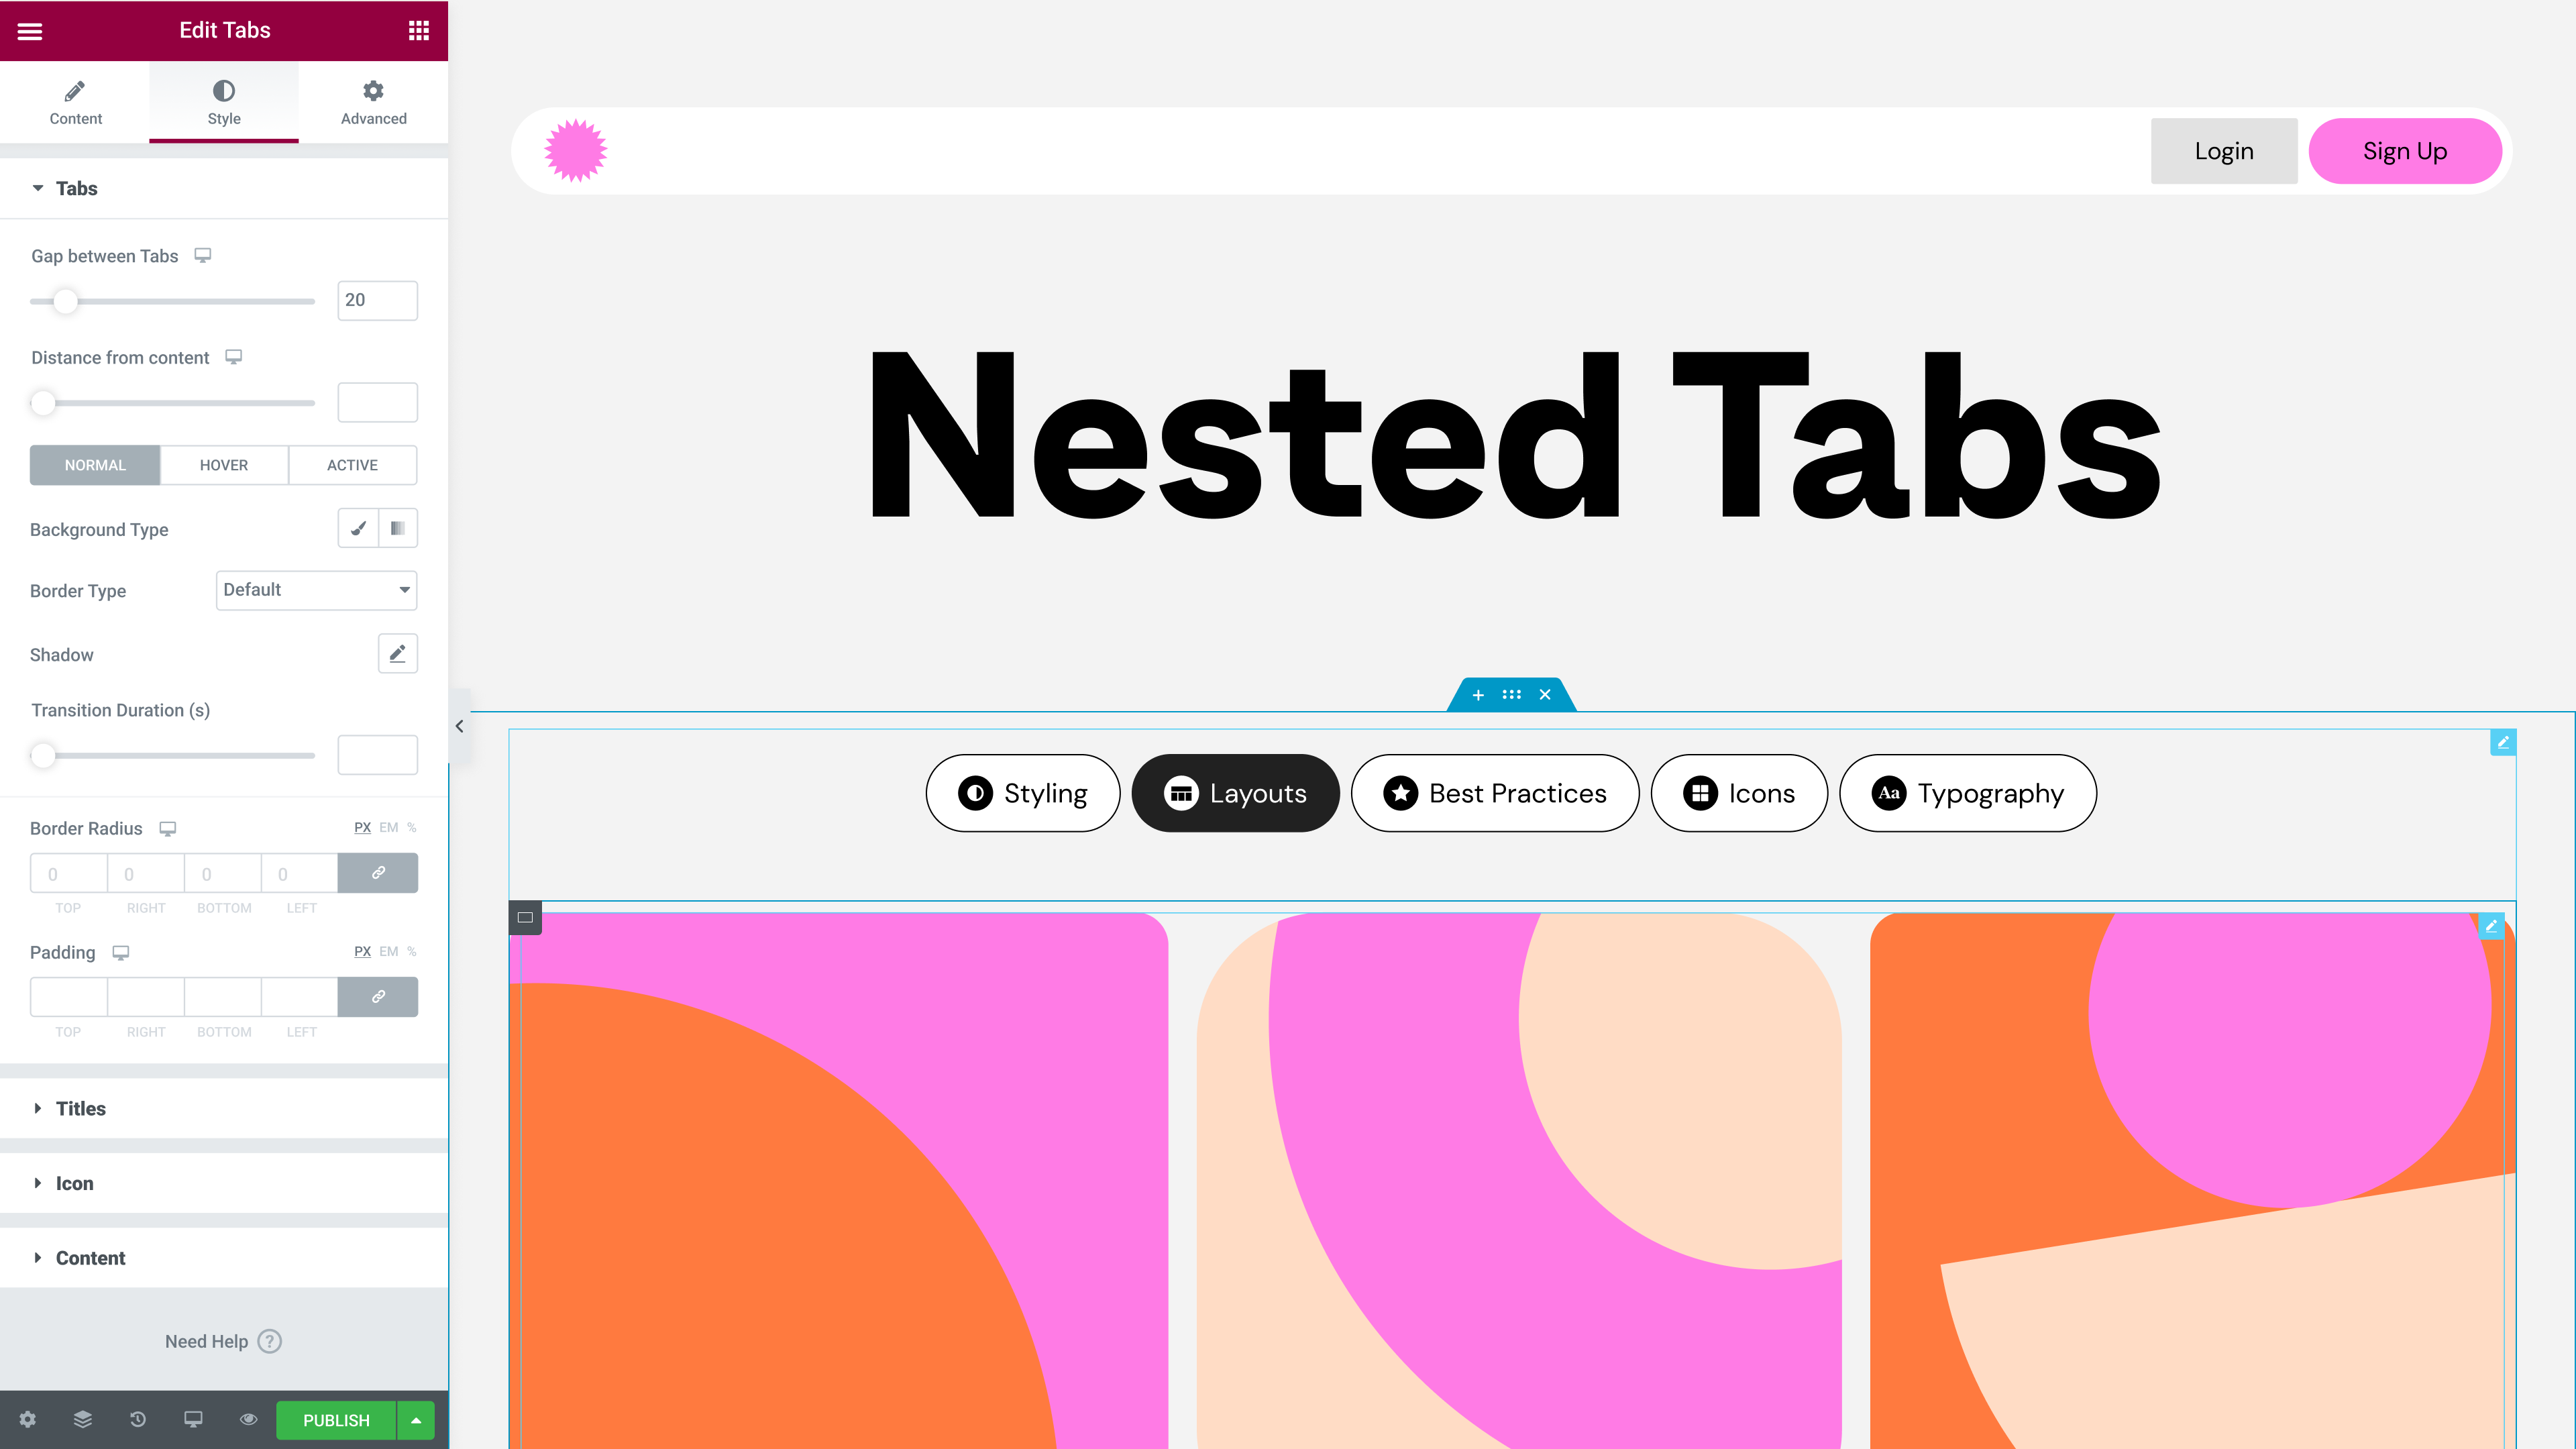
Nested elements empower you to take any element and place it inside another widget. This unlocks full design flexibility, and enhances what you’re capable of doing with each widget in terms of what it looks like, and what content it includes. As Flexbox Containers are stable, we have spent the past few weeks revisiting all our old widgets, some created over 5 years ago, to enable nesting capabilities in every widget that it would be relevant for. These include creating widgets to replace Carousel, Accordion, Tabs, and more.
Elementor 3.10 includes the first widget, to include Nested Elements – Tabs. During the upcoming releases, we will gradually be introducing more of these widgets.
Introducing the Renewed Tabs Widget – The first Elementor nested widget, unlocking design flexibility
Elementor 3.10 includes the new Tabs widget as an alpha experiment, which allows you to elevate the design of your website and unleash your creativity when displaying tabs on your website. The new Tabs widget, which is container-based, will replace the existing Tabs widget and will enable you to nest elements within each tab, and make your design options with Tabs endless. The new Tabs widget has three main improvements:
- Tabs & Titles – adjust the layout and positioning of the tabs, their style and design, as well as insert icons in addition to, or instead of the tab title.
- Content – as the new Tabs widget is based on Flexbox containers, the content of each tab will be composed of a main container. You will be able to nest containers within the main content container, as well as place any element you’d like to, inside any one of the content tabs. That way, you can create highly sophisticated designs and display more content in each tab, any way you’d like to.
- Better Responsive Settings – to improve the user experience, you will be able to choose the breakpoint at which you want the Tabs to automatically be displayed as an Accordion.
To use the new Tabs widget, you will need to first enable the Flexbox Container and Nested Elements experiments, then the Tabs widget in the widget panel will automatically be replaced with the new Tabs widget.
How to Test It:
- Ensure you activate the “Flexbox Container” and “Nested Elements” experiments by going to the Elementor menu in WordPress → Settings → Experiments.
- Create a new page and drag the Tabs widget into the Editor.
- Ensure you are viewing the new Tabs widget on the canvas, and that you have more content, style, and advanced options than in the original Tabs widget.
- Adjust the layout by adding more Tabs Items and changing the Direction, Justify and Align Title.
- Add Icons to each tab by opening the repeater item and choosing an Icon and Active Icon.
- Go over to the Style tab, and adjust the spacing and styling of the Tabs, Titles, Icon, and Content.
- Head over to the Content tab, and in the Responsive section, choose the breakpoint at which you want the Tabs to be displayed automatically as an Accordion.
- Check that previous Tabs made with the original Tabs widget can still be edited and styled.
- Make sure everything works as expected in the Editor and on the Frontend.
Introducing Custom Units – A new way to choose any unit you want, including CSS Math Functions
Many elements in the Editor include options for sizing, such as padding and margins, where you can choose between PX, EM, REM, %, VW, or VH units. Up until now, any time you would adjust the sizing of an element, you would have to choose one of these units. For example, if you wanted to add padding to an element, you would have to choose which measurement unit you wanted to use, you wouldn’t be able to use more than one.
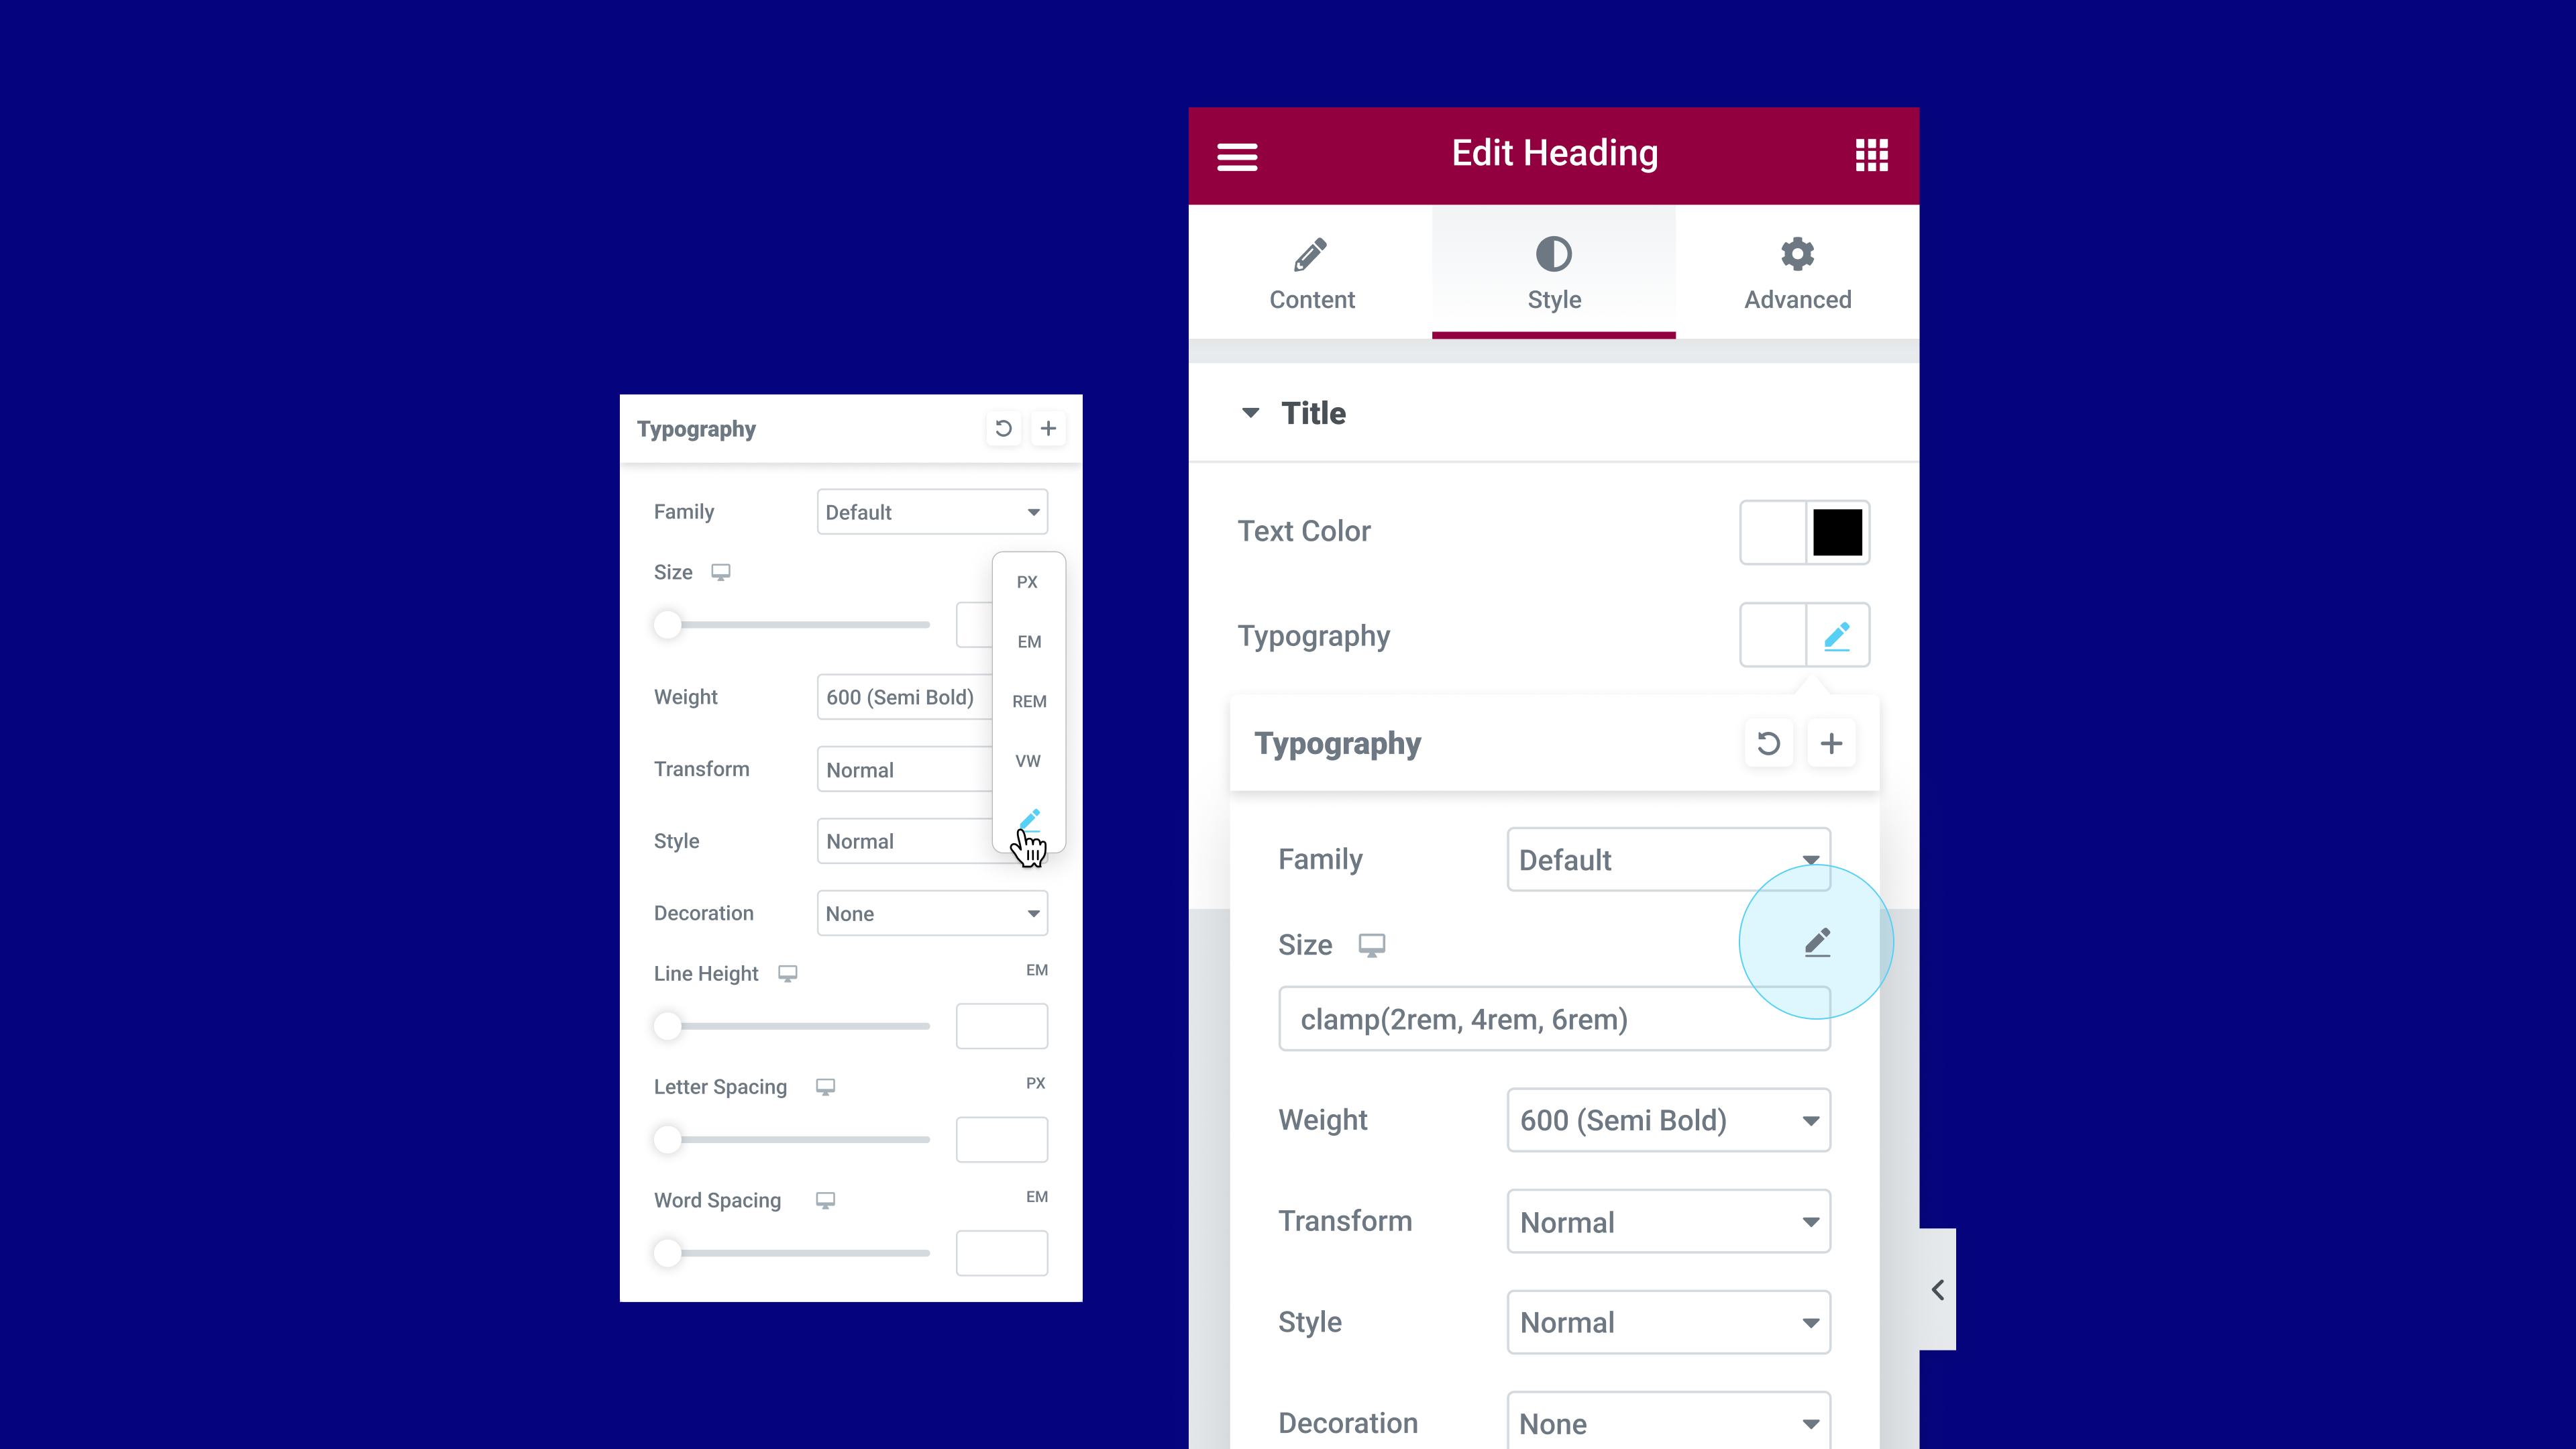
With this update, the unit labels will be moved into a drop down menu, and you will be able to choose the new Custom option. Choosing custom will allow you to combine a number of different measurement units, as well as run calculations for the measurement of values within the value input field, that way you can achieve greater design accuracy and responsive support.
For example, when choosing the custom option in the typography size controls, you will be able to use the clamp() CSS function to adjust your typography size to different device sizes, or the calc() CSS function to calculate and set a value that mixes units, and more.
As part of this version, the following controls will get custom options:
- Containers, Sections, and Columns – everywhere possible, including custom width, border, etc.
- Typography controls – line height, letter spacing, and word spacing
This will be expanded further to additional areas in future releases.
How to Test It:
- Go over to any numeric control inside the container, section or column (such as Width or Min Height)
- Choose a different unit with the new units selector UI.
- Change the unit to Custom (Pencil-edit Icon).
- Write any size or CSS math function, and ensure everything works accurately.
- Be sure to remember to add the desired unit to the size—for example, 50px and not just 50, and make sure there are no spaces between the value and the unit.
- Go to the Advanced tab and follow the instructions above to adjust the Margin or Padding controls.
- You can also test it with the Heading widget and the Typography control.
- Make sure everything works as expected in the Editor and on the Frontend.
Container-Based Full Website Kits, Templates and Blocks
As Flexbox Containers has been officially marked as a beta experiment, since Elementor 3.8, meaning you can confidently use them on your website, the Library team has been working tirelessly to provide you with Container-based website assets.
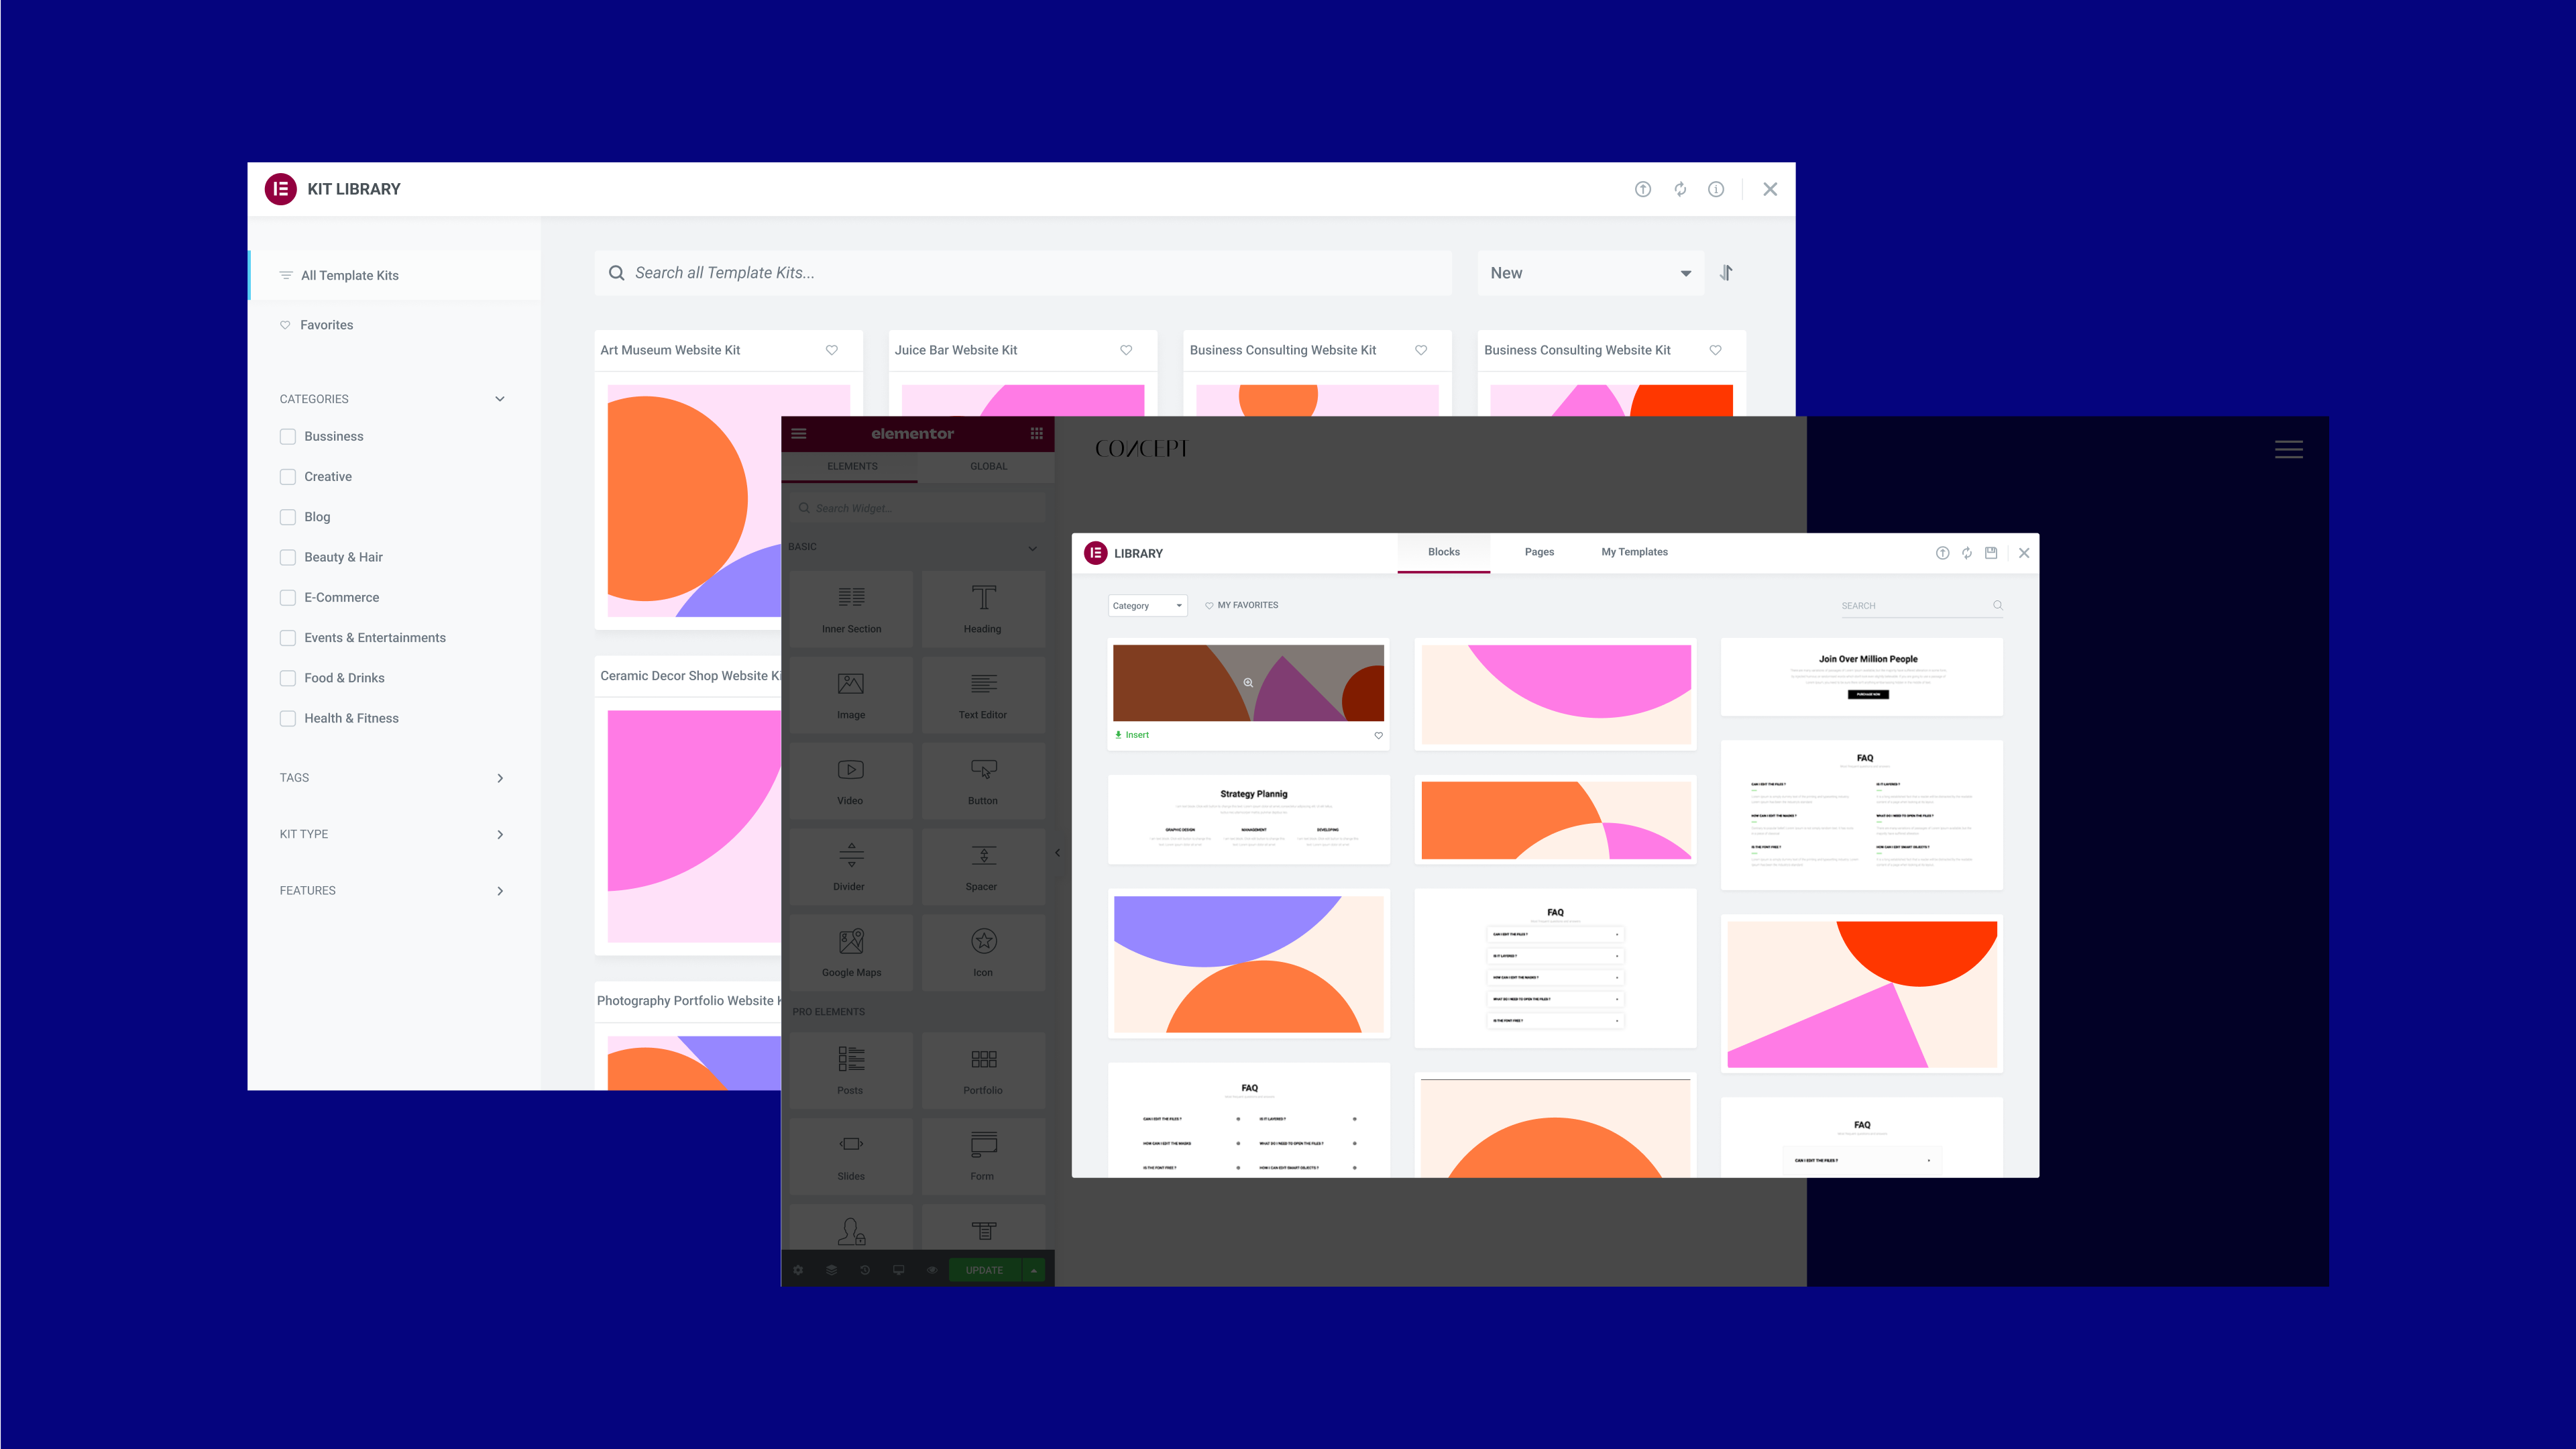
Now, when you activate the Flexbox Container experiment, you will notice that you’ve gotten a new library, made up entirely of container-based assets. This includes dozens of the most popular full website kits and page templates that have been converted from the section-column layout to the Flexbox Container layout, as well as brand-new Website Kits and page Templates.
With the new library, there are two additional noticeable changes. The first is that we introduced a new type of website kit – mini-shops, a one-page full website kit for ecommerce websites including PayPal and Stripe buttons for payment collection. The second is that all the previous Blocks (such as Contact, 404, etc.) have been replaced with completely new designs.
With the new, updated library, you will be able to kick-start your website creation and design process when enabling the Flexbox Container experiment, using the most up-to-date design trends. All the previous designs will still be available, if desired, by deactivating the Flexbox Container experiment (important note: deactivating the Flexbox Container experiment will remove all Containers and their content from your website).
How to Test It:
- Ensure you activate the “Flexbox Container” experiment by going to the Elementor menu in WordPress → Settings → Experiments.
- Create a new page and click on the Folder icon to open the Template library, available within a new Container. .
- Download a template and ensure that it is Container based by viewing its layout structure in the Editor, and ensure everything in the template works as expected.
- Head over to the Kit Library by going to the Elementor Template menu from the WordPress dashboard, and explore the new kits and old ones that converted to container-based kits.
- Ensure that you are able to download Container-based templates from the template library (Folder icon in the Editor) to other locations in the Editor, including the Theme Builder, Popups, and more.
- Make sure everything works as expected in the Editor and on the Frontend.
[Pro] Dynamic Due Date in Countdown Widget
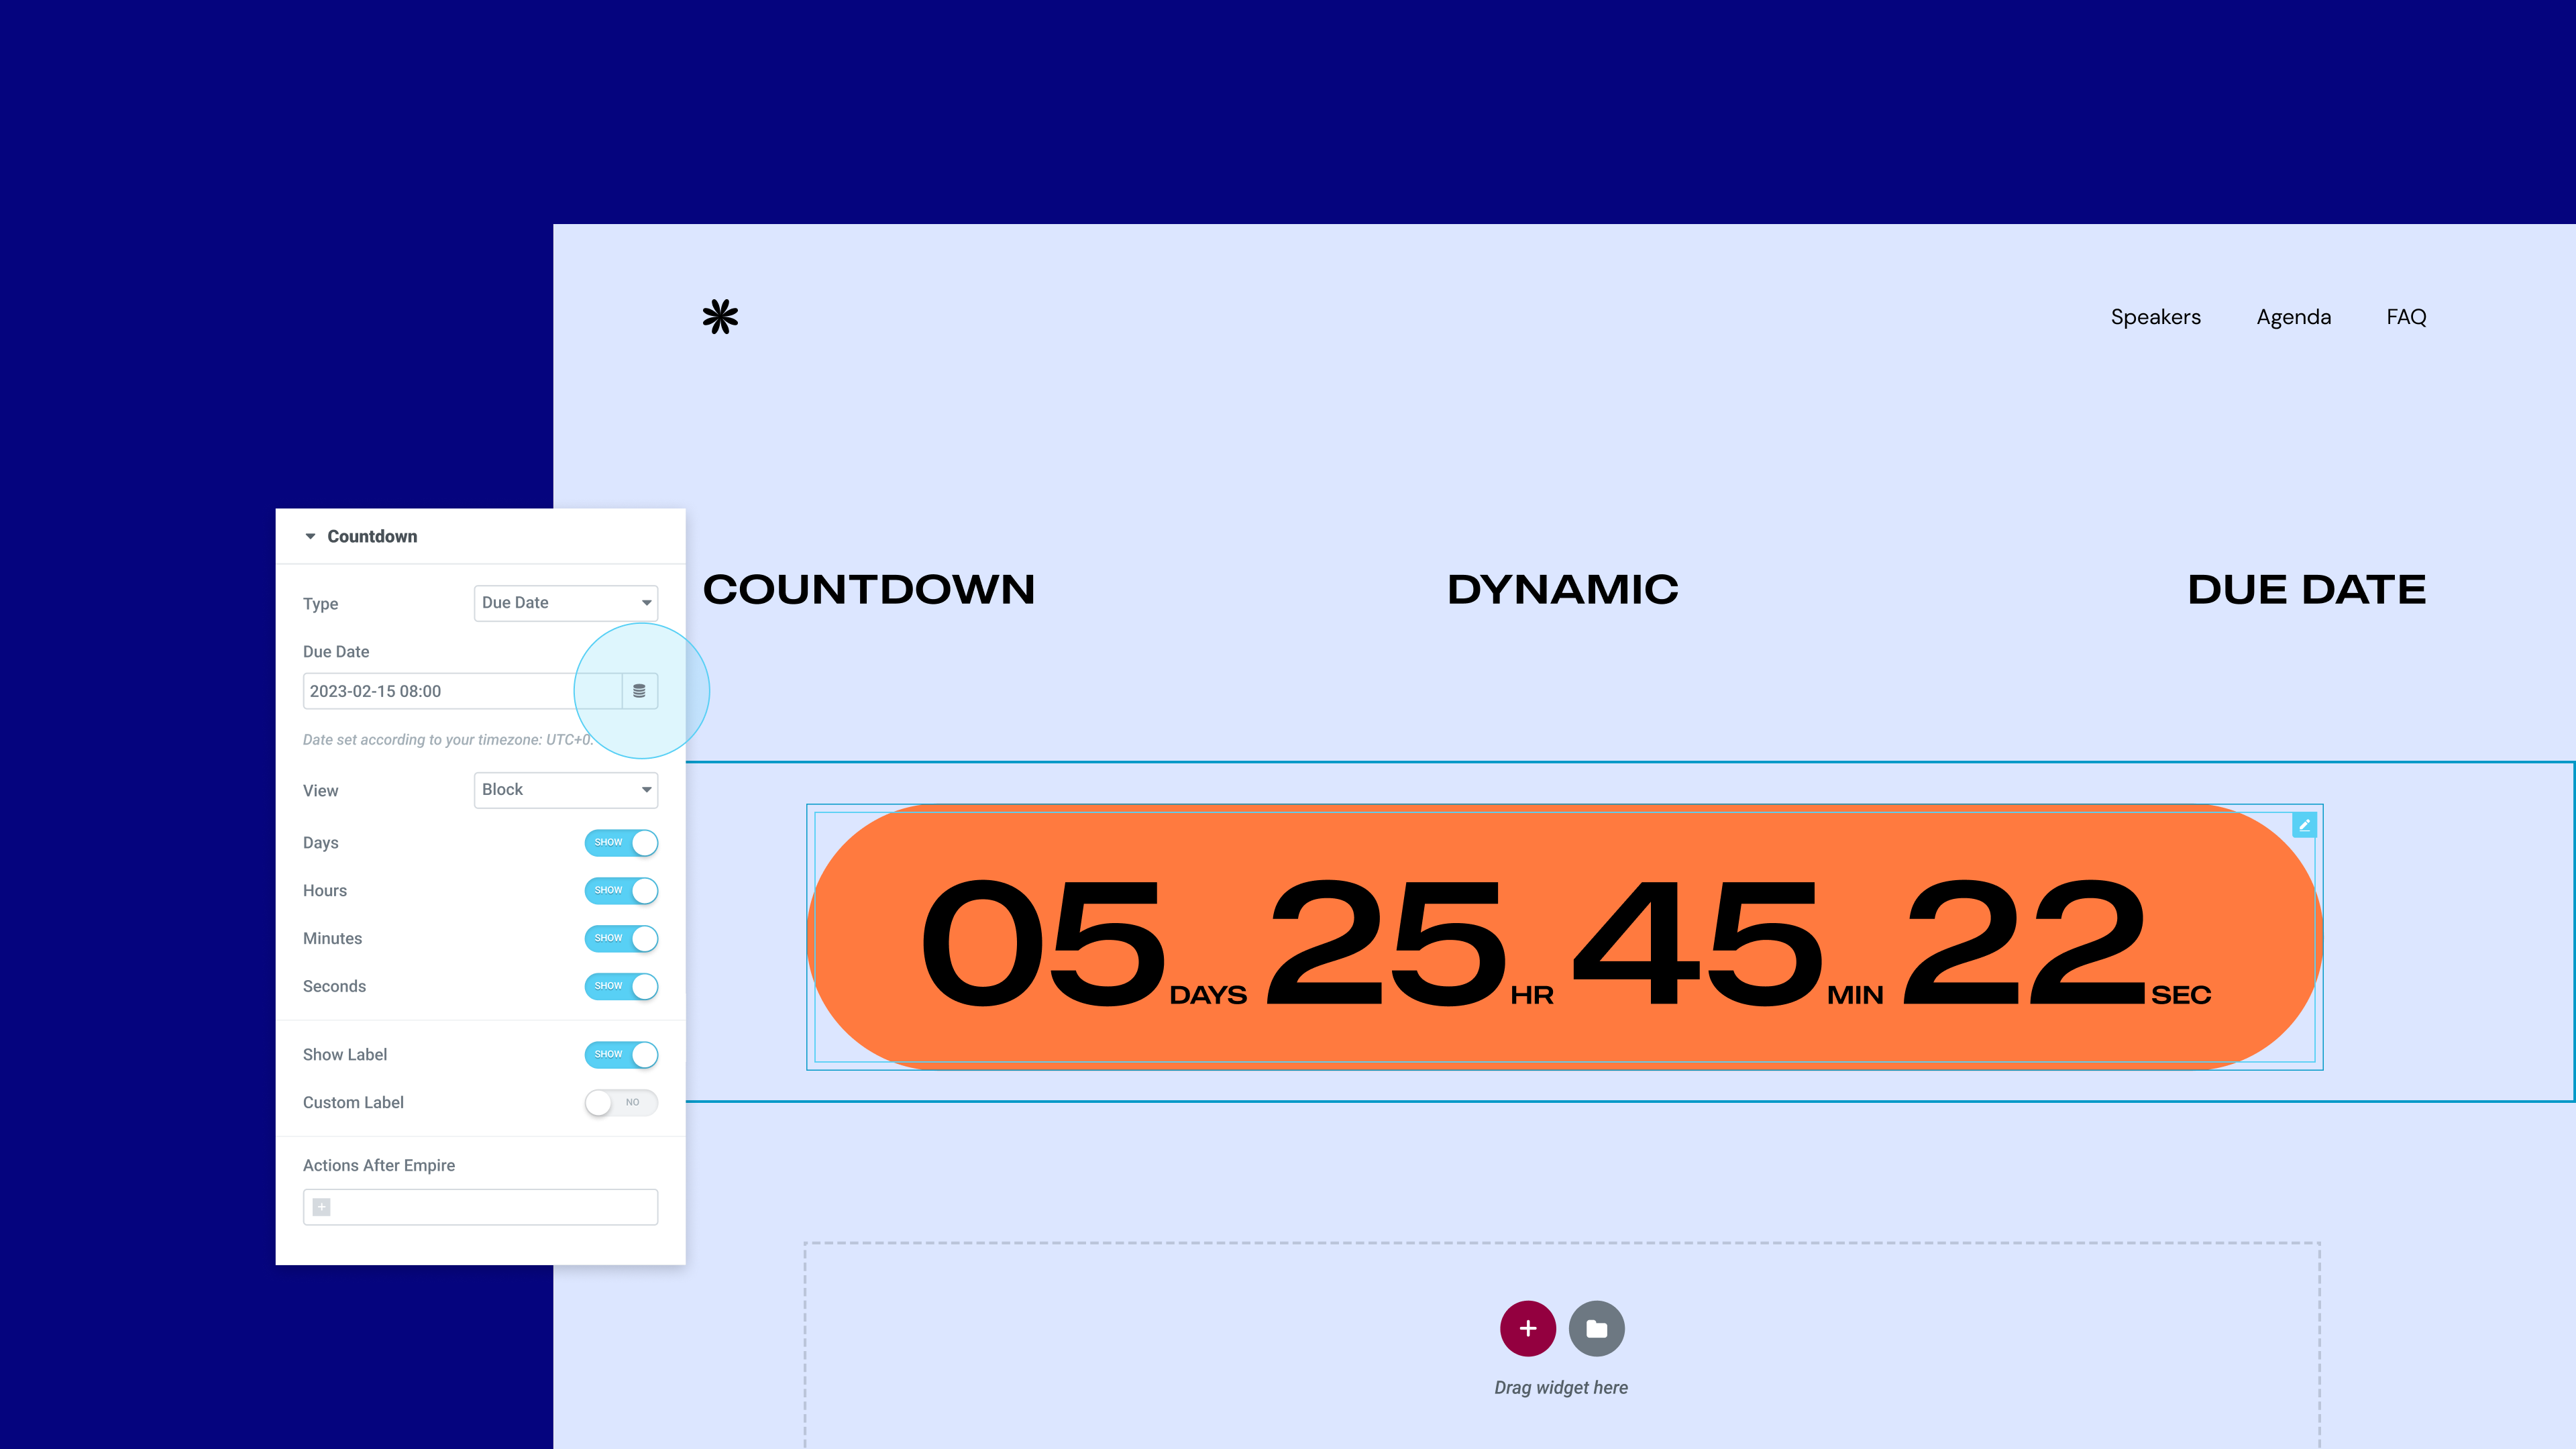
The Countdown Widget, a great tool for creating FOMO and boosting conversion, is now getting a dynamic tag control for the due date. The due date in the Countdown widget allows you to set a specific date and time to count down to. With this update, you will be able to use native WordPress custom fields, as well as custom fields from ACF, and PODS to dynamically populate the due date.
With the dynamic due date, you will be able to use the Countdown widget anywhere on your website, or in a number of different pages, while managing the due date in a custom field in WordPress. This will allow you to make changes to the Countdown’s due date, across your website in one simple step.
How to Test It:
- Make sure you installed and activated ACF or Pods plugins.
- Ensure you created Date-Time custom fields.
- Create a new page – First, without editing it with Elementor and populate the new date-time field you create with a value.
- Continue by clicking on Edit it with Elementor and drag in the Countdown widget.
- Go to the Due Date field and click on the dynamic tag.
- Choose the dynamic field created by ACF or Pods.
- Ensure that the due date time presents the correct value, based on the value you filled in the page backend.
- Make sure everything works as expected in the Editor and on the Frontend.
Disable Google Fonts
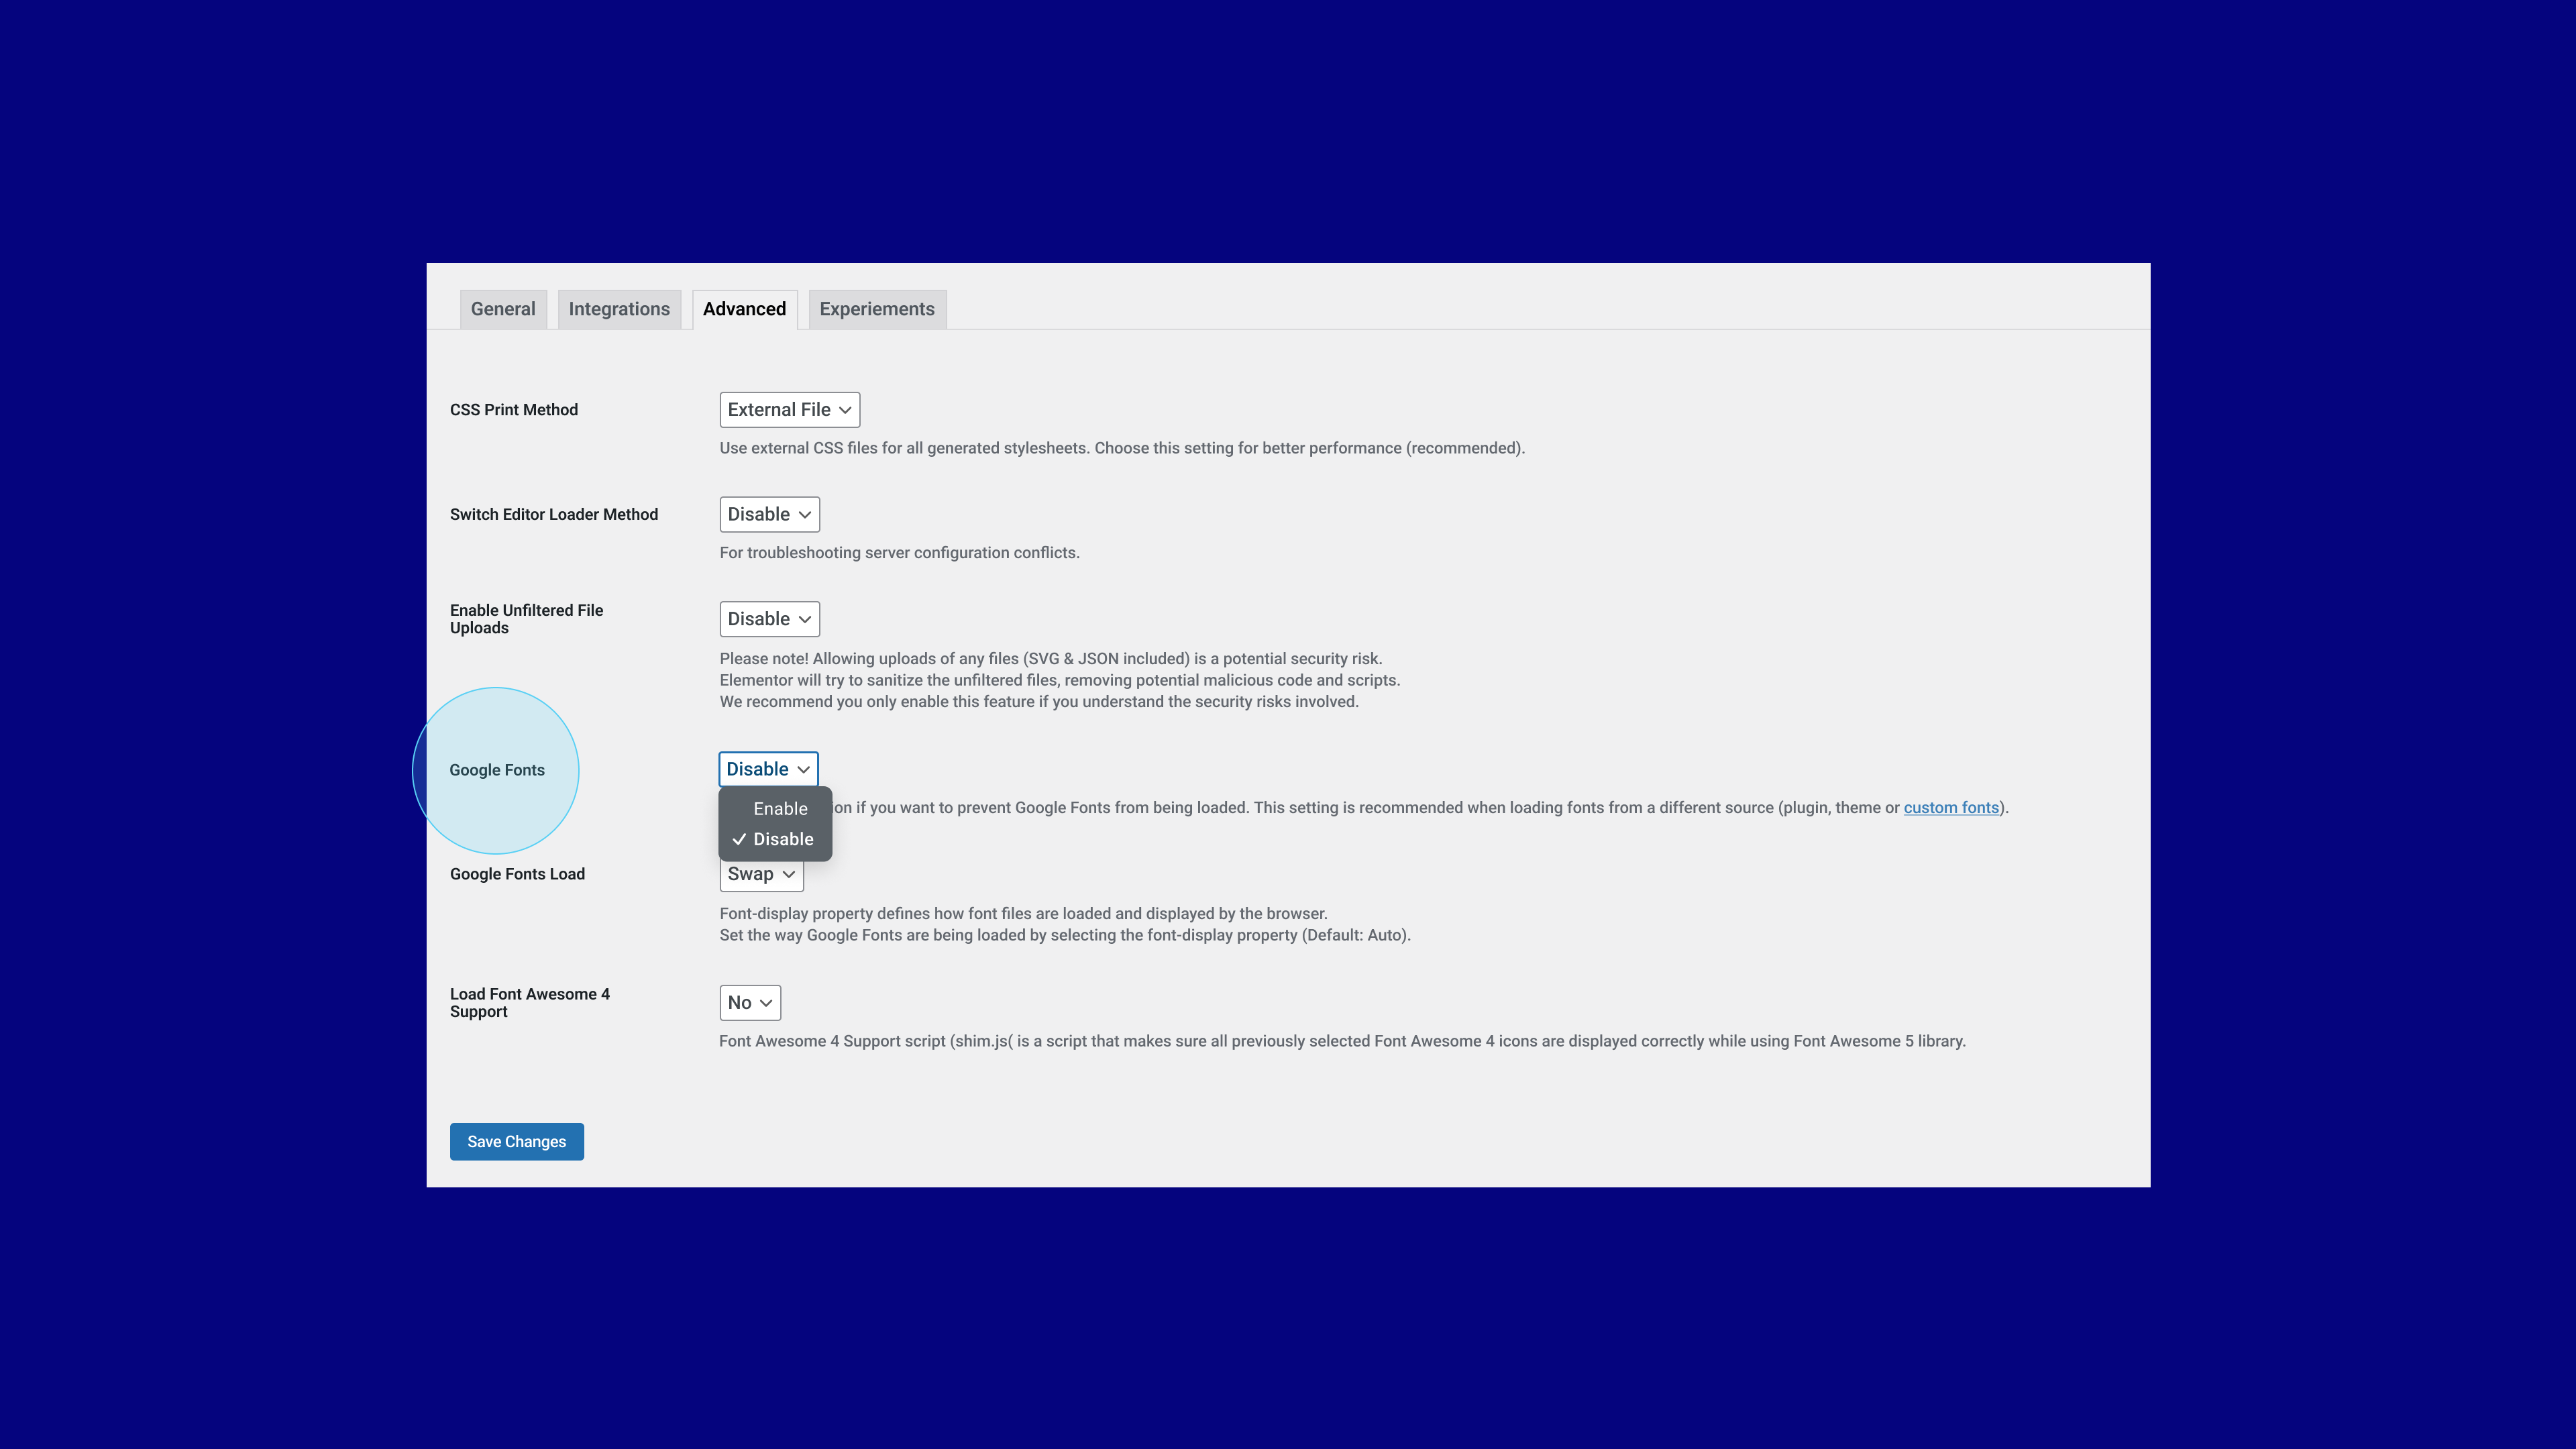
Google fonts, though a popular library for online fonts, exposes users to risk of violating GDPR and privacy regulation. To eliminate this risk, Elementor allows you to disable Google fonts from your website in a single click. When disabling Google fonts, you will no longer be able to use the online Google font library in the Editor, which will reduce the number of fonts available to you in the Editor to 7 fonts. If you’ve used Google fonts on your website, but choose to disable Google fonts from your website, all fonts on your website will default to one of the available fonts on your website.
If you are an Elementor Pro user, you will be able to continue using locally hosted fonts and adding them using the Custom Fonts feature.
How to Test It:
- Disable Google Fonts option by going to the Elementor menu in WordPress → Settings → Advanced.
- In the “Google Fonts” dropdown, choose the Disable option.
- Ensure that the “Google Fonts Load” text below also disappears.
- Create a new page and Edit it with Elementor.
- Drag a Heading widget to the Editor.
- Go to Typography control, and under Family, ensure the only available fonts are the System ones, there should be 7 system fonts.
- Activate the option, and ensure the previously selected Google font is not available and the font is changed to one of the system fonts.
- Make sure everything works as expected in the Editor and on the Frontend.
Make An Impact: Share Feedback Before Features Are Released
We’re always looking to get to know Elementor customers on a deeper level. If you’re interested in meeting with our team and sharing your insights, feedback, and feature requests you’re welcome to sign up for some quality time with us here. Or download Elementor’s Dev Edition. Talk soon!
How to Install the Beta Version
If you still haven’t enabled beta testing in Elementor, please follow these steps:
- Go to Elementor > Tools > Versions
- Enable the beta tester feature
- Go to Dashboard > Updates and update to the latest beta version.
- This will get you set up to test the new Elementor 3.10 Beta.
Notes
As we make changes to our GitHub in an effort to keep it organized, improve the way we deliver information to you, and our ability to review your feedback, please follow the instructions below when reporting bugs, or making feature requests:
- To report a bug related to this beta version – open a new Bug report
- For feature requests – open a new Feature request issue
- For other comments specifically about this beta version – comment here
Designated time for release: January 2023 (Estimated)
Many thanks for your support and help!
Cheers,
Elementor Team
